Overview
In this article we will go over implementing a data pipeline that migrates data with Oracle change data capture to Snowflake.
With Striim now on Snowflake Partner Connect, customers can start loading their data in minutes with one-click access to a proven and intuitive cloud-based data integration service – Harsha Kapre, Director of Product Management at Snowflake
Migrate data from Oracle to Snowflake with Striim’s Free Trial on Partner Connect
At Striim, we value building real-time data integration solutions for cloud data warehouses. Snowflake has become a leading Cloud Data Platform by making it easy to address some of the key challenges in modern data management such as
- Building a 360 view of the customer
- Combining historical and real-time data
- Handling large scale IoT device data
- Aggregating data for machine learning purposes
It only took you minutes to get up and running with Snowflake. So, it should be just as easy to move your data into Snowflake with an intuitive cloud-based data integration service.
A Quick Tutorial
We’ll dive into a tutorial on how you can use Striim on Partner Connect to create schemas and move data into Snowflake in minutes. We’ll cover the following in the tutorial:
- Launch Striim’s cloud service directly from the Snowflake UI
- Migrate data and schemas from Oracle to Snowflake
- Perform initial load: move millions of rows in minutes all during a free trial
- Kick off a real-time replication pipeline using change data capture from Oracle to Snowflake
- Monitoring your data integration pipelines with real-time dashboards and rule-based alerts
But first a little background!
What is Striim?
At a high level, Striim is a next generation Cloud Data Integration product that offers change data capture (CDC) enabling real-time data integration from popular databases such as Oracle, SQLServer, PostgreSQL and many others.
In addition to CDC connectors, Striim has hundreds of automated adapters for file-based data (logs, xml, csv), IoT data (OPCUA, MQTT), and applications such as Salesforce and SAP. Our SQL-based stream processing engine makes it easy to enrich and normalize data before it’s written to Snowflake.
Our focus on usability and scalability has driven adoption from customers like Attentia, Belgium-based HR and well-being company, and Inspyrus, a Silicon Valley-based invoice processing company, that chose Striim for data integration to Snowflake.
What is Change Data Capture?
While many products focus on batch data integration, Striim specializes in helping you build continuous, real-time database replication pipelines using change data capture (CDC).This keeps the target system in sync with the source database to address real-time requirements.
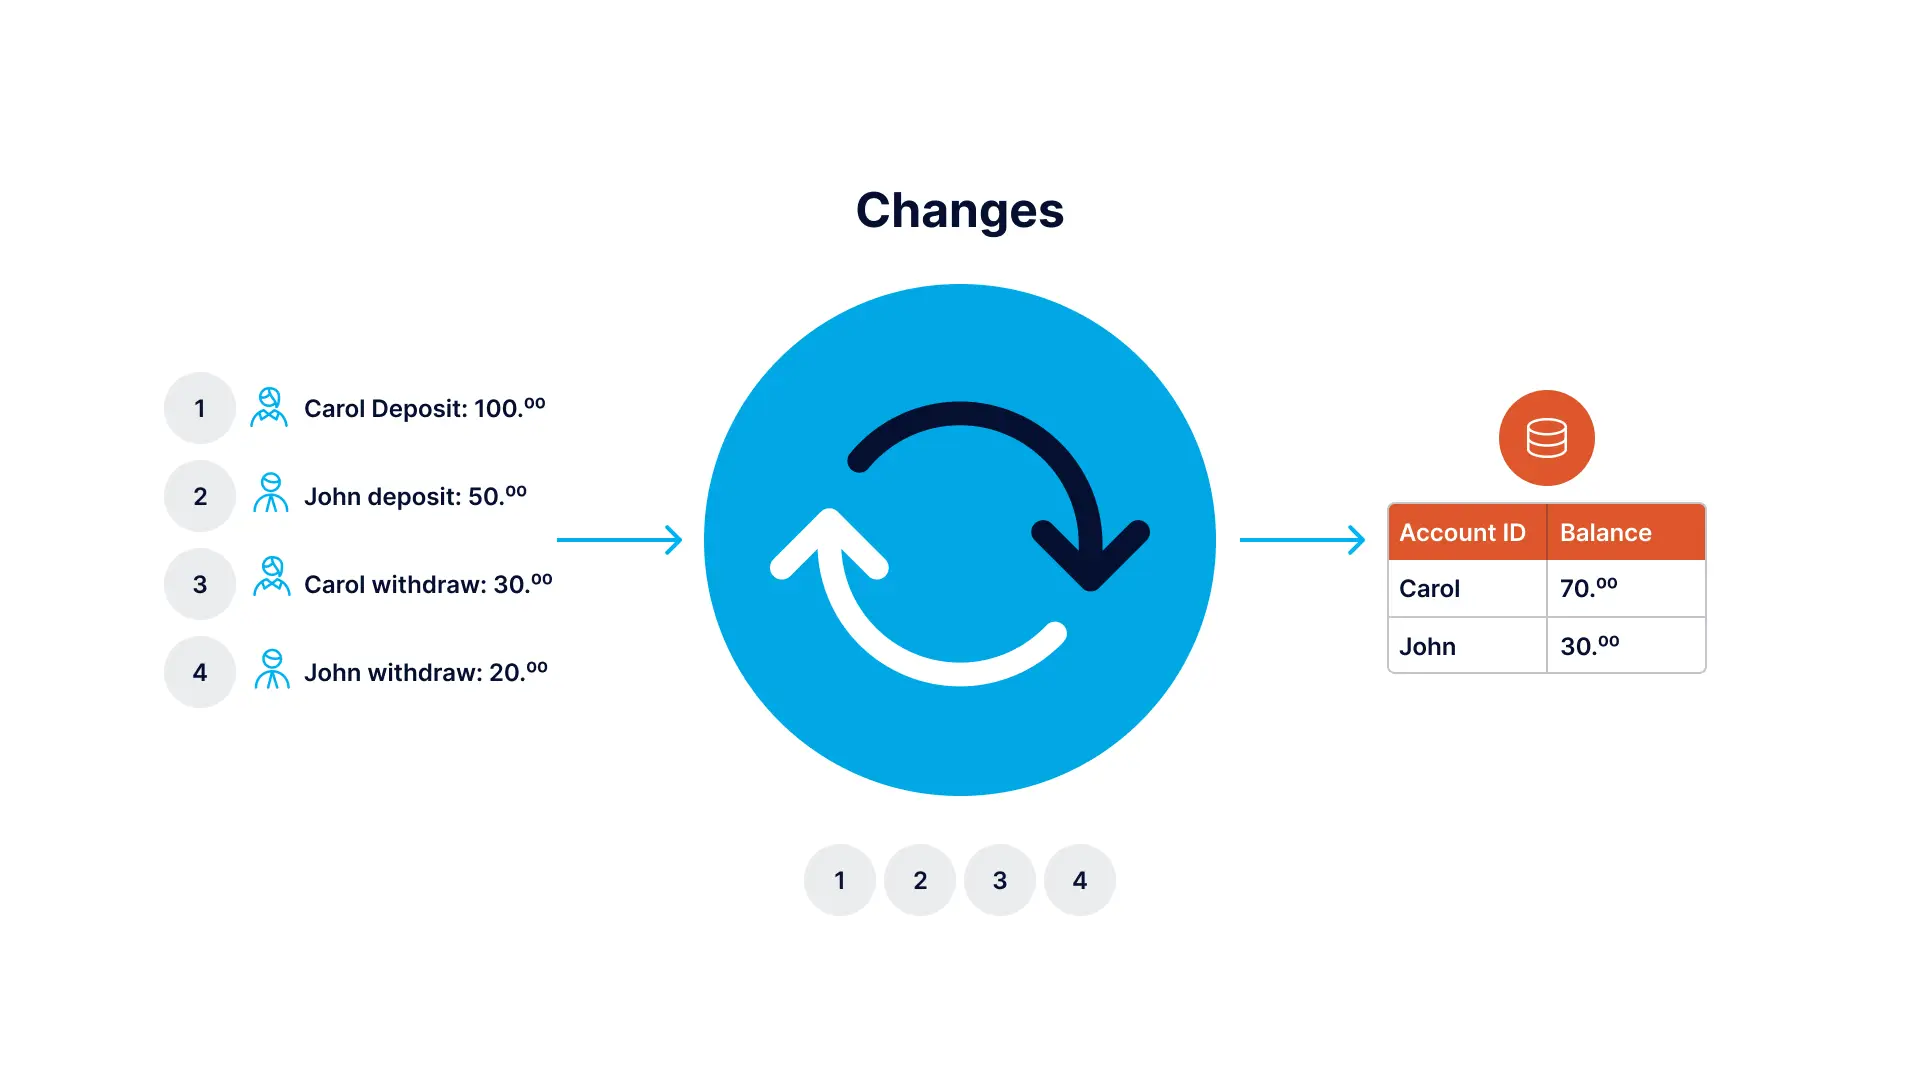
Before we dive into an example pipeline, we’ll briefly go over the concept of Change Data Capture (CDC). CDC is the process of tailing the database’s change logs, turning database events such as inserts, updates, deletes, and relevant DDL statements into a stream of immutable events, and applying those changes to a target database or data warehouse.
Change data capture is also a useful software abstraction for other software applications such as version control and event sourcing.
Striim brings decades of experience delivering change data capture products that work in mission-critical environments. The founding team at Striim was the executive (and technical) team at GoldenGate Software (now Oracle GoldenGate). Now Striim is offering CDC as an easy-to-use, cloud-based product for data integration.
Migrating data to Snowflake in minutes with Striim’s cloud service
Let’s dive into how you can start moving data into Snowflake in minutes using our platform. In a few simple steps, this example shows how you can move transactional data from Oracle to Snowflake.
Here are the simple high level steps to move data from Oracle to Snowflake:
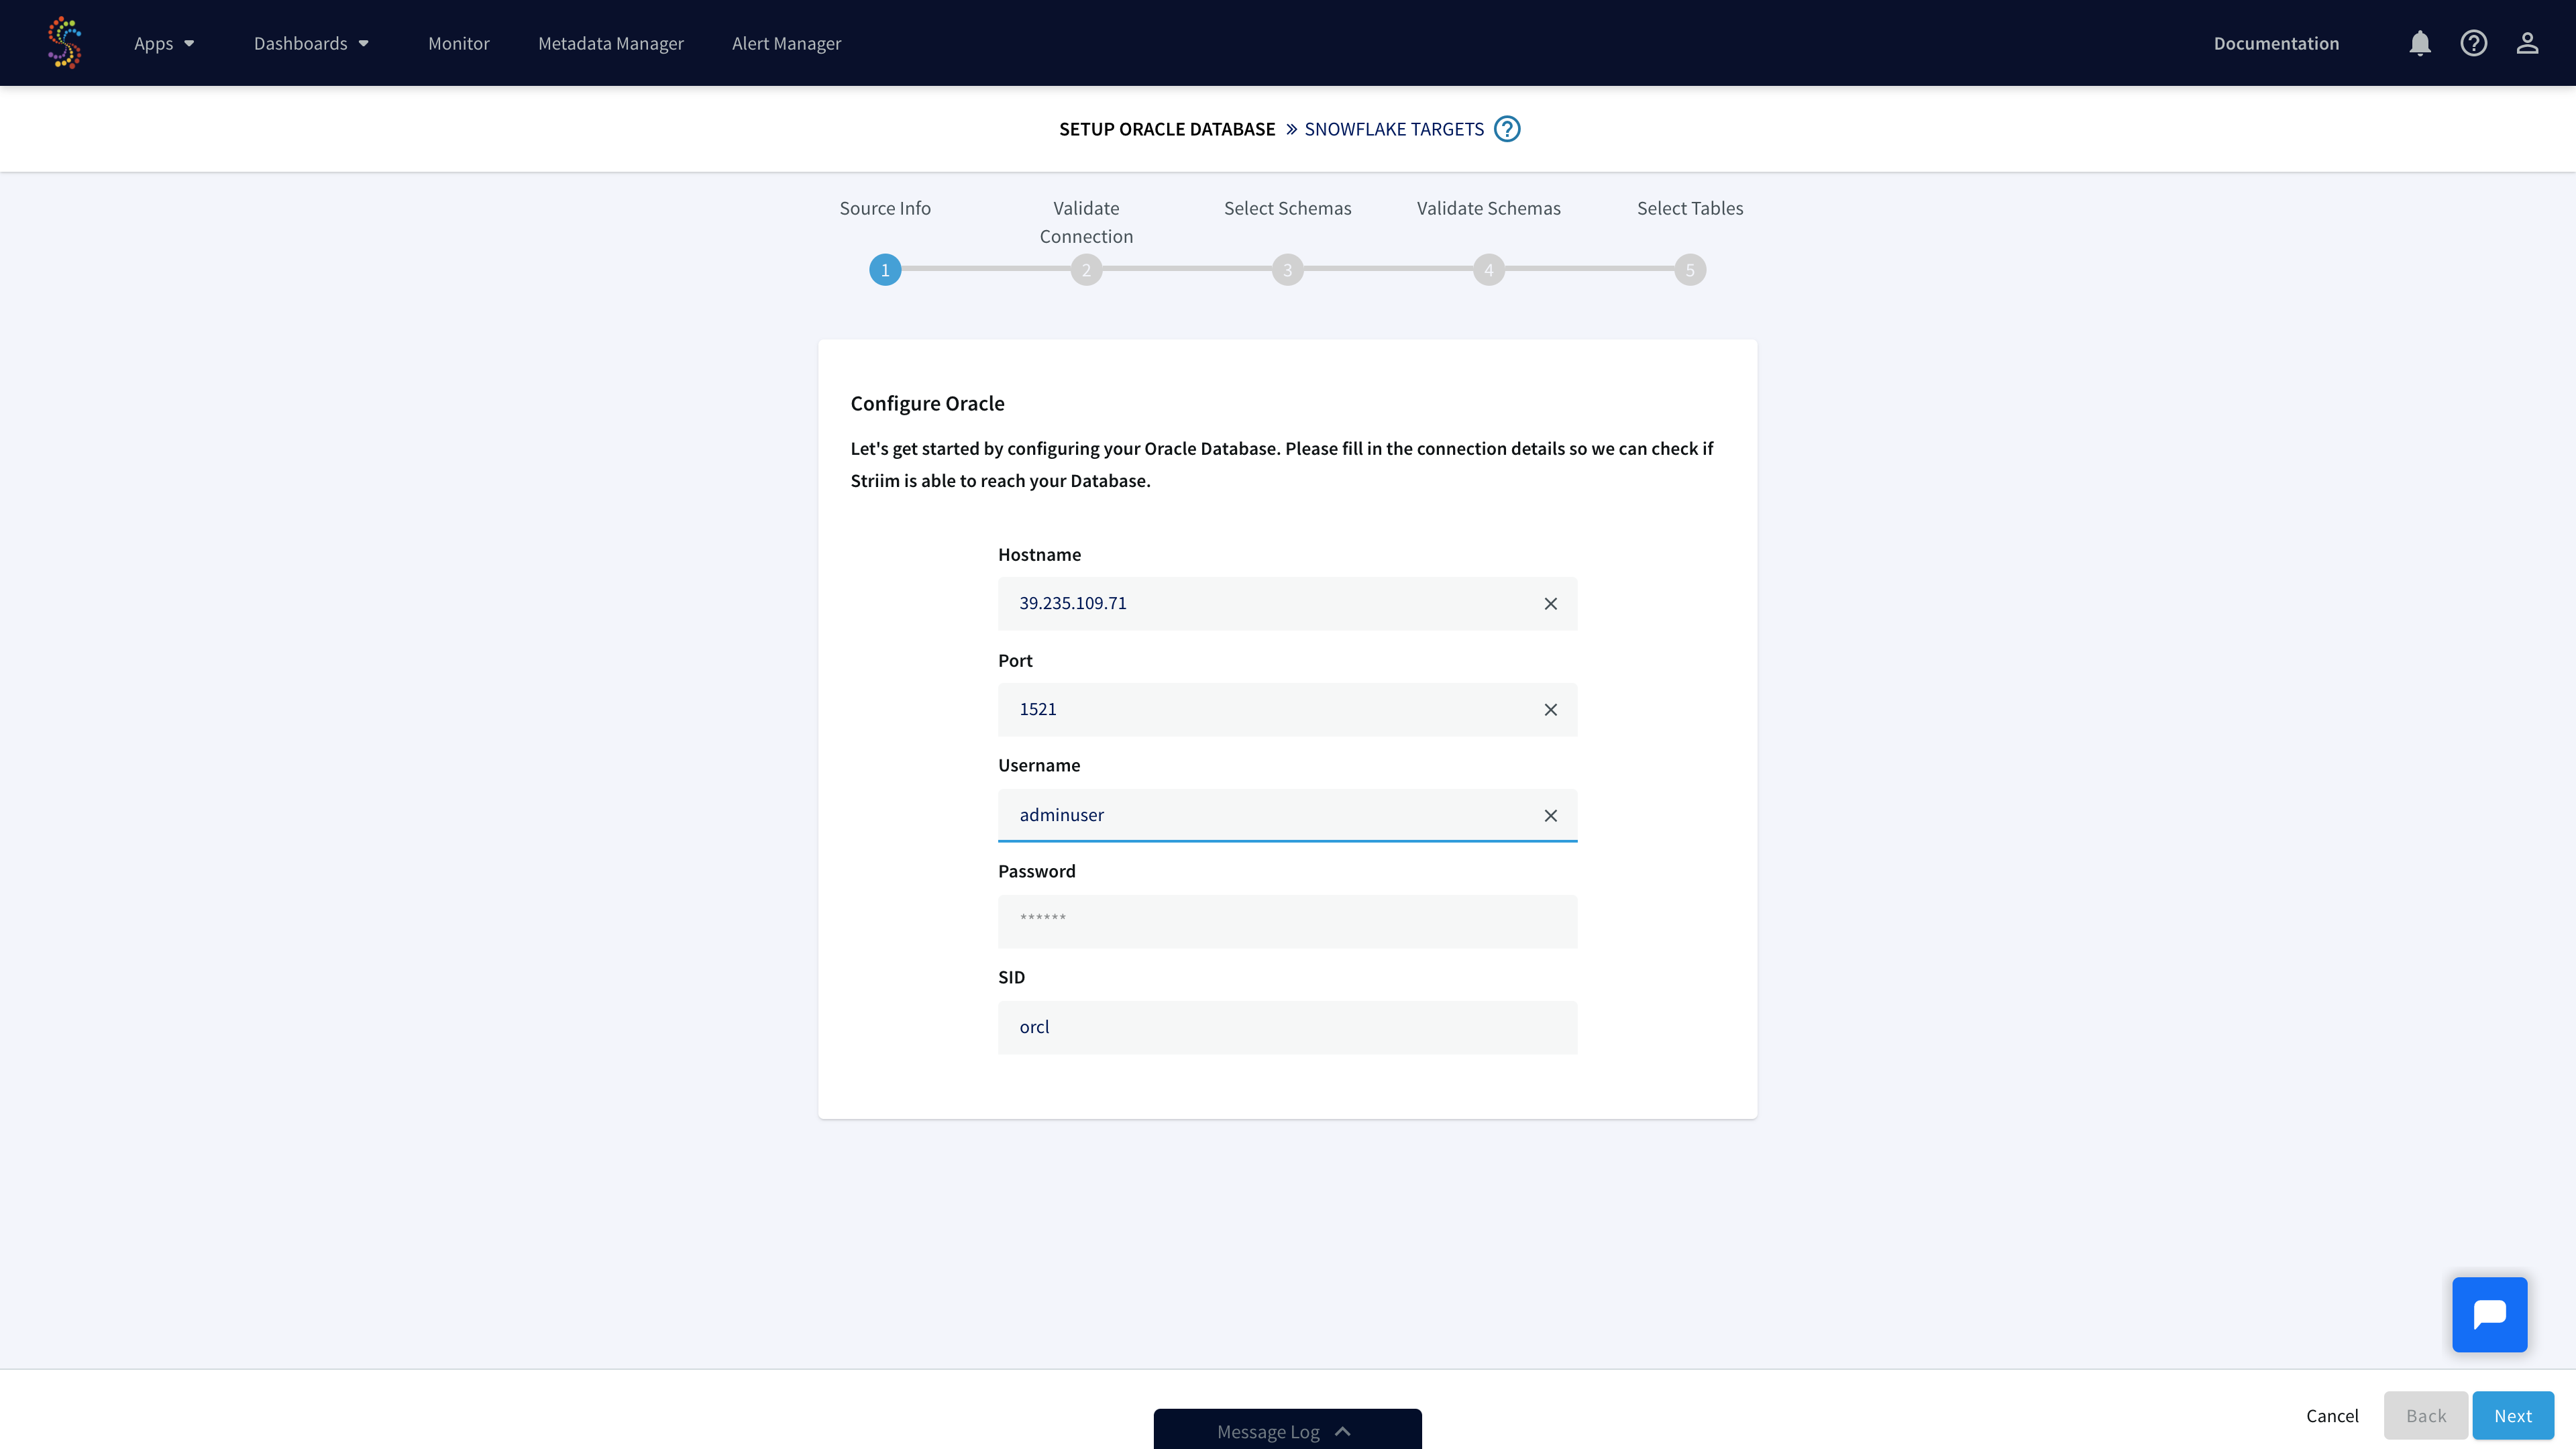
- Connect to Oracle database
- Connect to your Snowflake environment – this step is done automatically in Striim for Snowflake Partner Connect
- Map data types from Oracle to Snowflake – this step is also done automatically in Striim’s wizards
- Start data migration with Oracle change data capture to Snowflake
- Monitor and validate your data pipeline from Oracle to Snowflake
Let’s get started:
1. Launch Striim in Snowflake Partner Connect
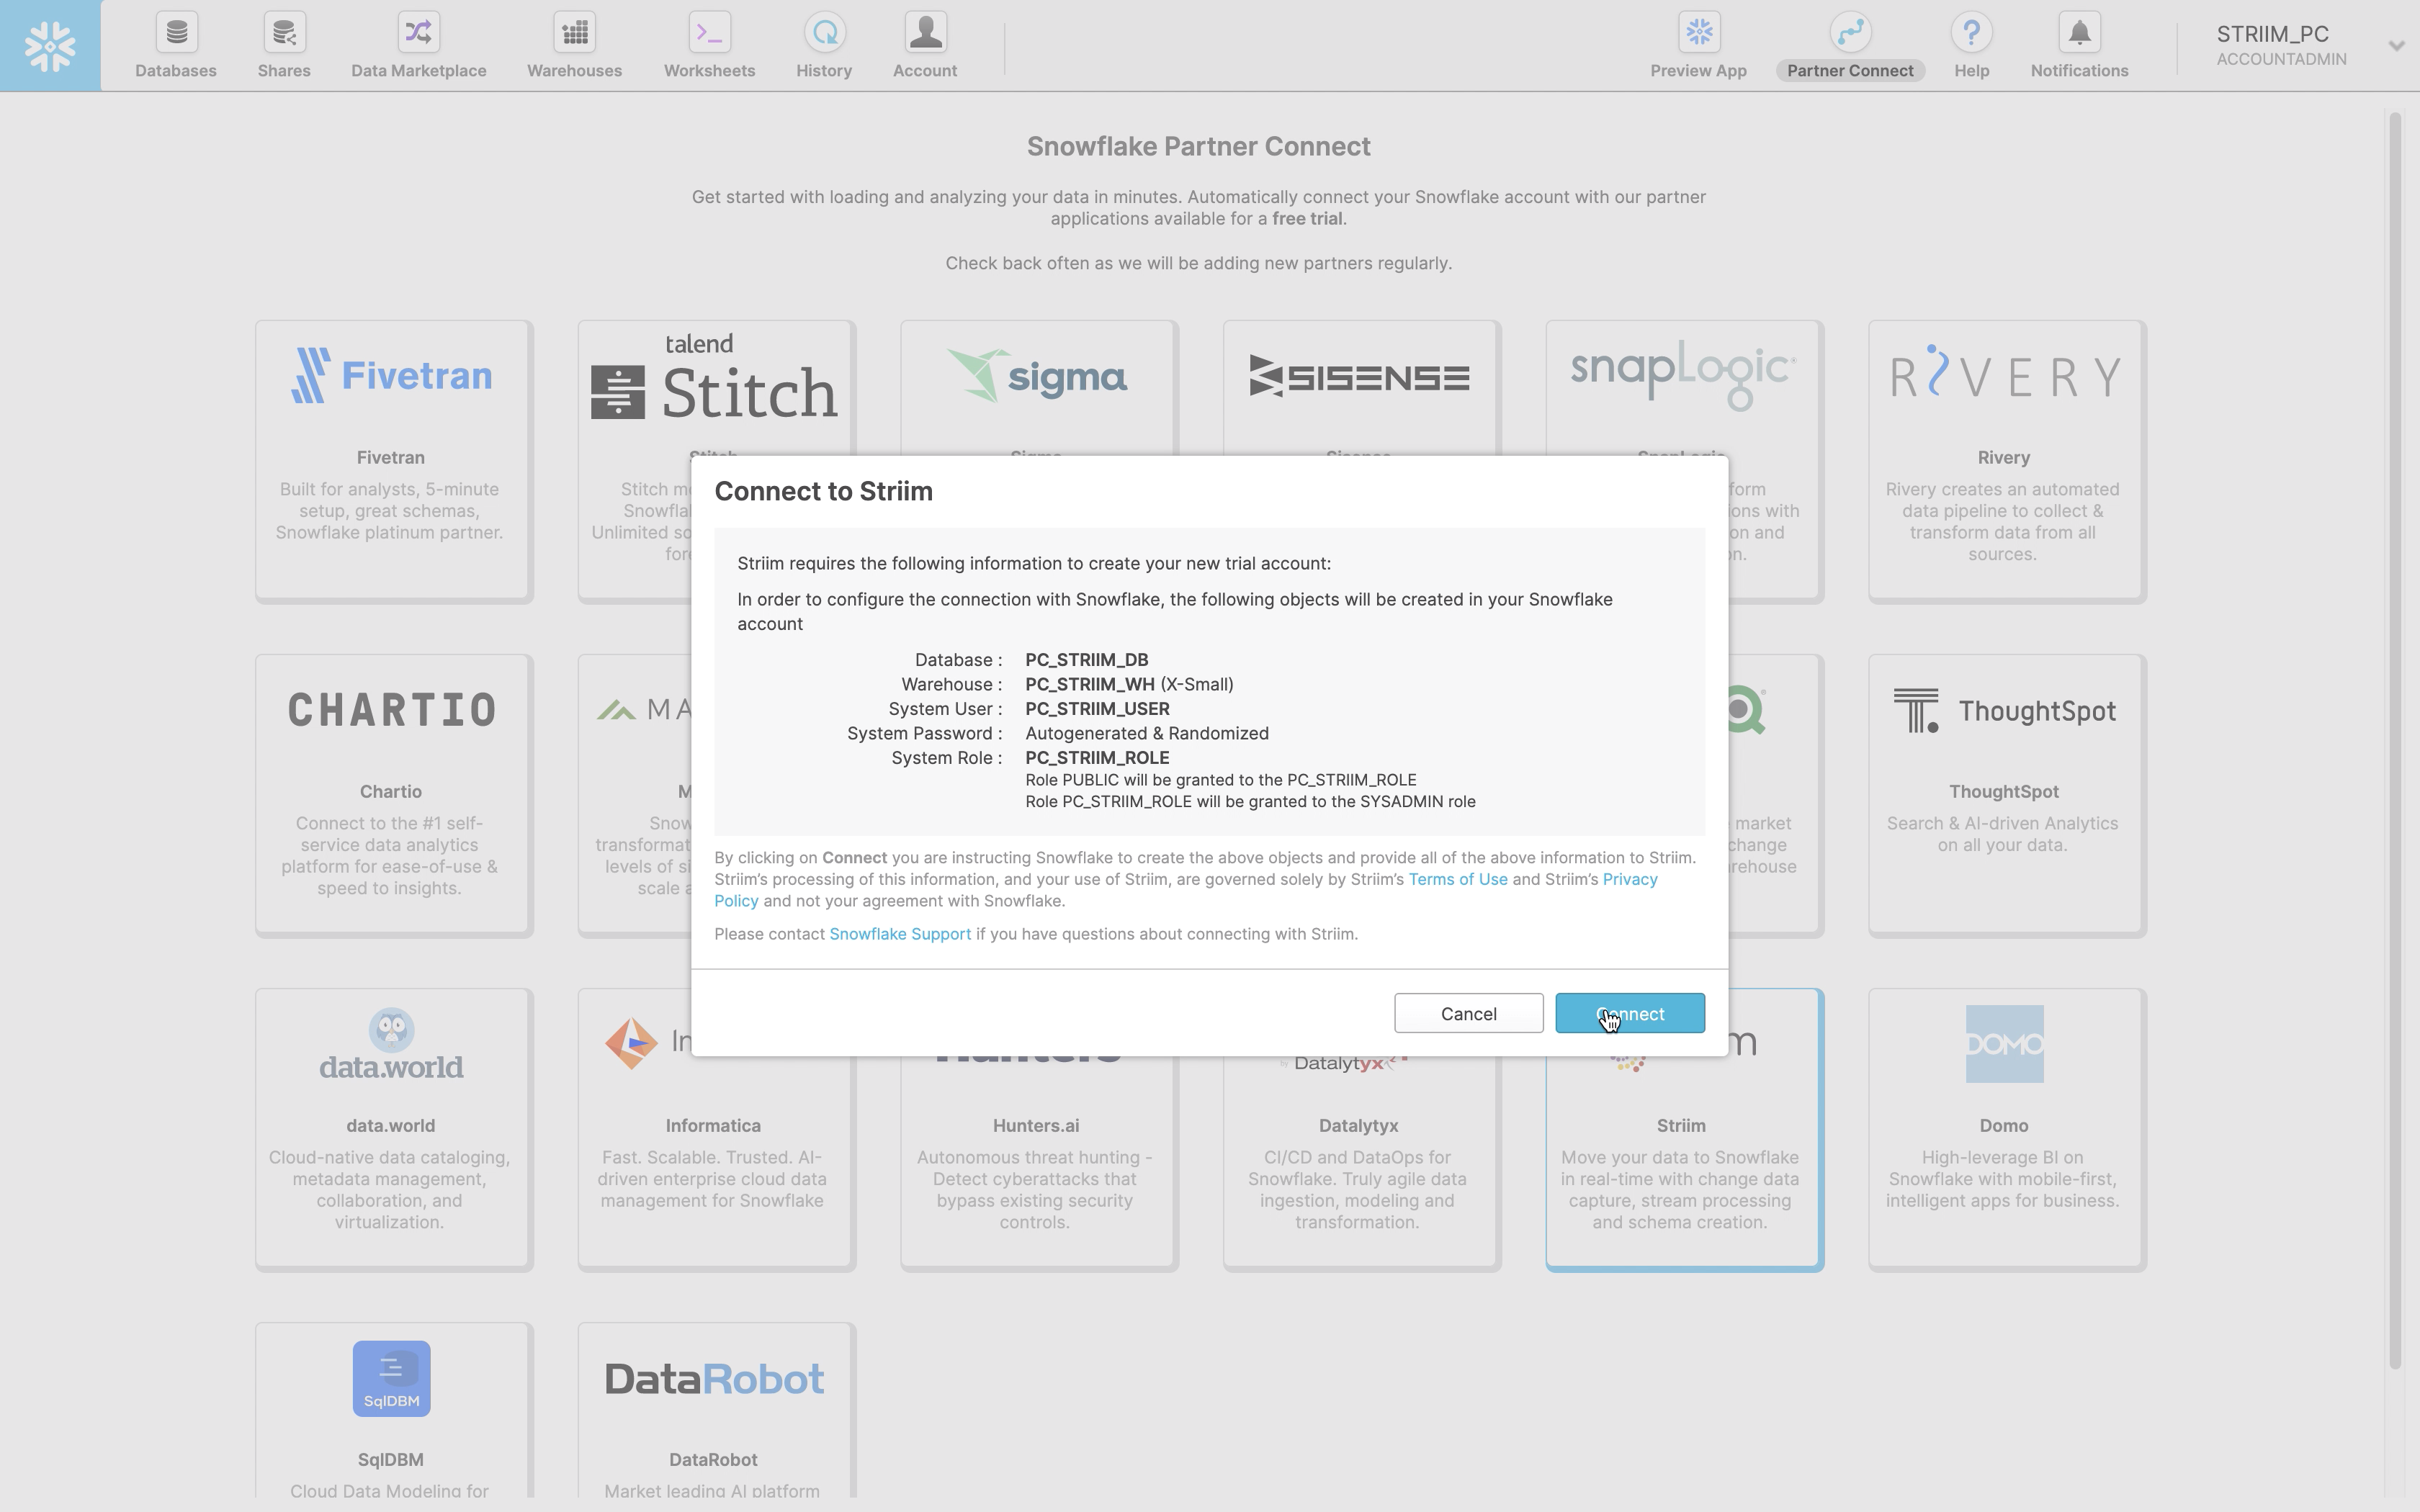
In your Snowflake UI, navigate to “Partner Connect” by clicking the link in the top right corner of the navigation bar. There you can find and launch Striim.
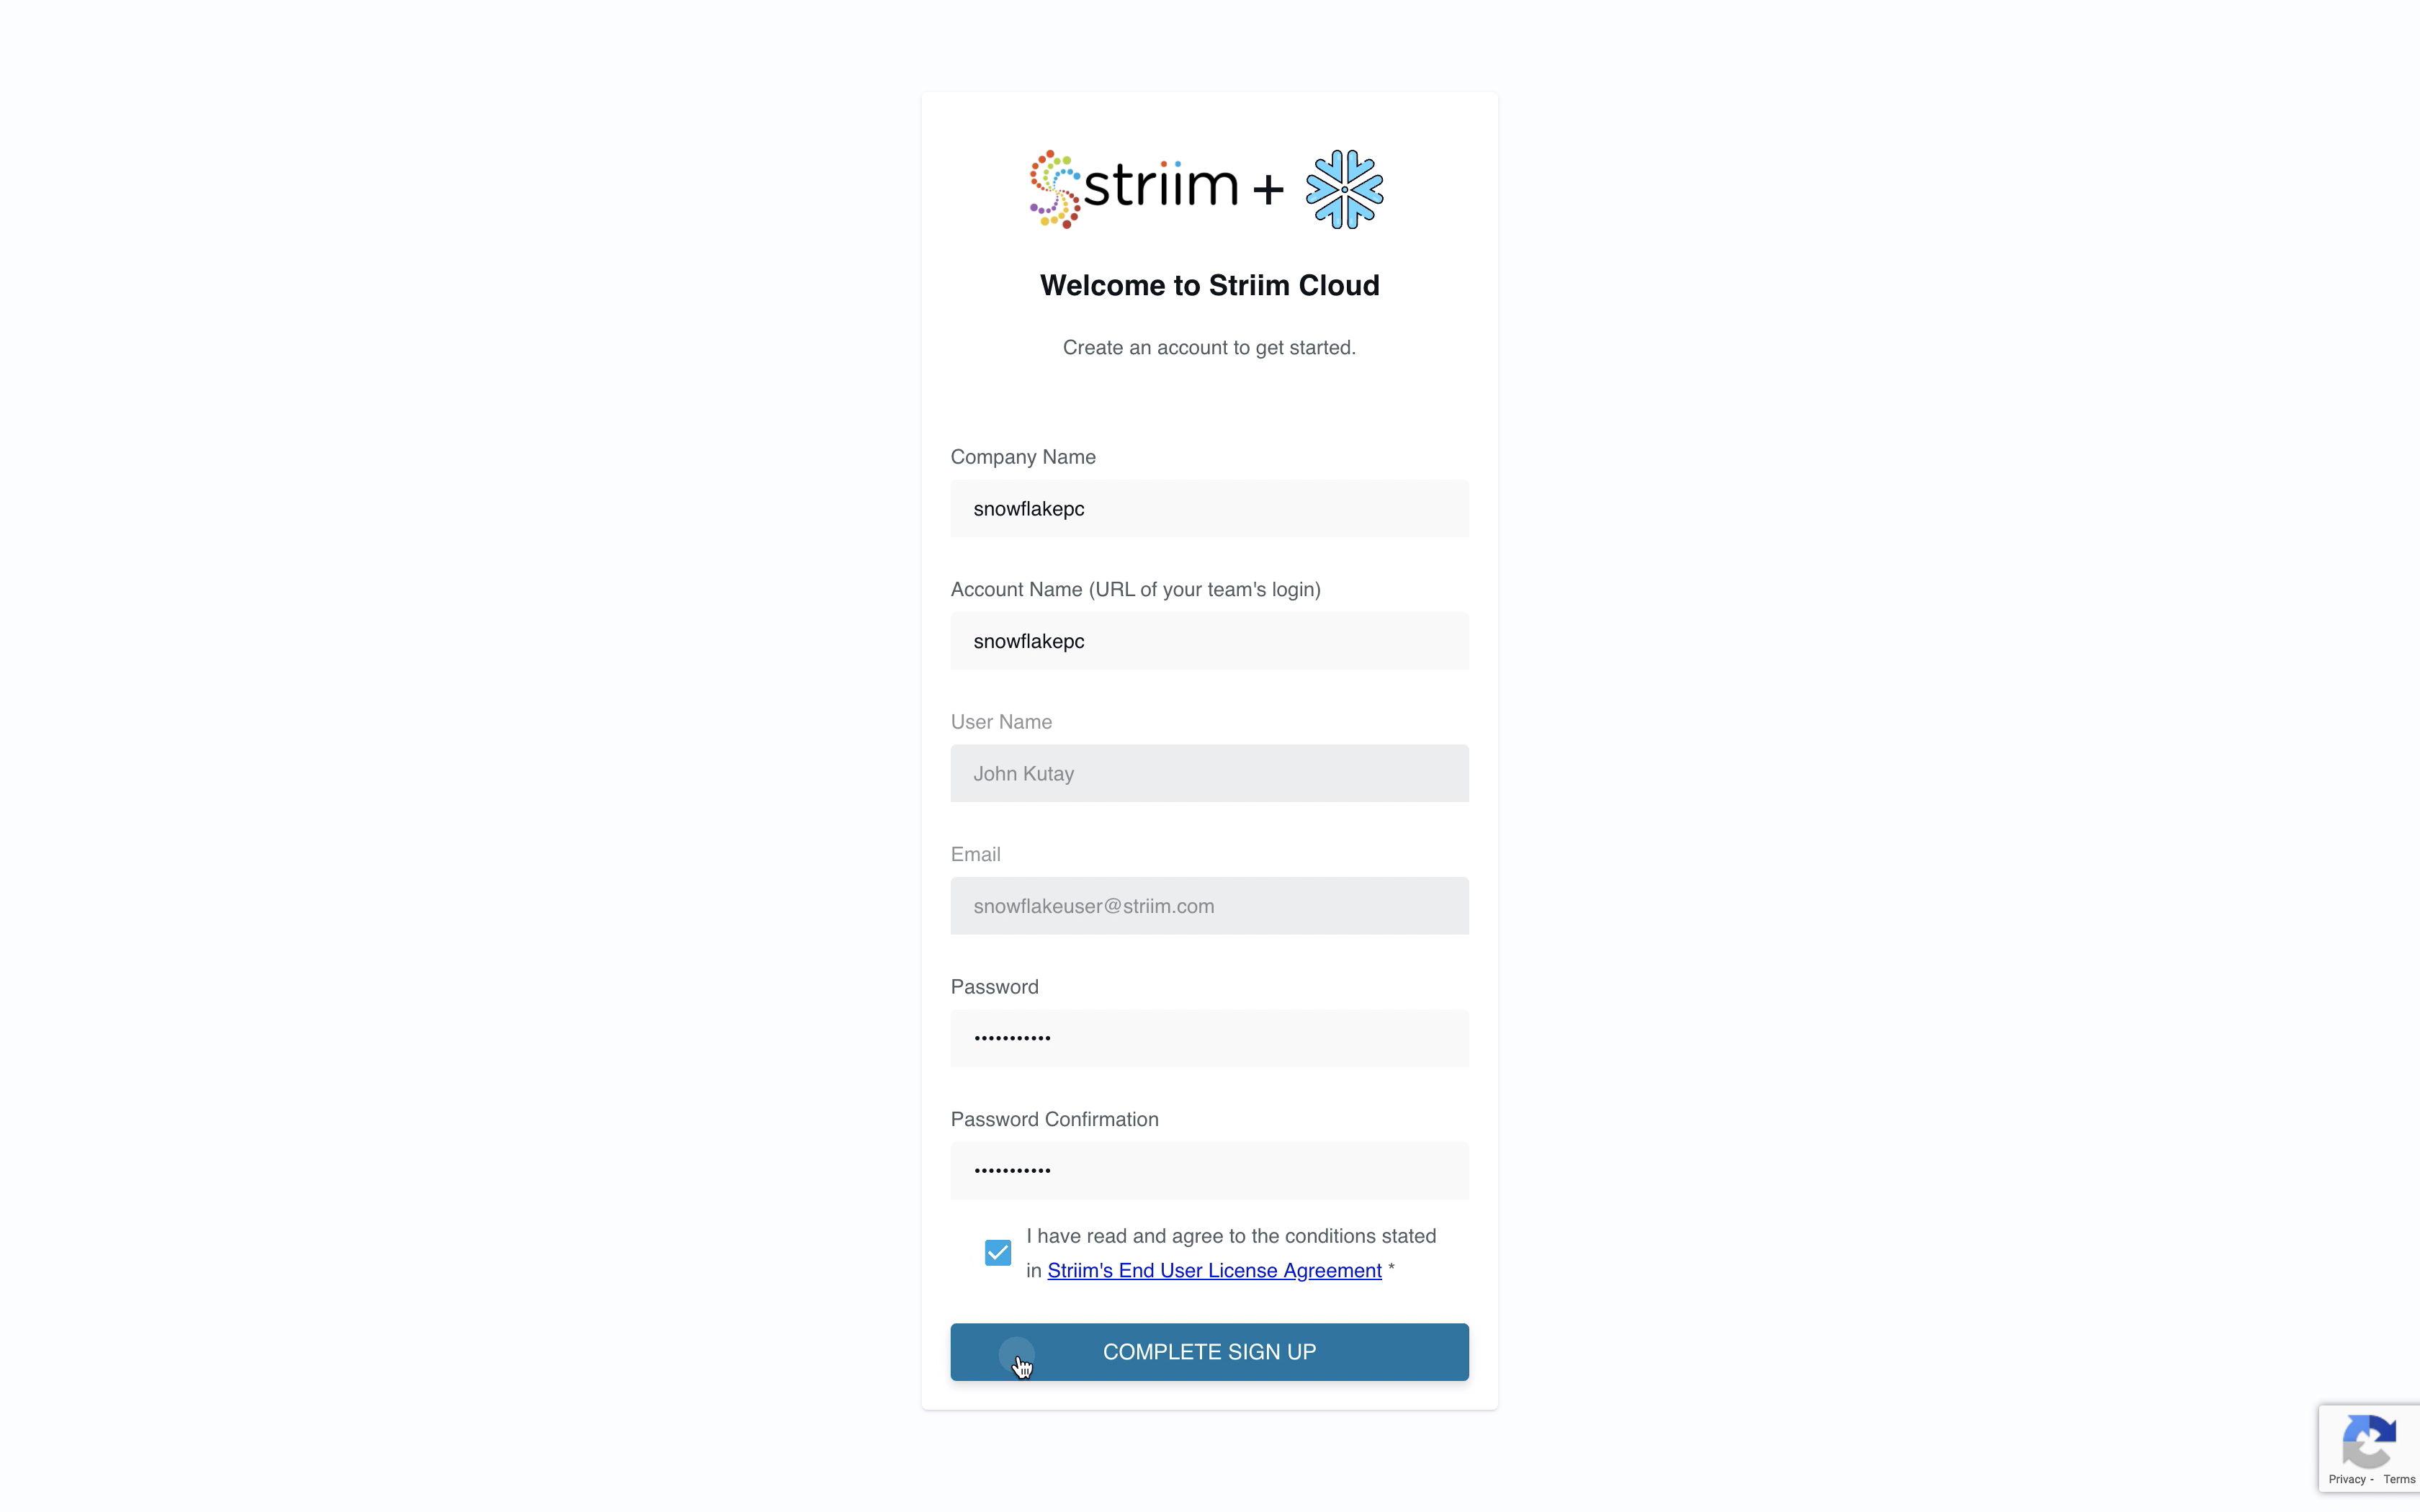
2. Sign Up For a Striim Free Trial
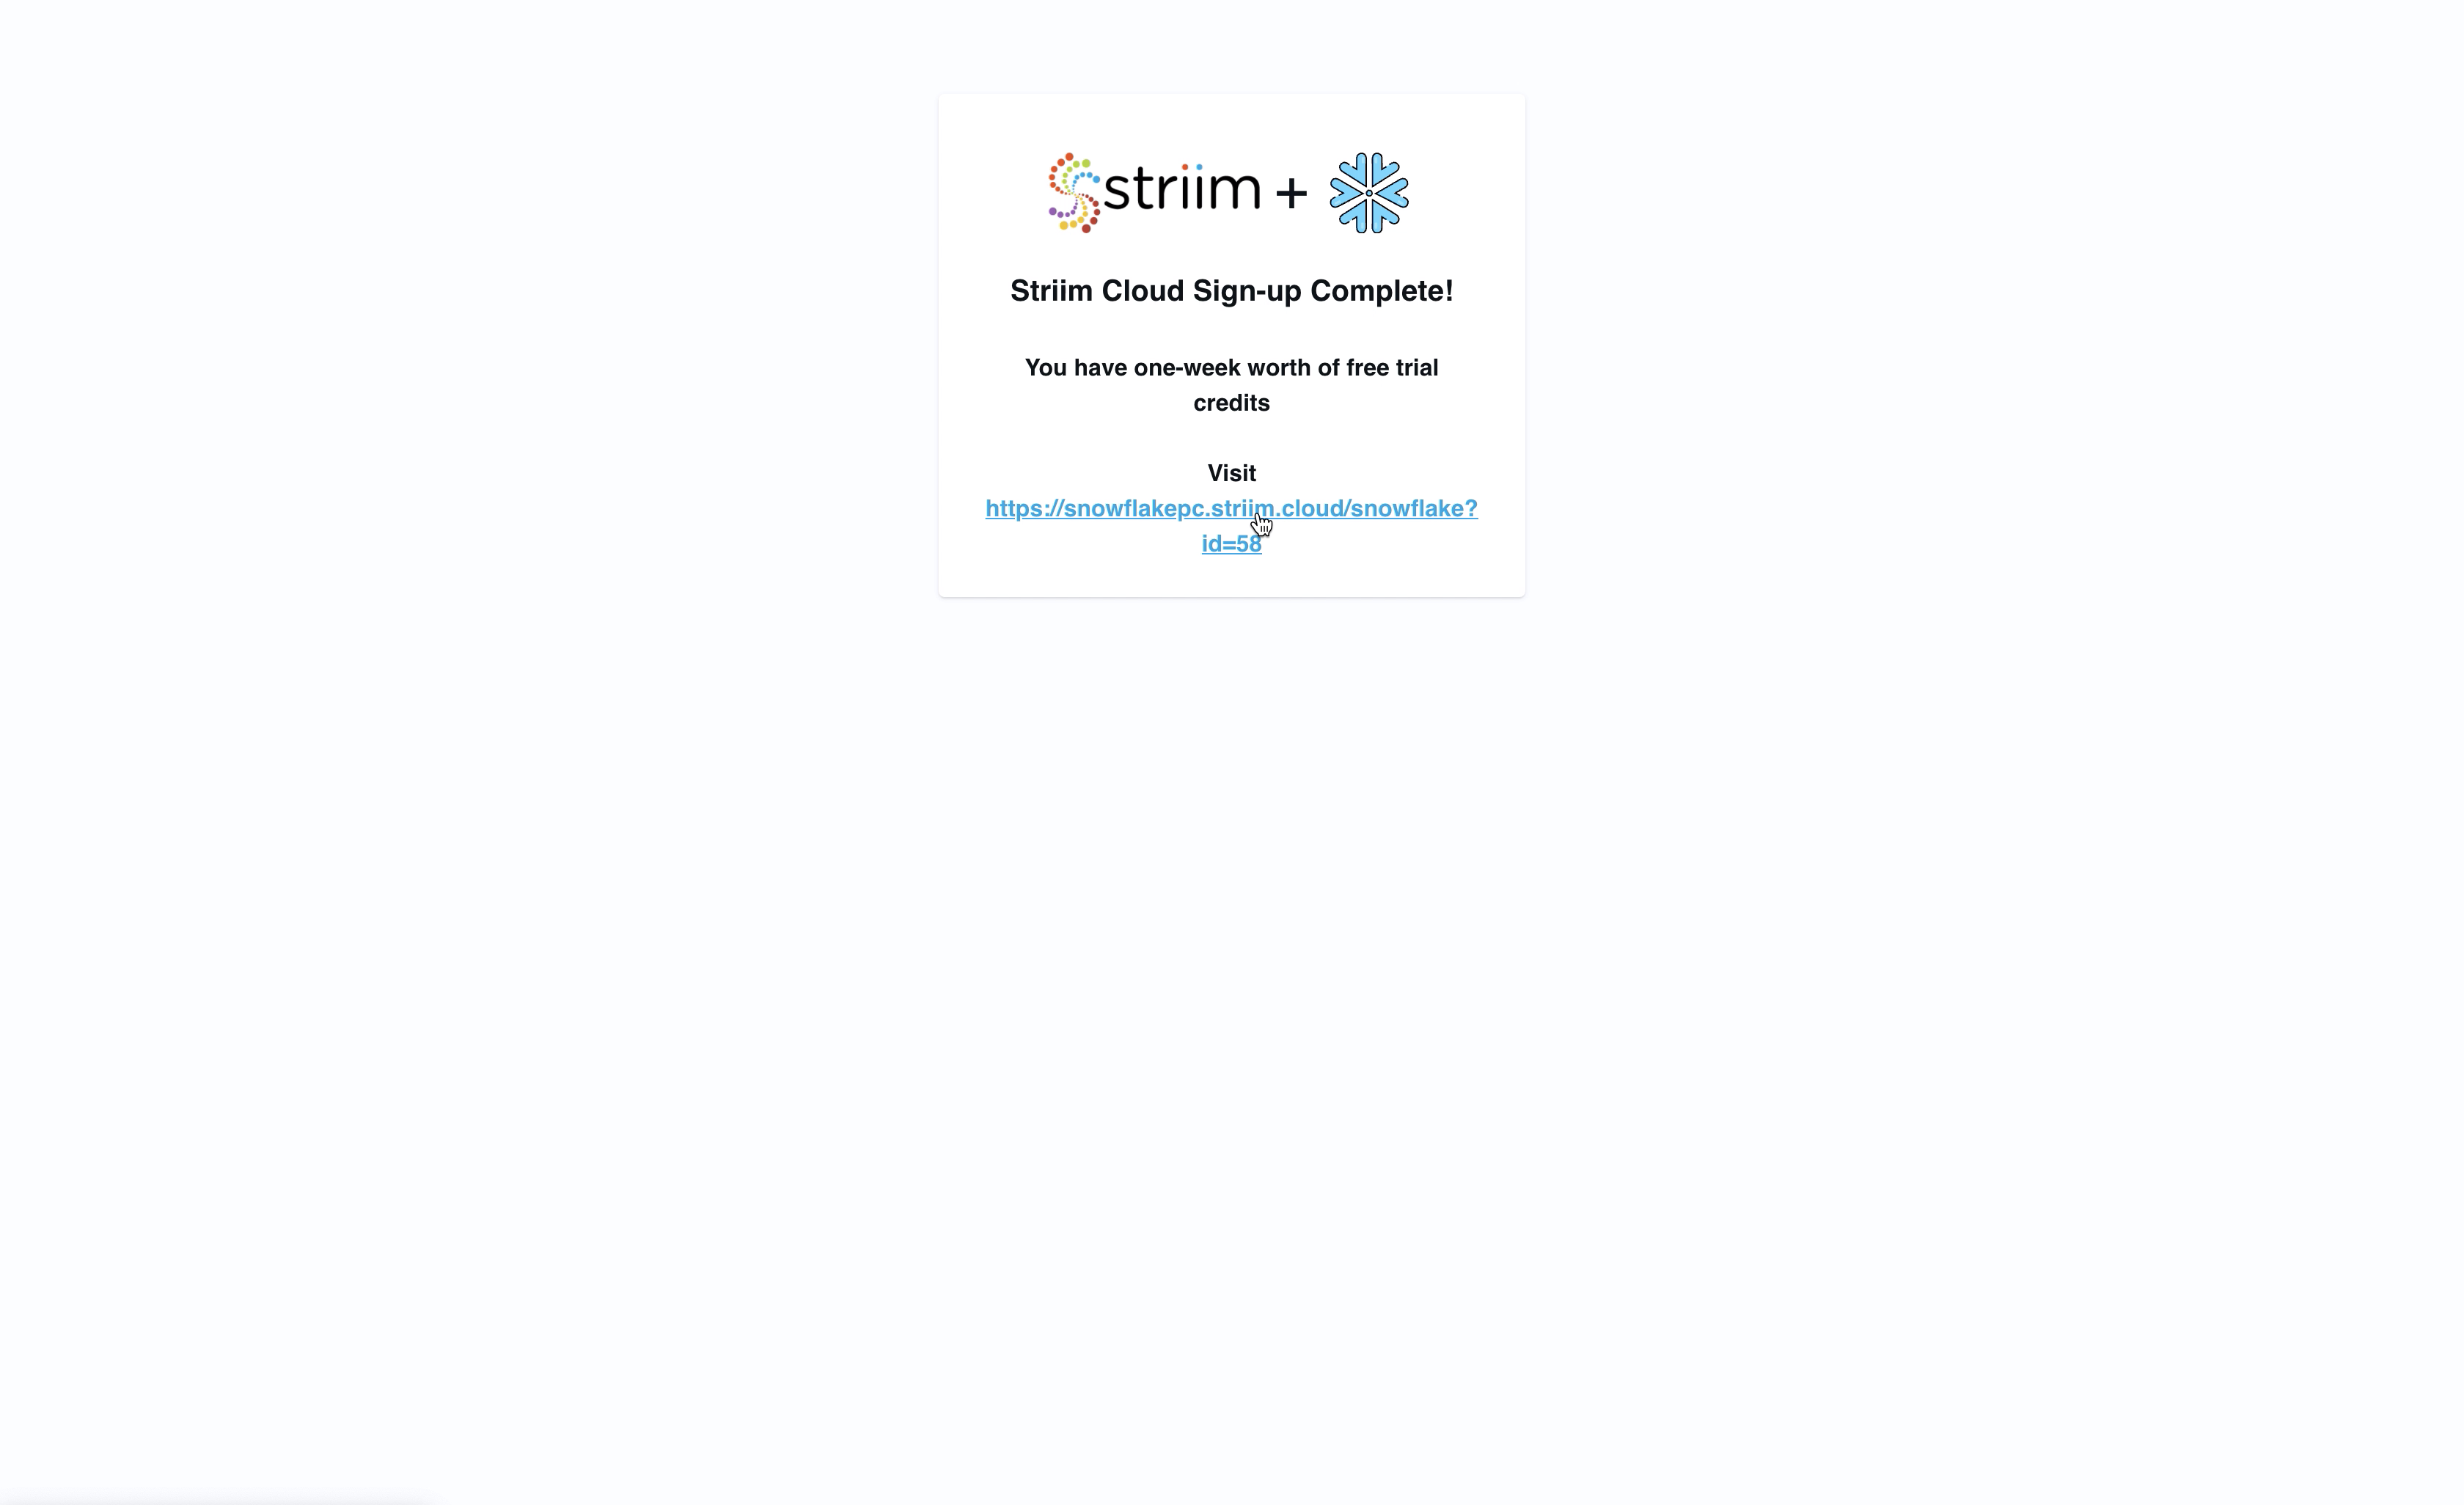
Striim’s free trial gives you seven calendar days of the full product offering to get started. But we’ll get you up and running with schema migration and database replication in a matter of minutes.
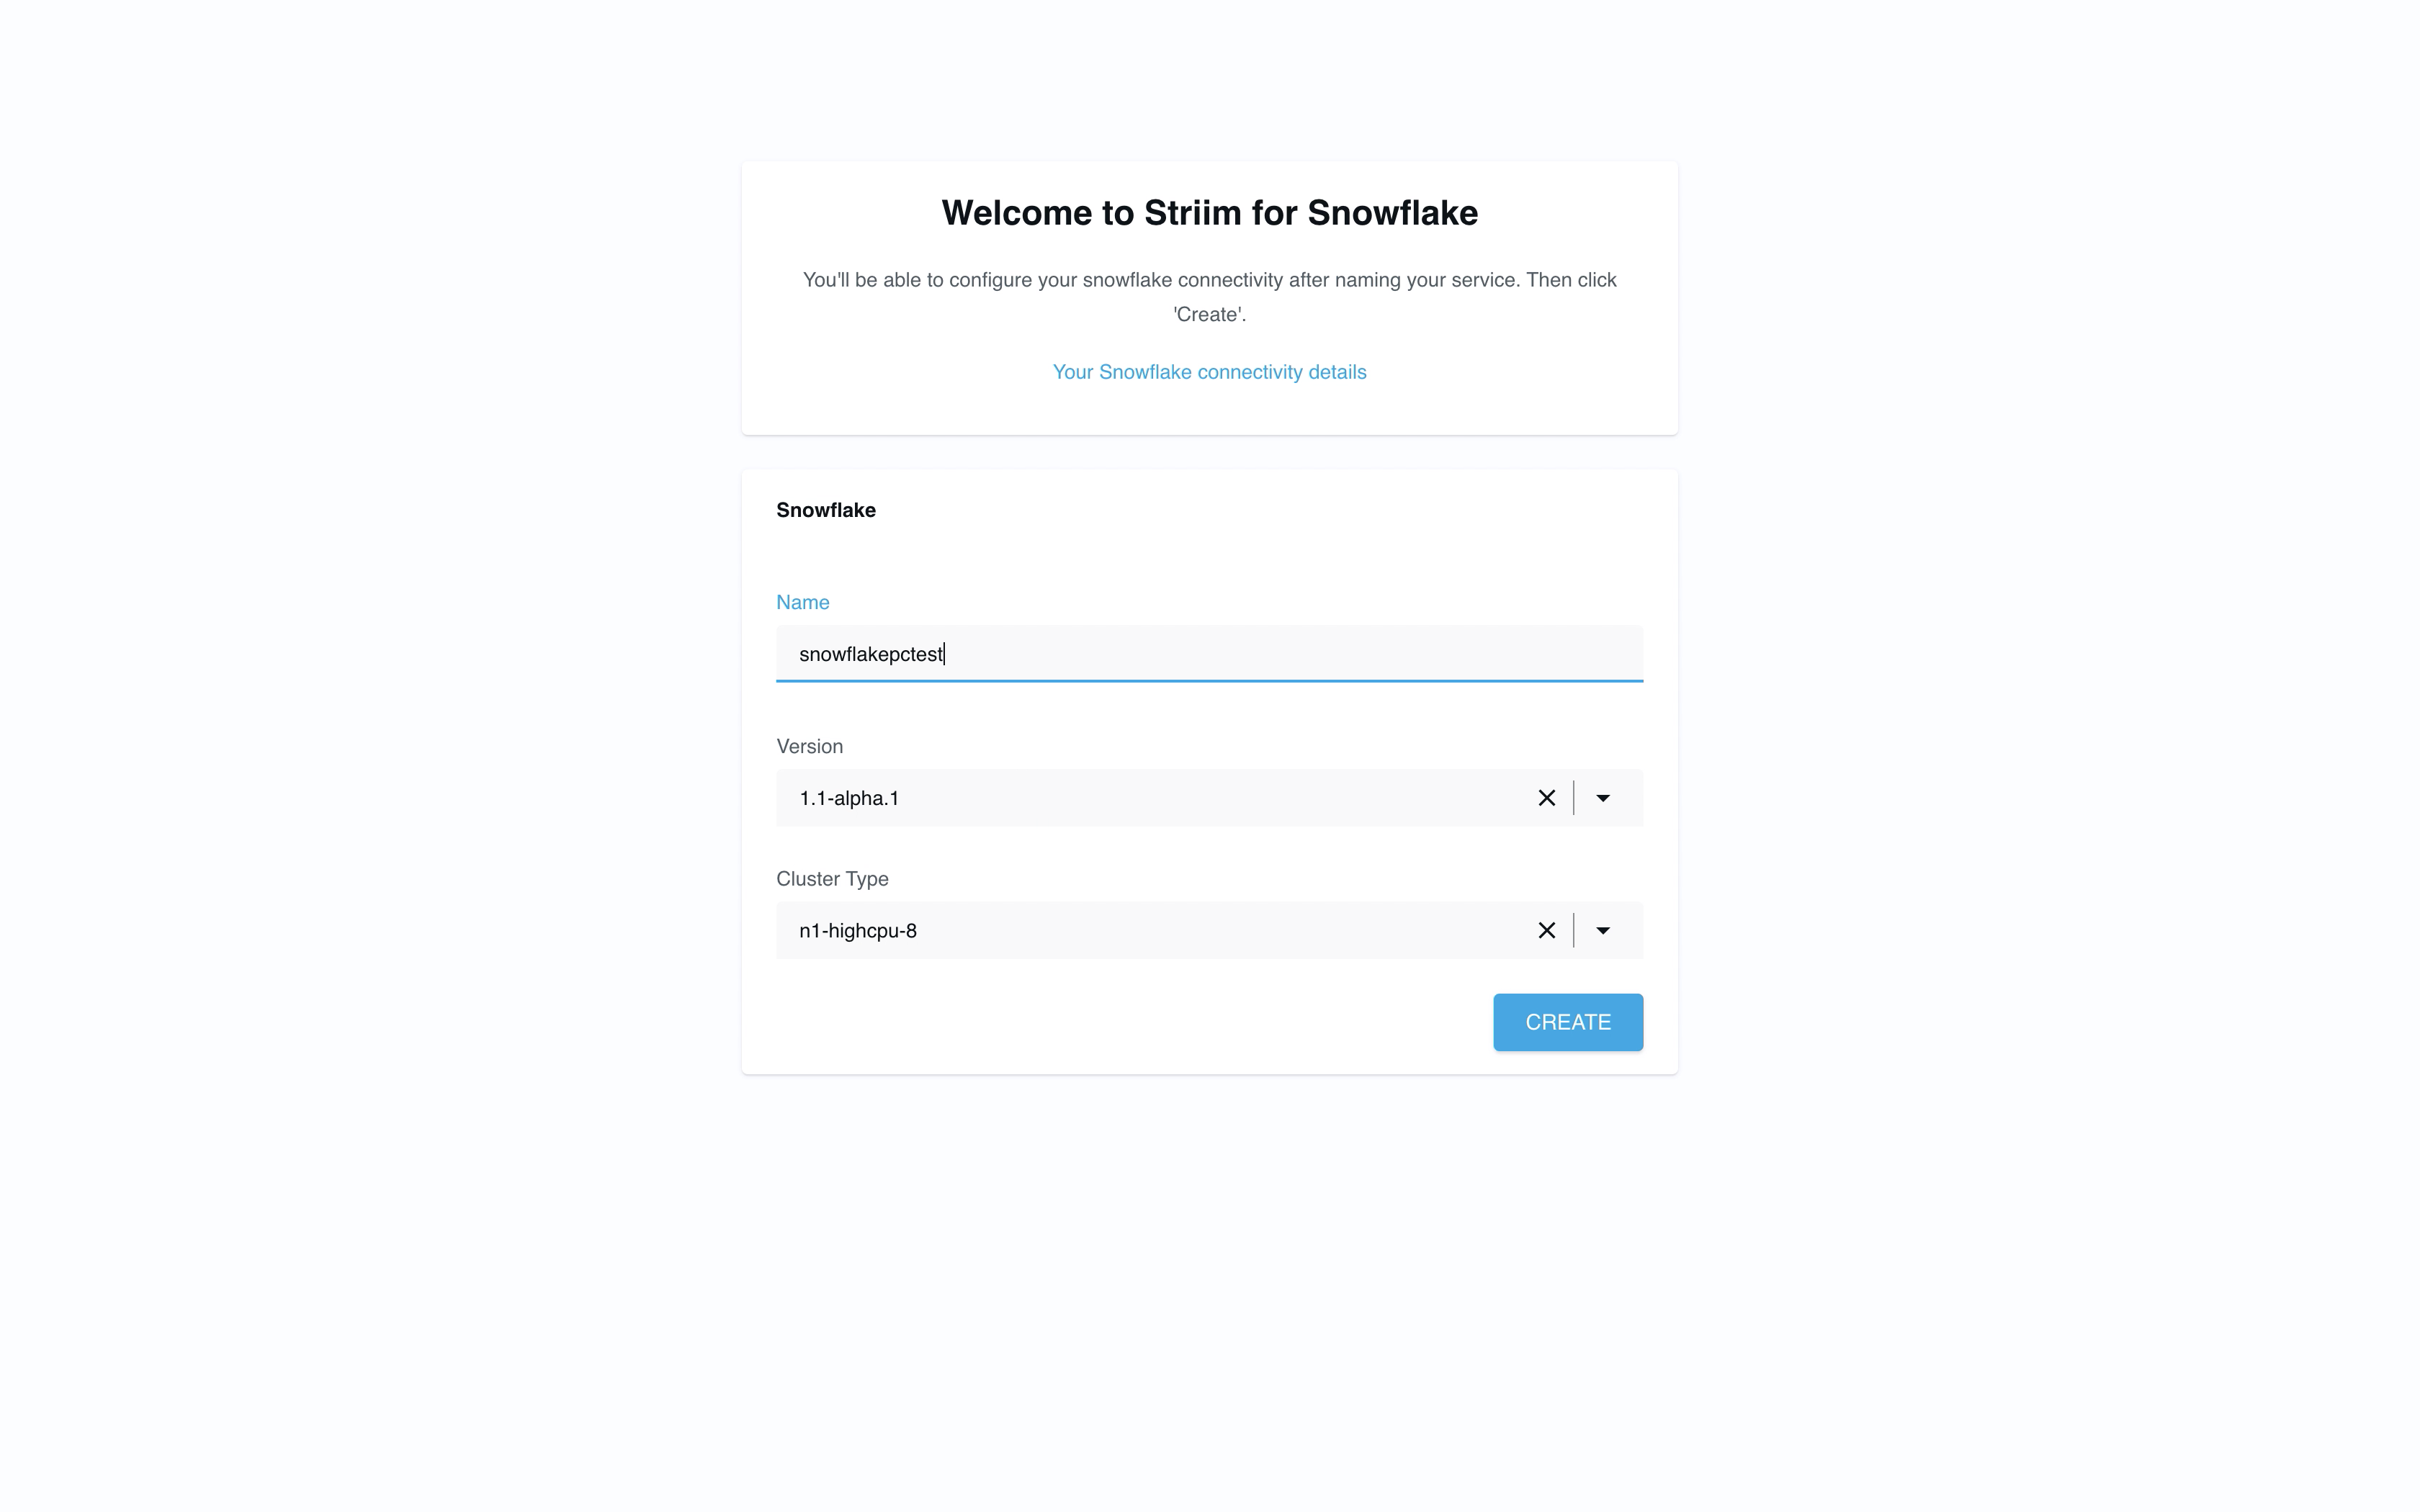
3. Create your first Striim Service.
A Striim Service is an encapsulated SaaS application that dedicates the software and fully managed compute resources you need to accomplish a specific workload; in this case we’re creating a service to help you move data to Snowflake! We’re also available to assist with you via chat in the bottom right corner of your screen.
4. Start migrating data with Striim’s step-by-step wizards.
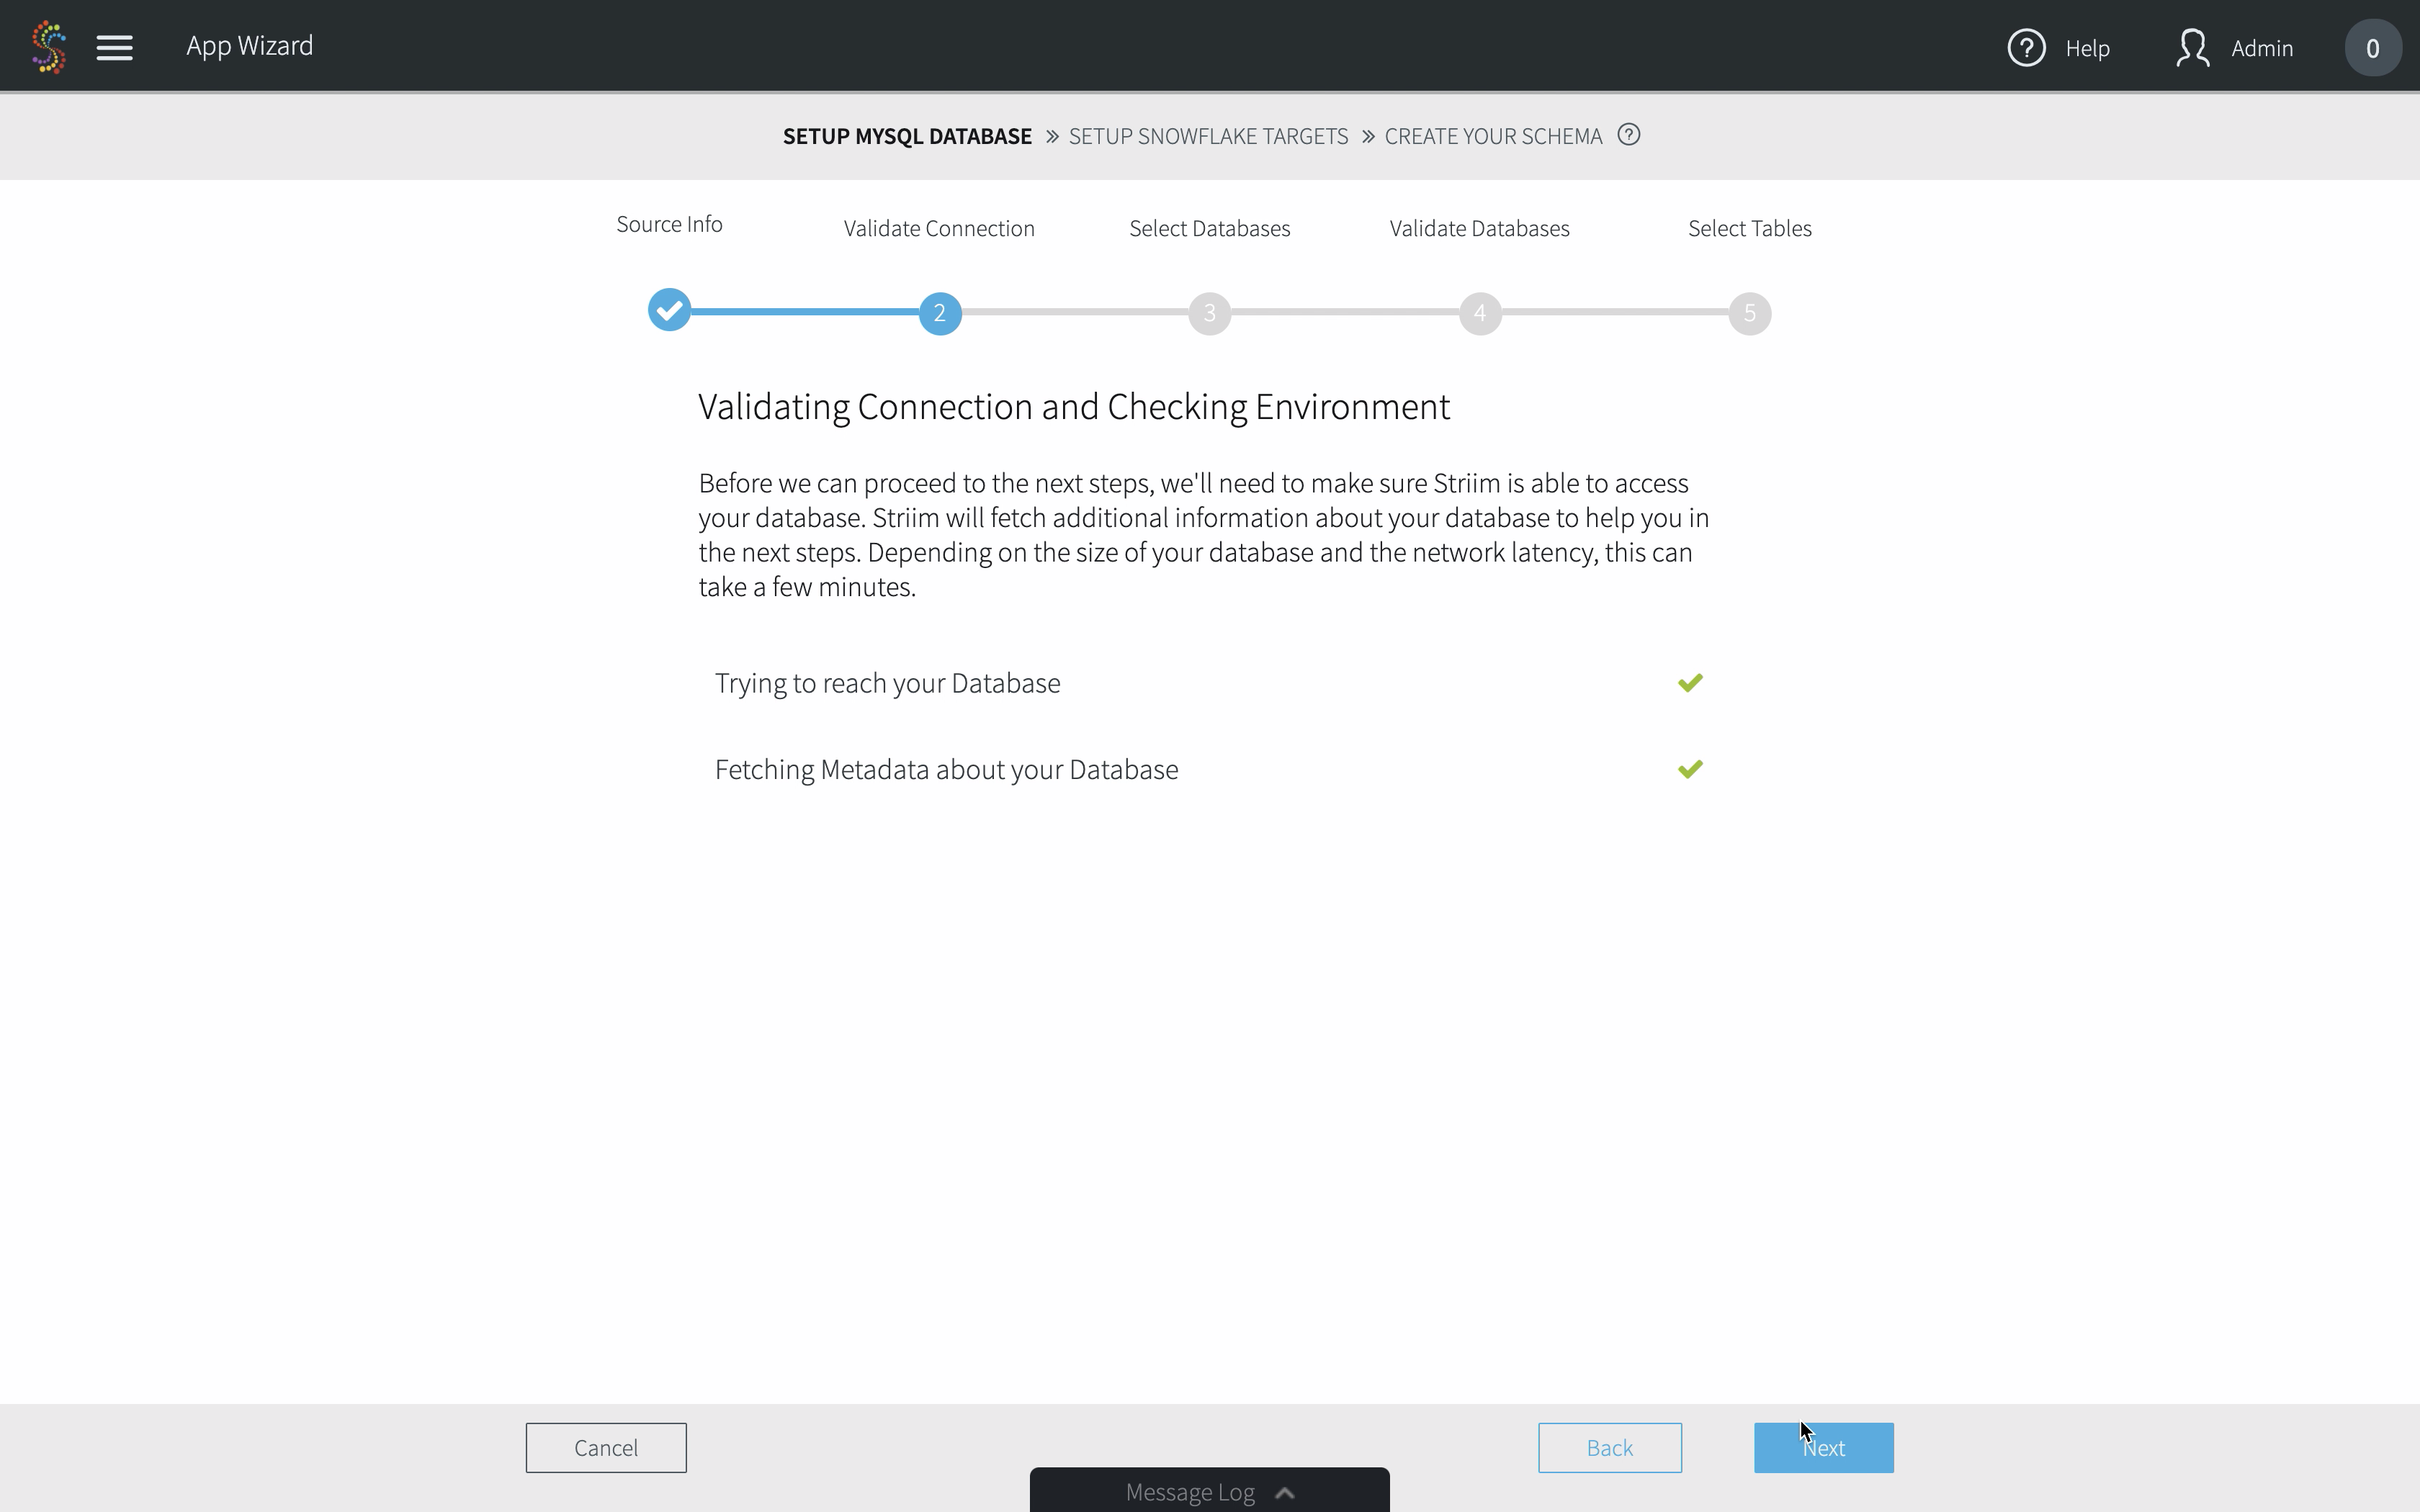
To backfill and/or migrate your historical data set from your database to Snowflake, choose one of the ‘Database’ wizards. For instance, select the wizard with ‘Oracle Database’ as a source to perform an initial migration of schemas and data. For pure replication with no schema or historical data mgration, choose the ‘CDC’ wizards. In this case, we will use the Oracle Database to Snowflake wizard.
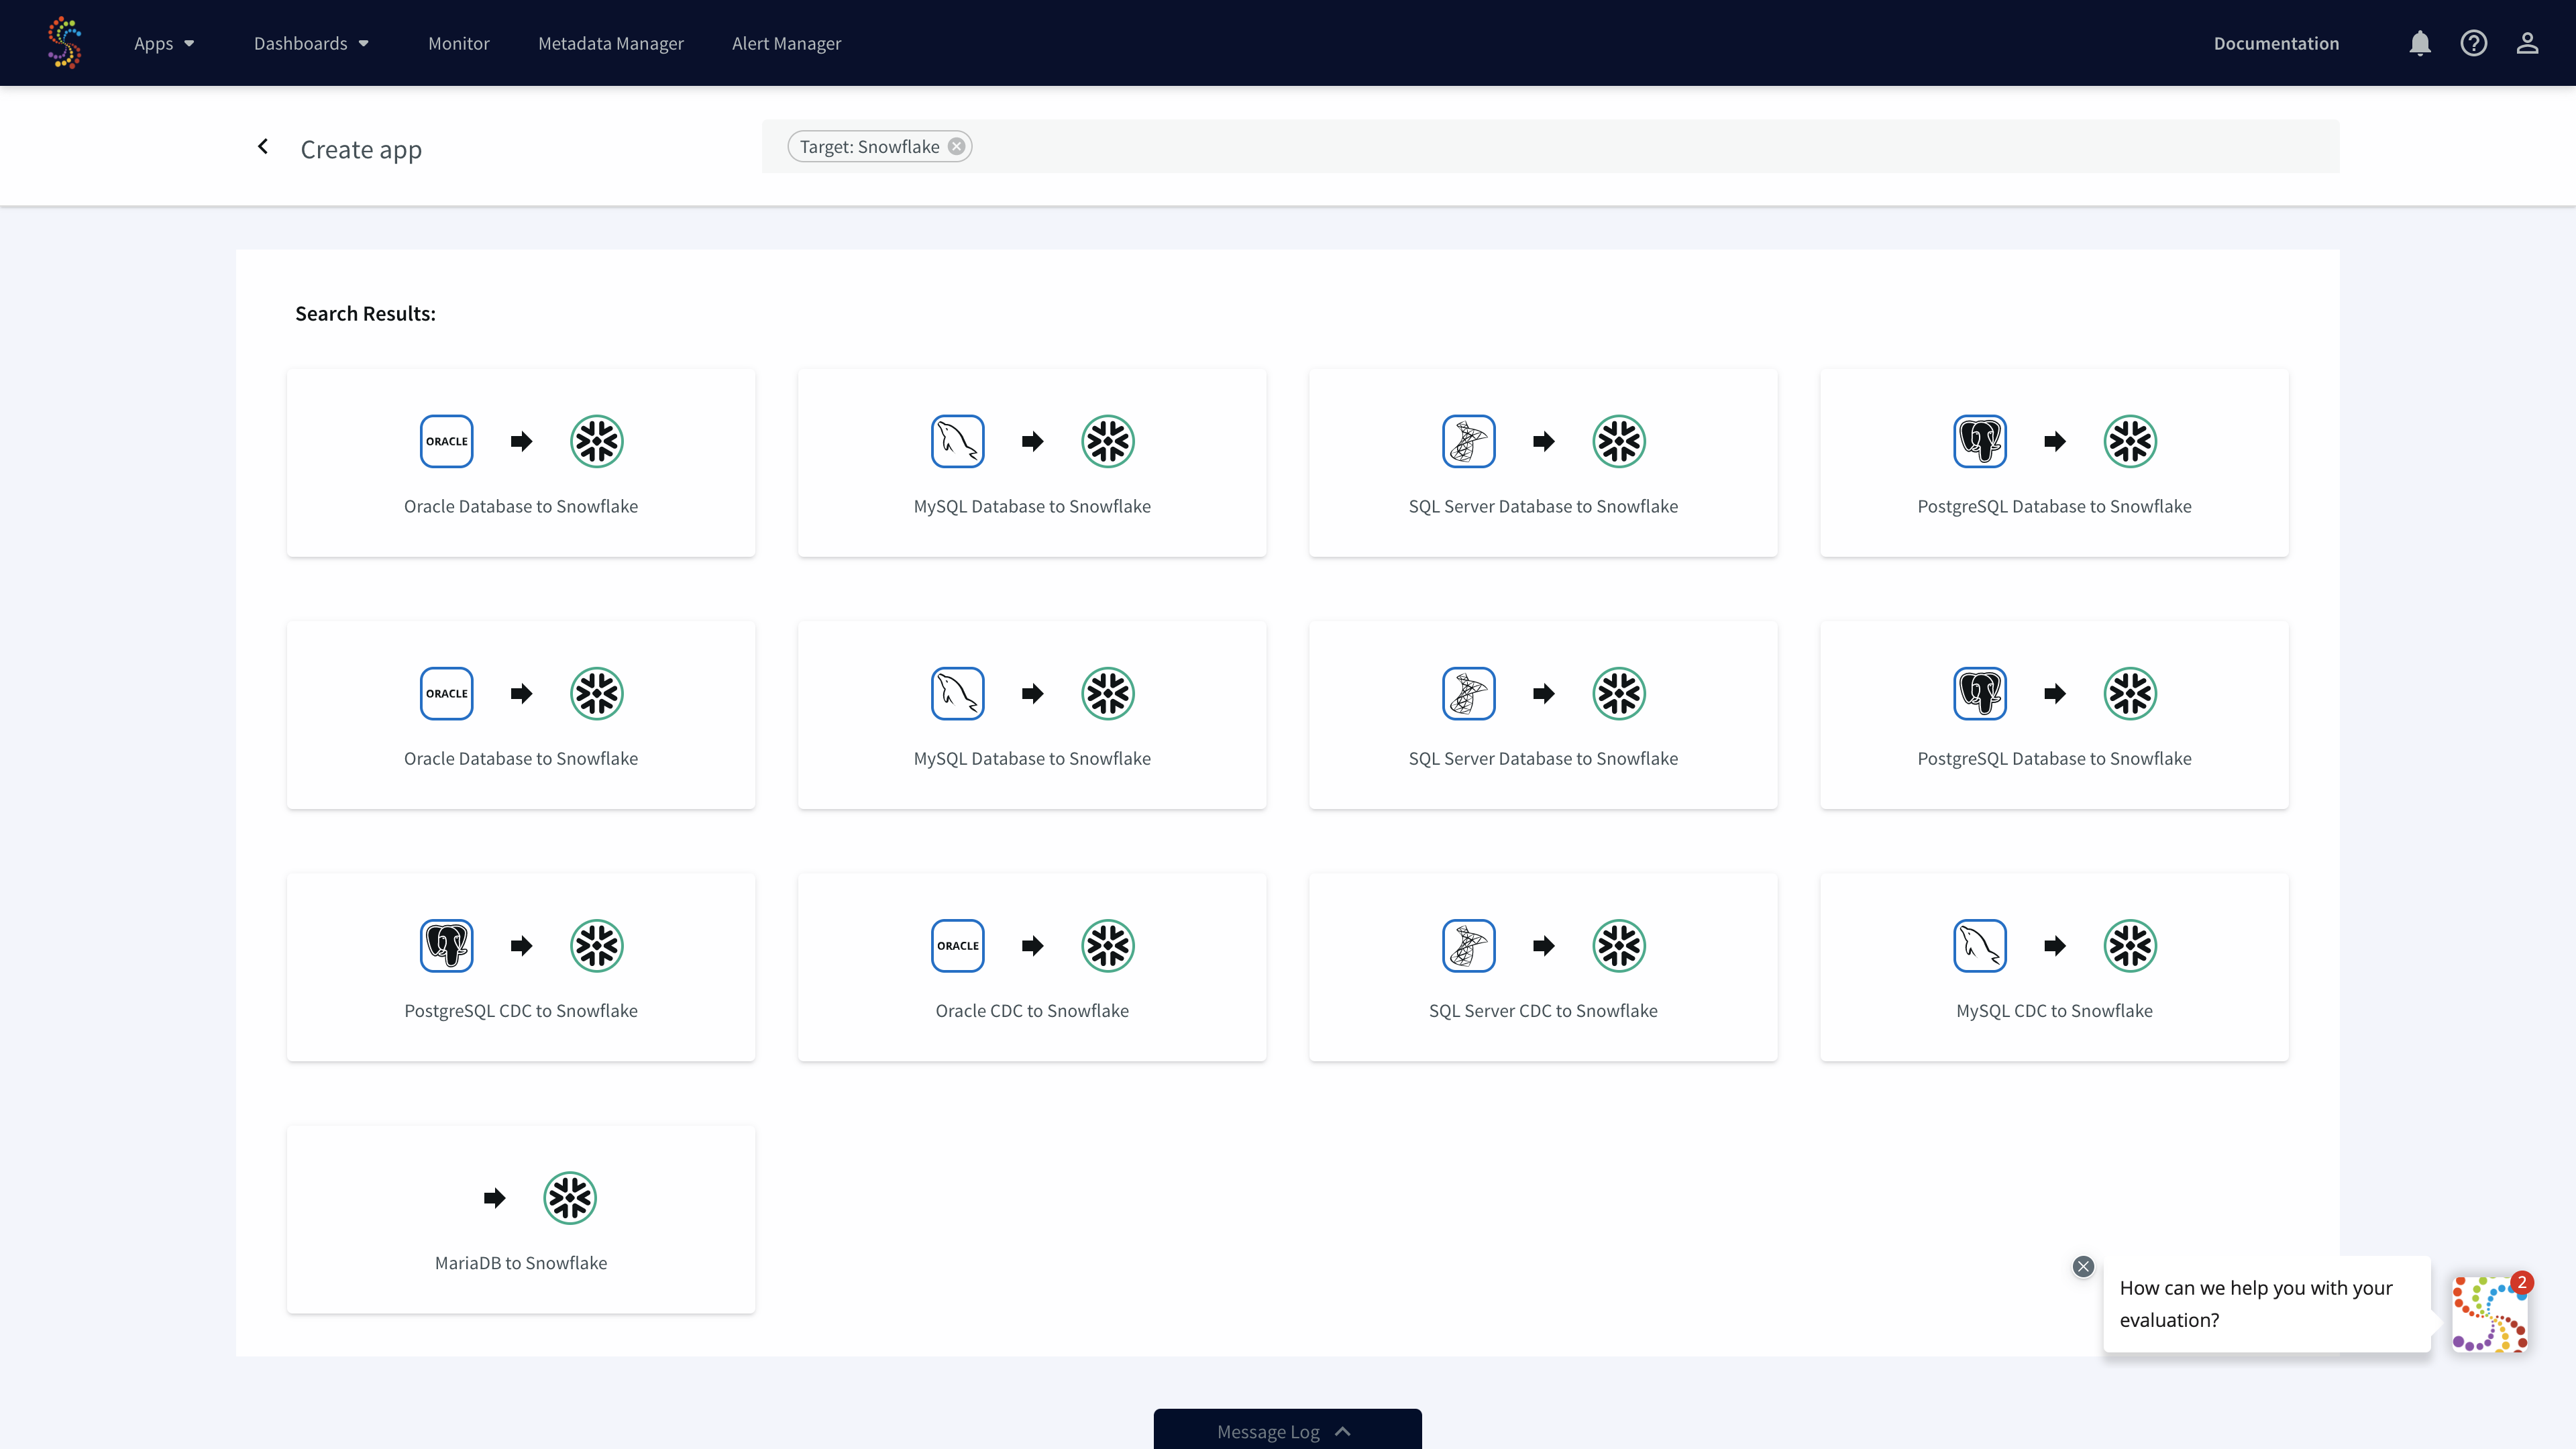
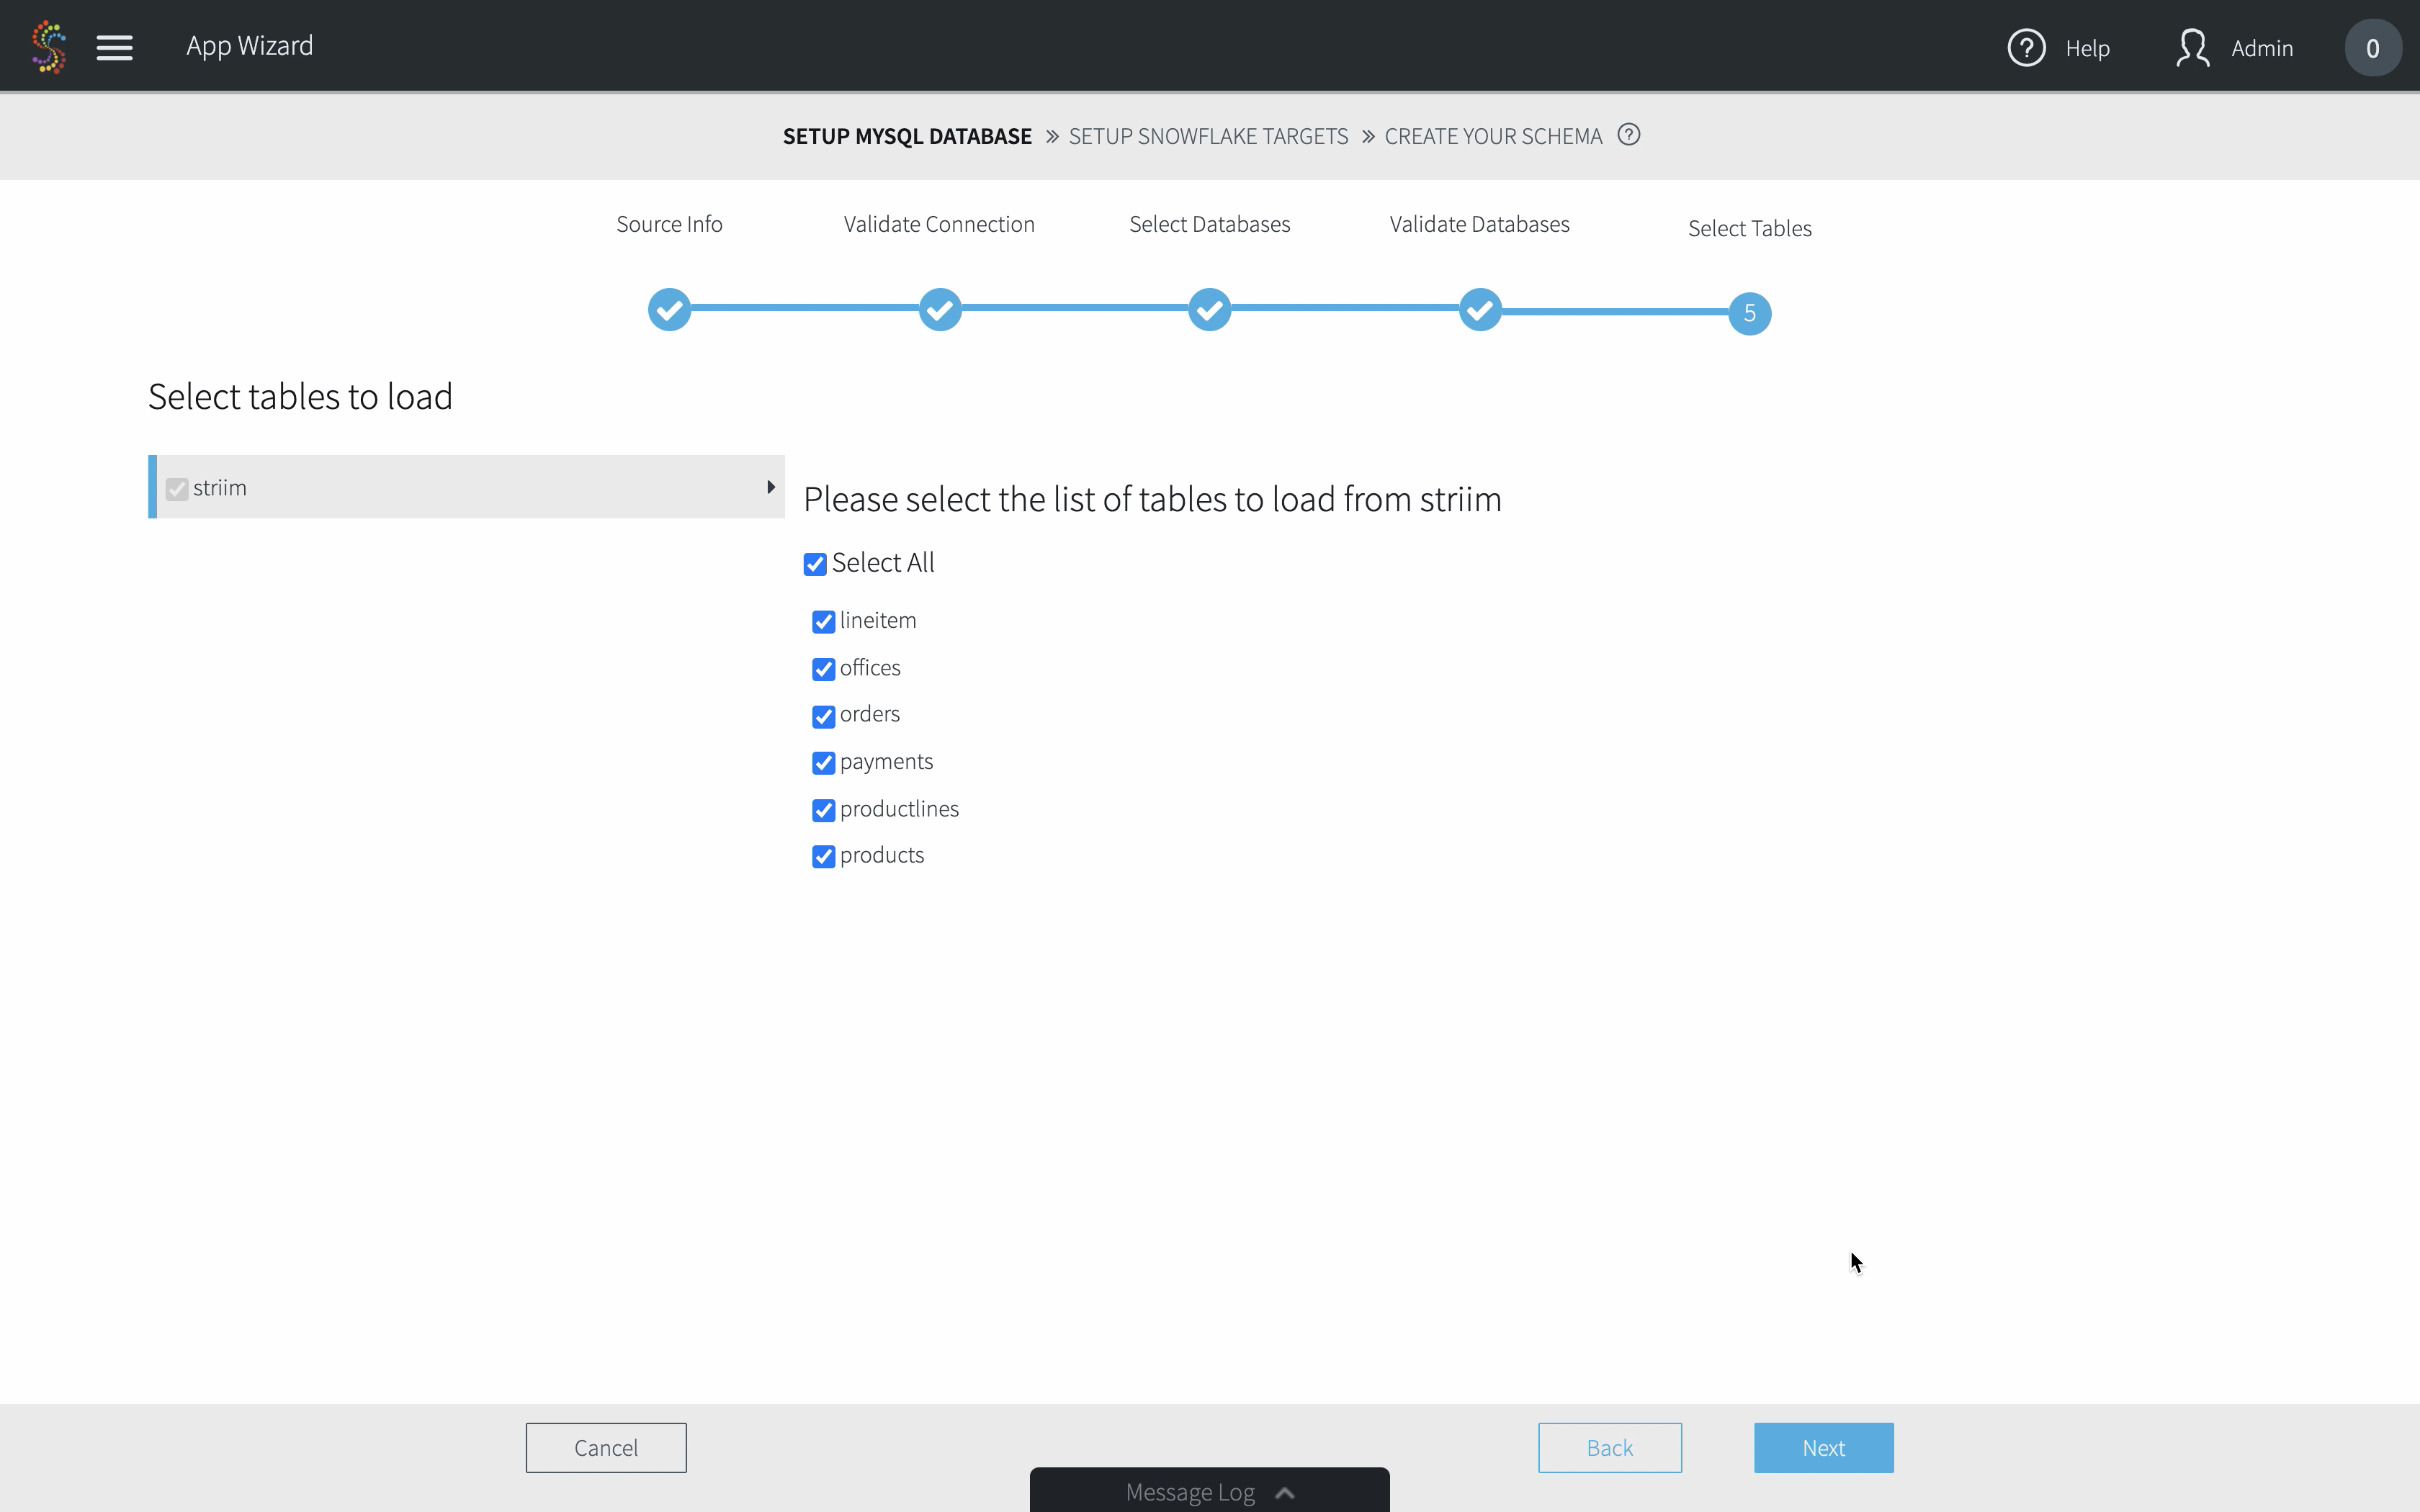
5. Select your schemas and tables from your source database
6. Start migrating your schemas and data
After select your tables, simply click ‘Next’ and your data migration pipeline will begin!
7. Monitor your data pipelines in the Flow Designer
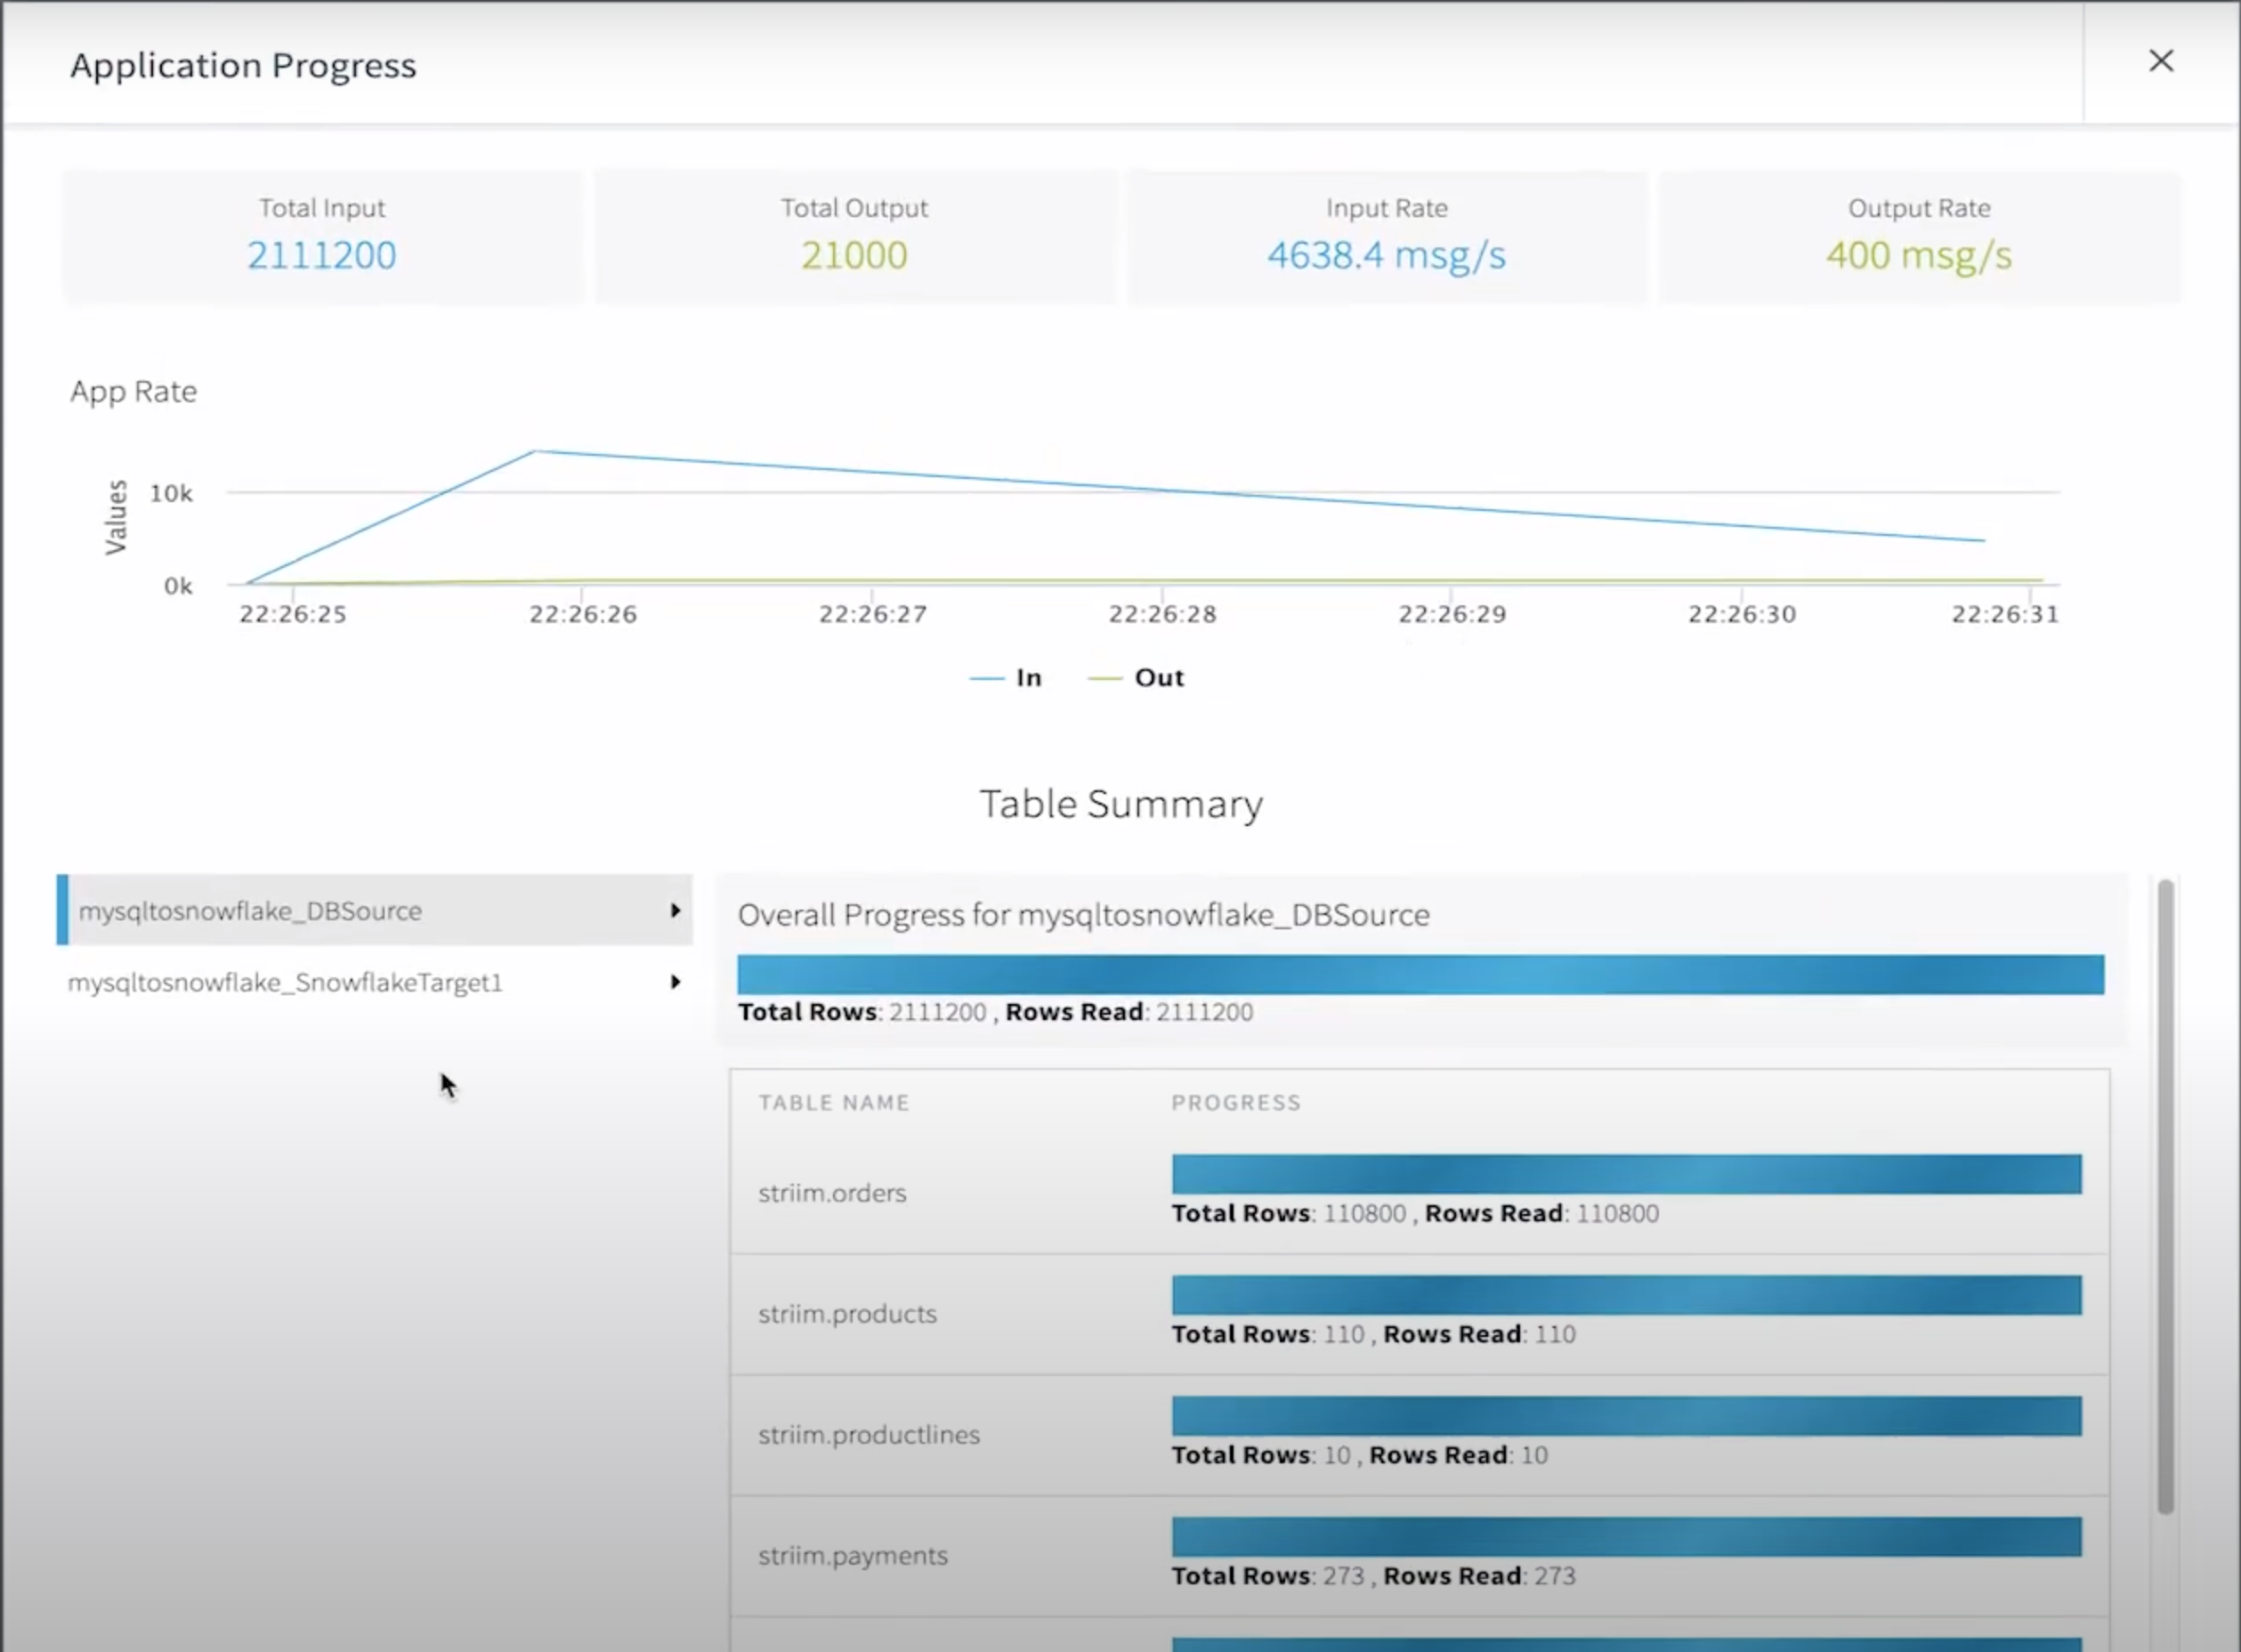
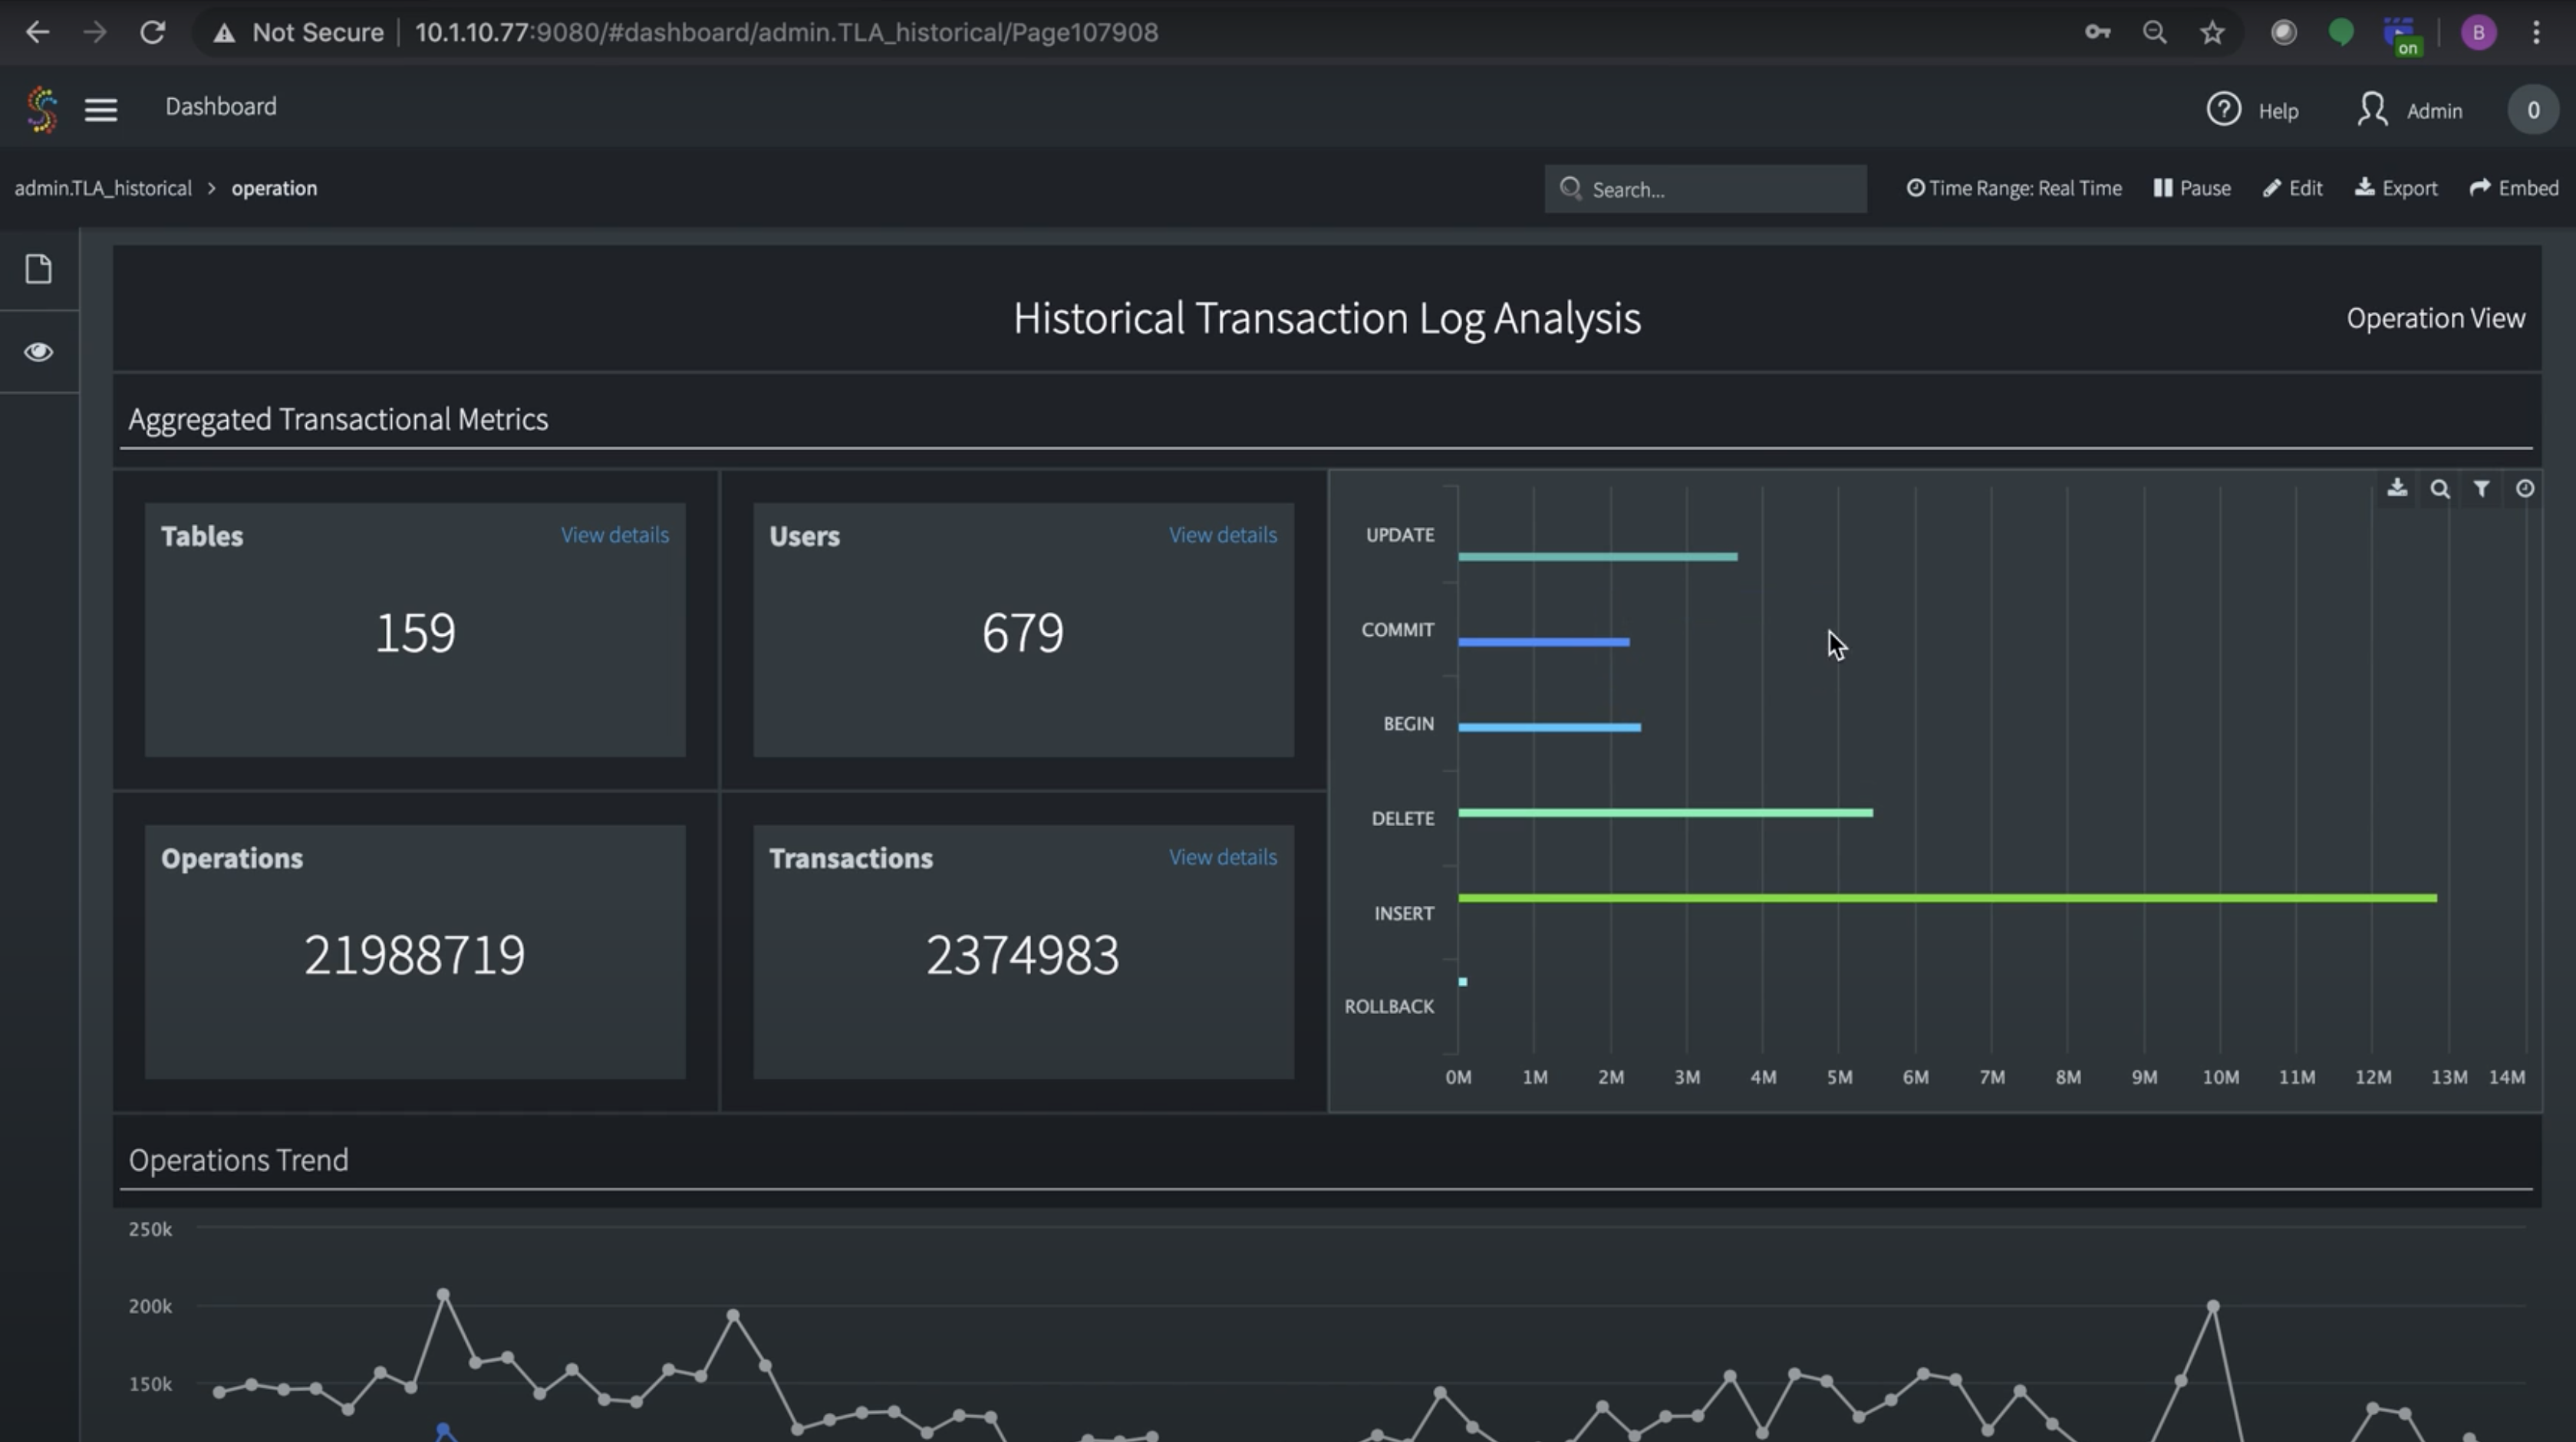
As your data starts moving, you’ll have a full view into the amount of data being ingested and written into Snowflake including the distribution of inserts, updates, deletes, primary key changes and more.
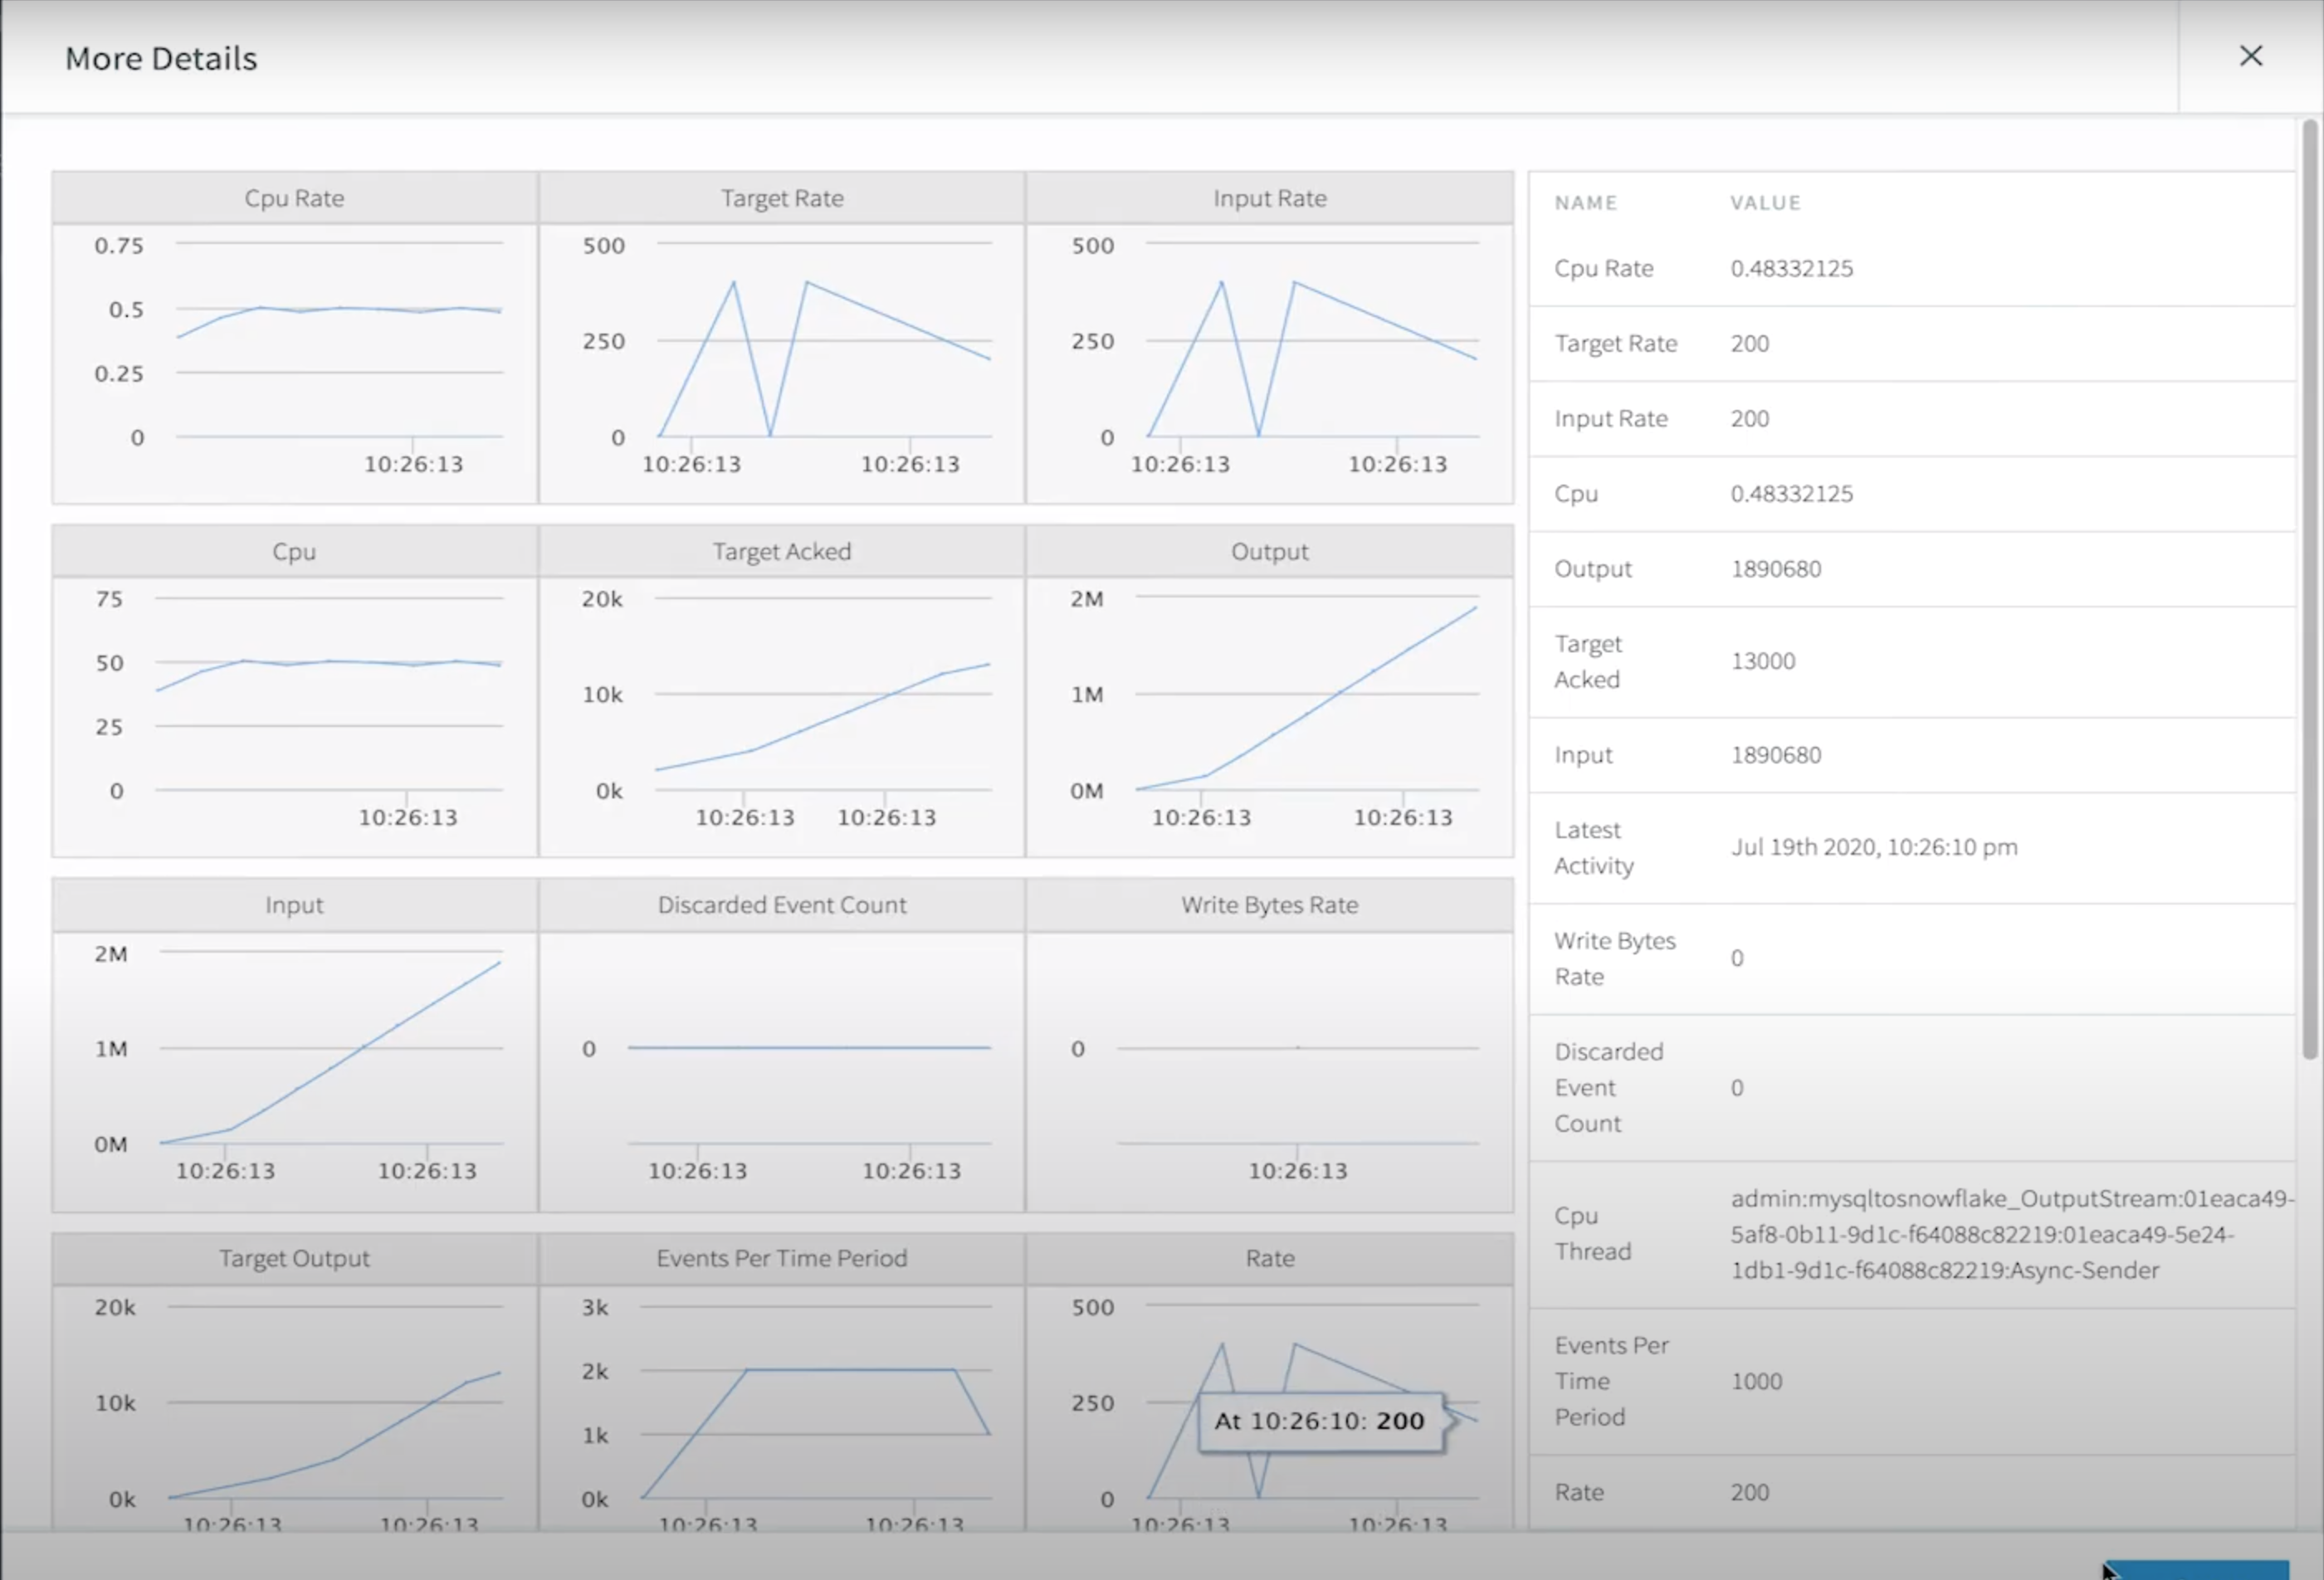
For a deeper drill down, our application monitor gives even more insights into low-level compute metrics that impact your integration latency.
Real-Time Database Replication with Oracle Change Data Capture to Snowflake
Striim makes it easy to sync your schema migration and CDC applications.
While Striim makes it just as easy to build these pipelines, there are some prerequisites to configuring CDC from most databases that are outside the scope of Striim.
To perform change data capture an administrator with the necessary privileges must create a user for use by the adapter and assign it the necessary privileges:
If using Oracle 11g ,or 12c, 18c, or 19c without CDB, enter the following commands
create role striim_privs;
grant create session,
  execute_catalog_role,
  select any transaction,
  select any dictionary
  to striim_privs;
grant select on SYSTEM.LOGMNR_COL$ to striim_privs;
grant select on SYSTEM.LOGMNR_OBJ$ to striim_privs;
grant select on SYSTEM.LOGMNR_USER$ to striim_privs;
grant select on SYSTEM.LOGMNR_UID$ to striim_privs;
create user striim identified by ******** default tablespace users;
grant striim_privs to striim;
alter user striim quota unlimited on users;
If using Database Vault, omit execute_catalog_role, and also enter the following commands:
grant execute on SYS.DBMS_LOGMNR to striim_privs;
grant execute on SYS.DBMS_LOGMNR_D to striim_privs;
grant execute on SYS.DBMS_LOGMNR_LOGREP_DICT to striim_privs;
grant execute on SYS.DBMS_LOGMNR_SESSION to striim_privs;
For Oracle 12c only, also enter the following command.
grant LOGMINING to striim_privs;
If using Oracle 12c, 18c, or 19c with PDB, enter the following commands. Replace <PDB name> with the name of your PDB.
create role c##striim_privs;
grant create session,
execute_catalog_role,
select any transaction,
select any dictionary,
logmining
to c##striim_privs;
grant select on SYSTEM.LOGMNR_COL$ to c##striim_privs;
grant select on SYSTEM.LOGMNR_OBJ$ to c##striim_privs;
grant select on SYSTEM.LOGMNR_USER$ to c##striim_privs;
grant select on SYSTEM.LOGMNR_UID$ to c##striim_privs;
create user c##striim identified by ******* container=all;
grant c##striim_privs to c##striim container=all;
alter user c##striim set container_data = (cdb$root, <PDB name>) container=current;
If using Database Vault, omit execute_catalog_role, and also enter the following commands:
grant execute on SYS.DBMS_LOGMNR to c##striim_privs;
grant execute on SYS.DBMS_LOGMNR_D to c##striim_privs;
grant execute on SYS.DBMS_LOGMNR_LOGREP_DICT to c##striim_privs;
grant execute on SYS.DBMS_LOGMNR_SESSION to c##striim_privs;
Maximum Uptime with Guaranteed Delivery, Monitoring and Alerts
Striim gives your team full visibility into your data pipelines with the following monitoring capabilities:
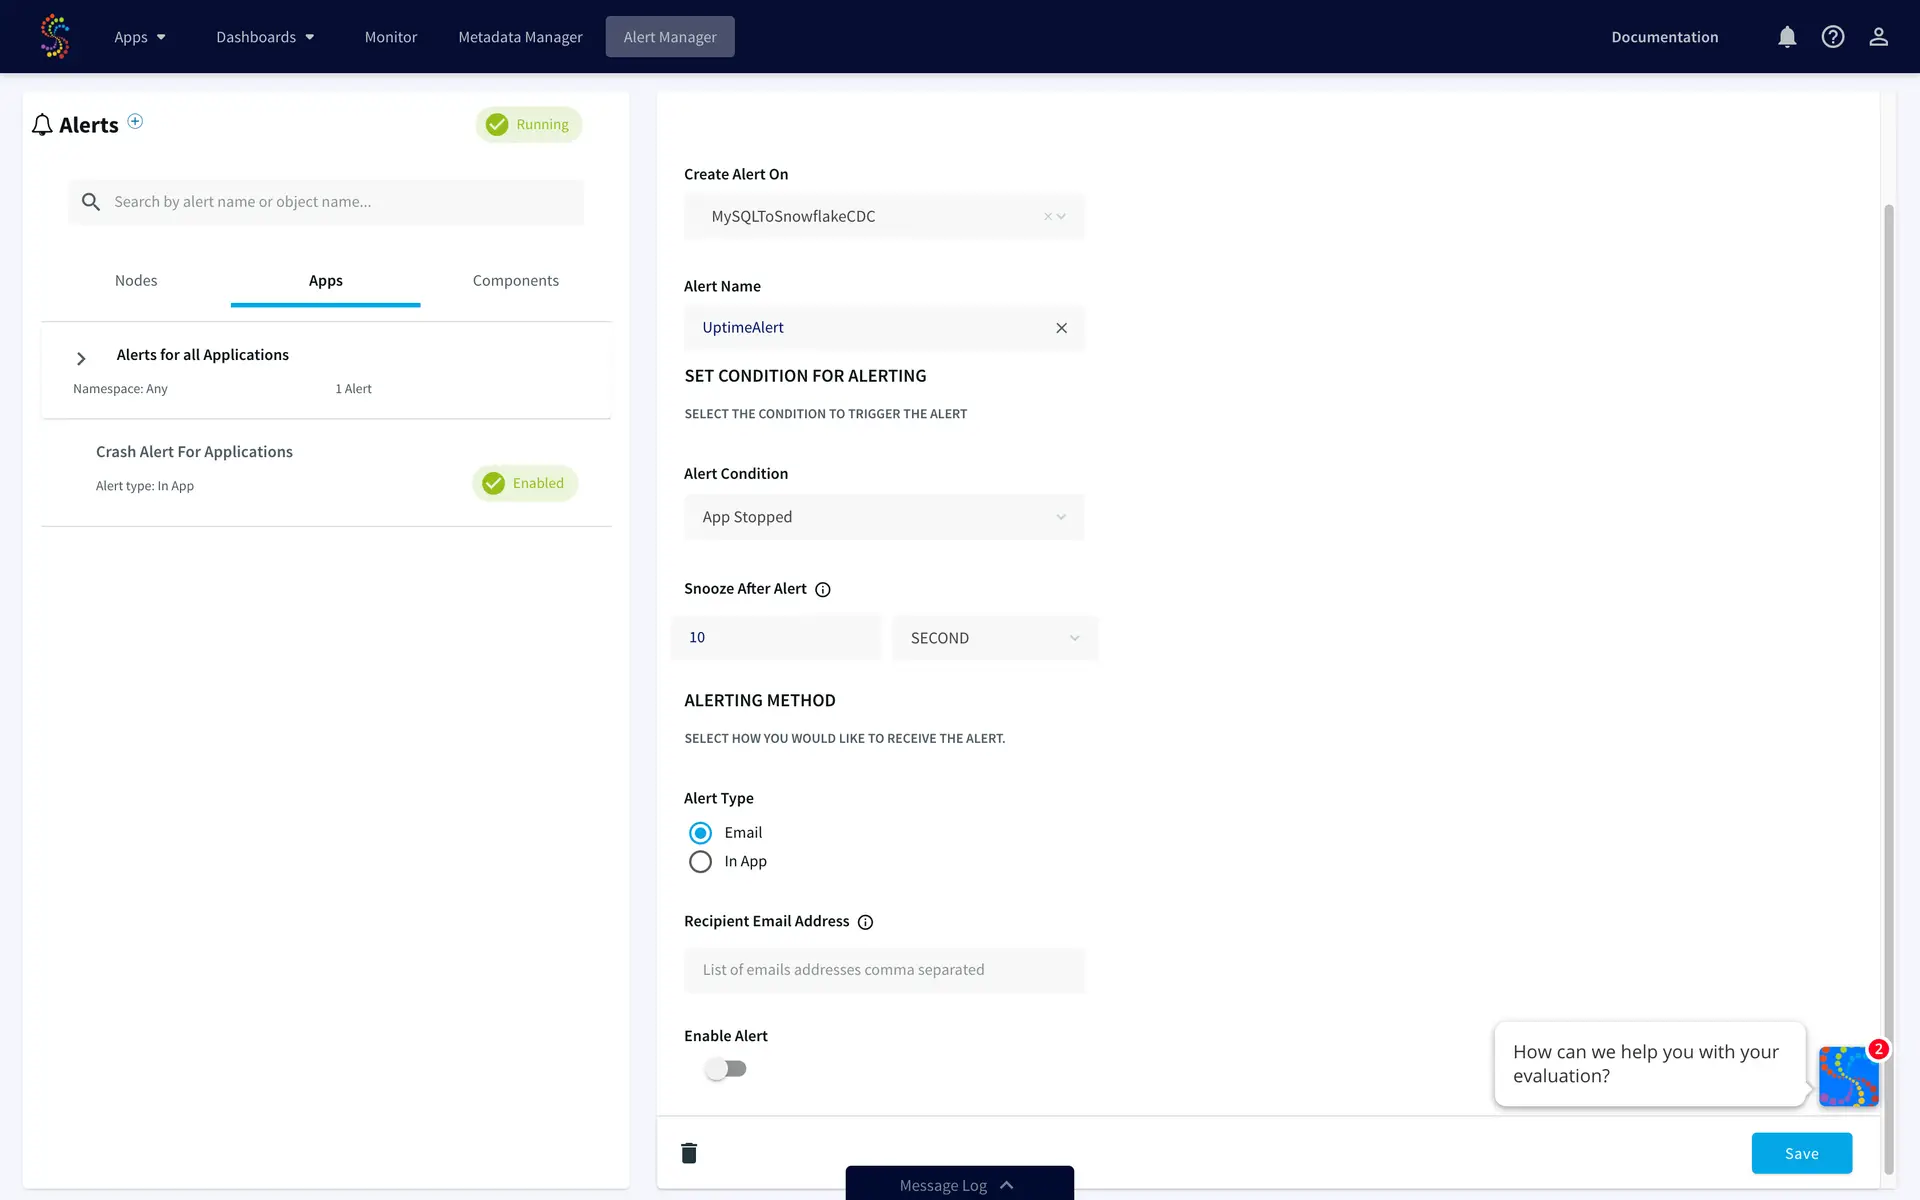
- Rule-based, real-time alerts where you can define your custom alert criteria
- Real-time monitoring tailored to your metrics
- Exactly-once processing (E1P) guarantees
Striim uses a built-in stream processing engine that allows high volume data ingest and processing for Snowflake ETL purposes.
Conclusion
To summarize, Striim on Snowflake Partner Connect provides an easy-to-use cloud data integration service for Snowflake. The service comes with a 7-day free trial, giving you ample time to begin your journey to bridge your operational data with your Snowflake Data Warehouse.
Visit our Striim for Snowflake webpage for a deeper dive into solutions such as
- How to migrate data from Oracle to Snowflake using Change Data Capture
- How to migrate data from SQL Server to Snowflake using Change Data Capture
- Teradata to Snowflake migrations
- AWS Redshift to Snowflake migrations
- Moving IoT data to Snowflake (OPCUA, MQTT)
- Moving data from AWS S3 to Snowflake
As always, feel free to reach out to our integration experts to schedule a demo.
hbspt.forms.create({
portalId: “4691734”,
formId: “d62e8c47-580a-468d-81a9-9570eaabffd0”
});


