Introduction
At Striim, we use our Salesforce Reader to read from our Salesforce account and write into Google BigQuery where we join data from HubSpot to create Looker reports that multiple internal teams (Sales, Customer Success and Finance) use for reporting, analysis and drive action items for their departments.
This recipe shows how you can build a data pipeline to read data from Salesforce and write to BigQuery. Striim’s Salesforce Reader will first read the existing tables from the configured Salesforce dataset and then write them to the target BigQuery project using the BigQuery Writer, a process called “initial load” in Striim and “historical sync” or “initial snapshot” by others. After completing the initial load, the Salesforce Reader will automatically transition to continuously reading updates to the configured Salesforce datasets, and then writing these source updates to the target BigQuery project using the BigQuery Writer.You can use the recipe to write into any of Striim supported targets.
Benefits
- Act in Real Time – Predict, automate, and react to business events as they happen, not minutes or hours later.
- Empower Your Teams – Give teams across your organization a real-time view into operational data.
Step – 1 – Prep Work
Setting up Salesforce as a source
Make sure you have the permissions to be able to access the objects in the Salesforce account that you would like to read the data from. These are the permissions that will be required for Automated OAuth:
- Access the identity URL service
- Manage Salesforce services
- Manage user data via APIs
- Perform requests at any time
Google BigQuery Target
- Create an account in BigQuery where you can access the transferred data.
- You will require a service account to be created. Service account needs to be created with the following permissions: https://www.striim.com/docs/en/bigquery-writer-initial-setup.html#create-a-service-account-with-the-necessary-bigquery-permissions
Striim setup details
- Get started on your journey with Striim by signing up for free on Striim’s Developer Edition.
Step – 2 – Create Striim Application
In Striim, App (application) is the component that holds the details of the data pipeline – source & target details, other logical components organized into one or more flows.
Below steps will help you create an application (refer – Screenshot-1):
- Click on Apps (left-hand panel) to create your application.
- Enter Source:Salesforce Target:BigQuery (as shown in the screenshots-1,2,3 below)
- For this recipe, we are going to use Salesforce Reader with App type as automated (screenshot-3)
- Click on “Get Started” button.
(Screenshot- 1 – App selection based on source & target)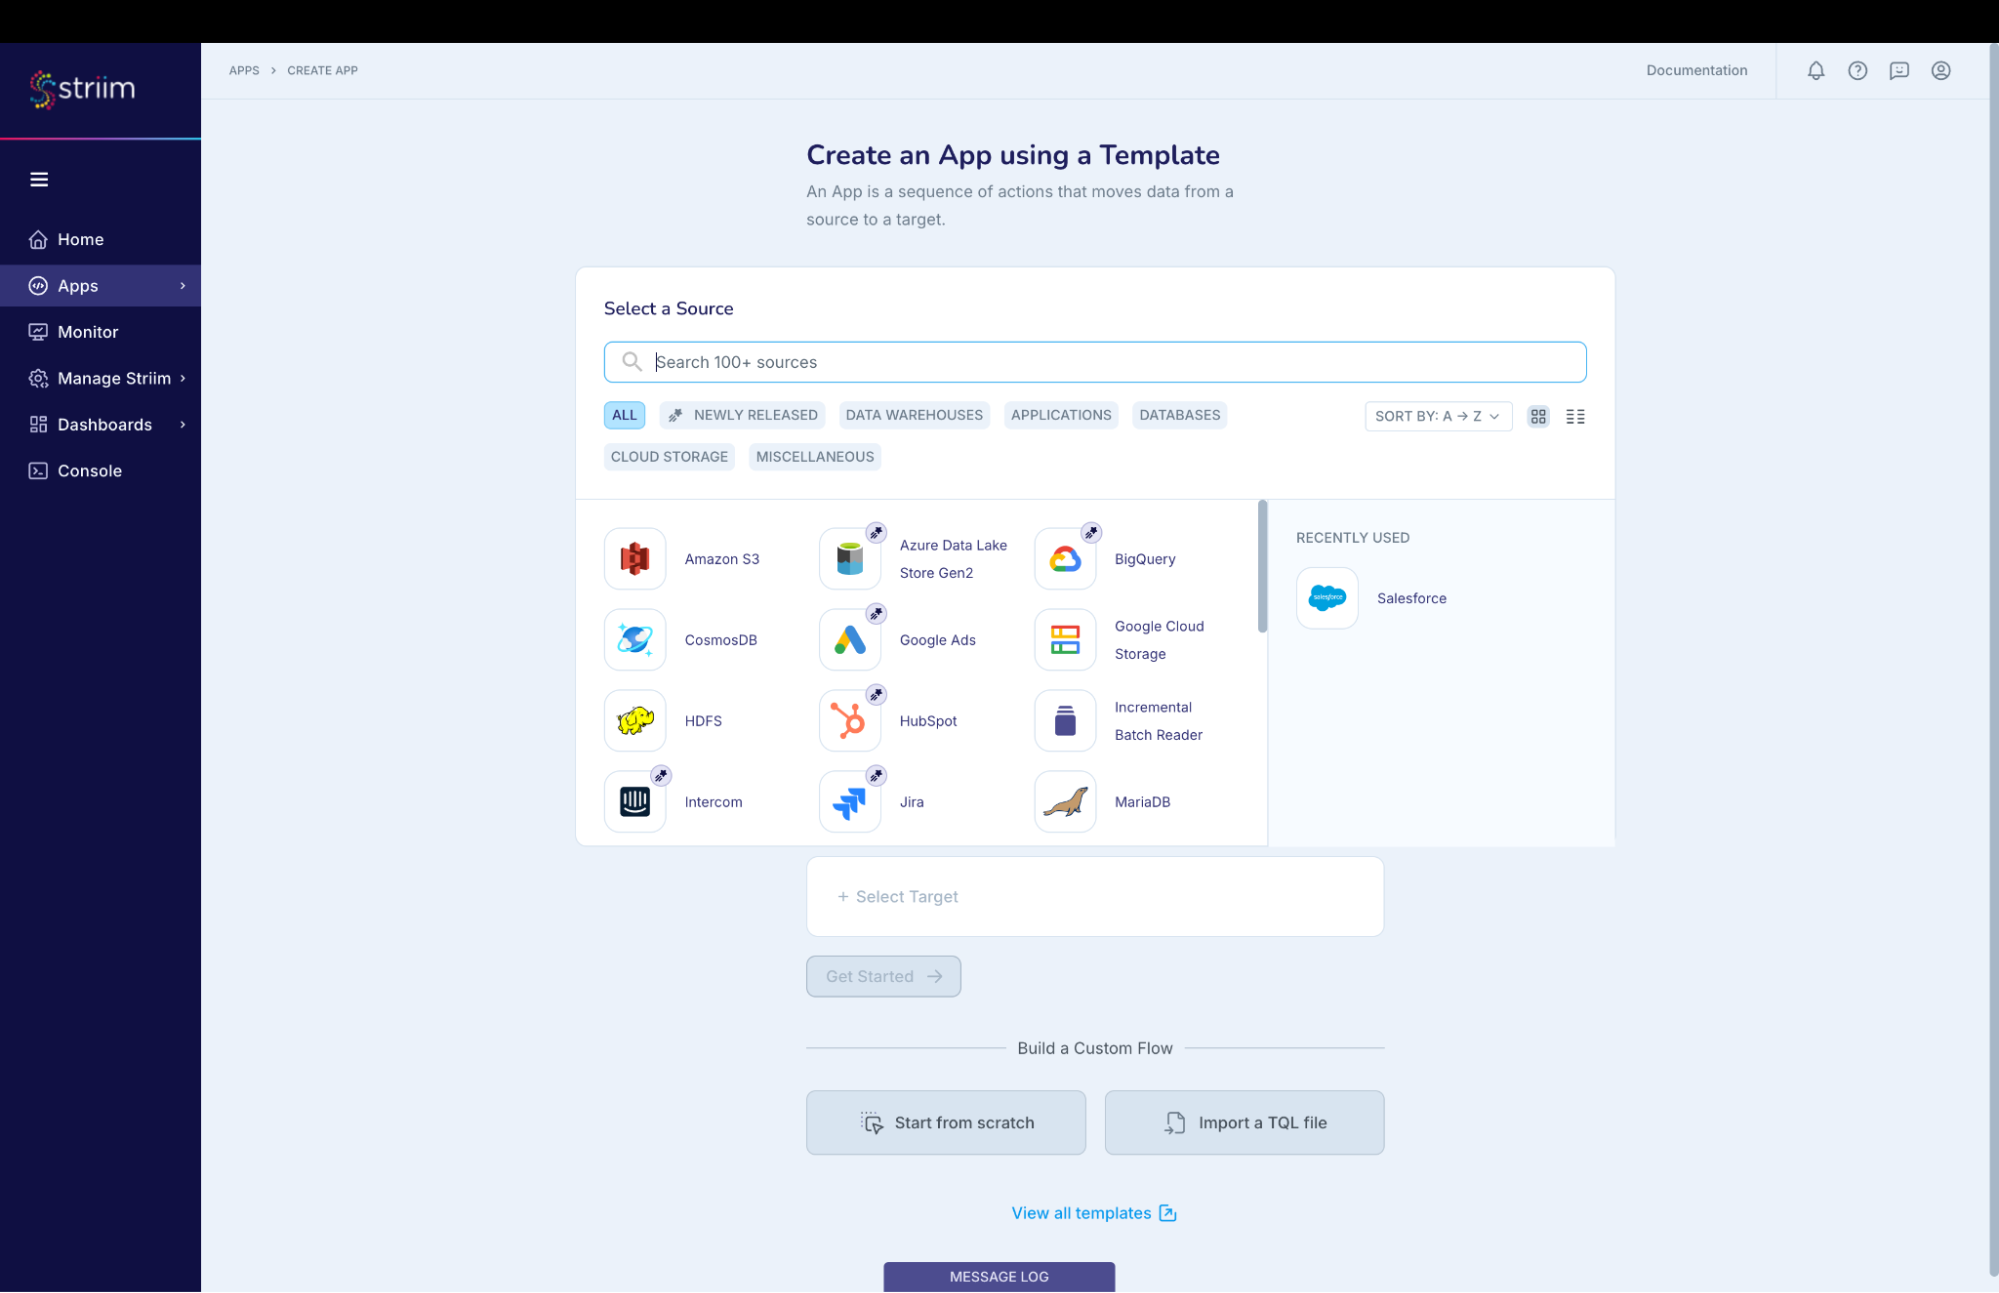
(Screenshot- 2 – Select the Salesforce Reader (first in the list as shown below))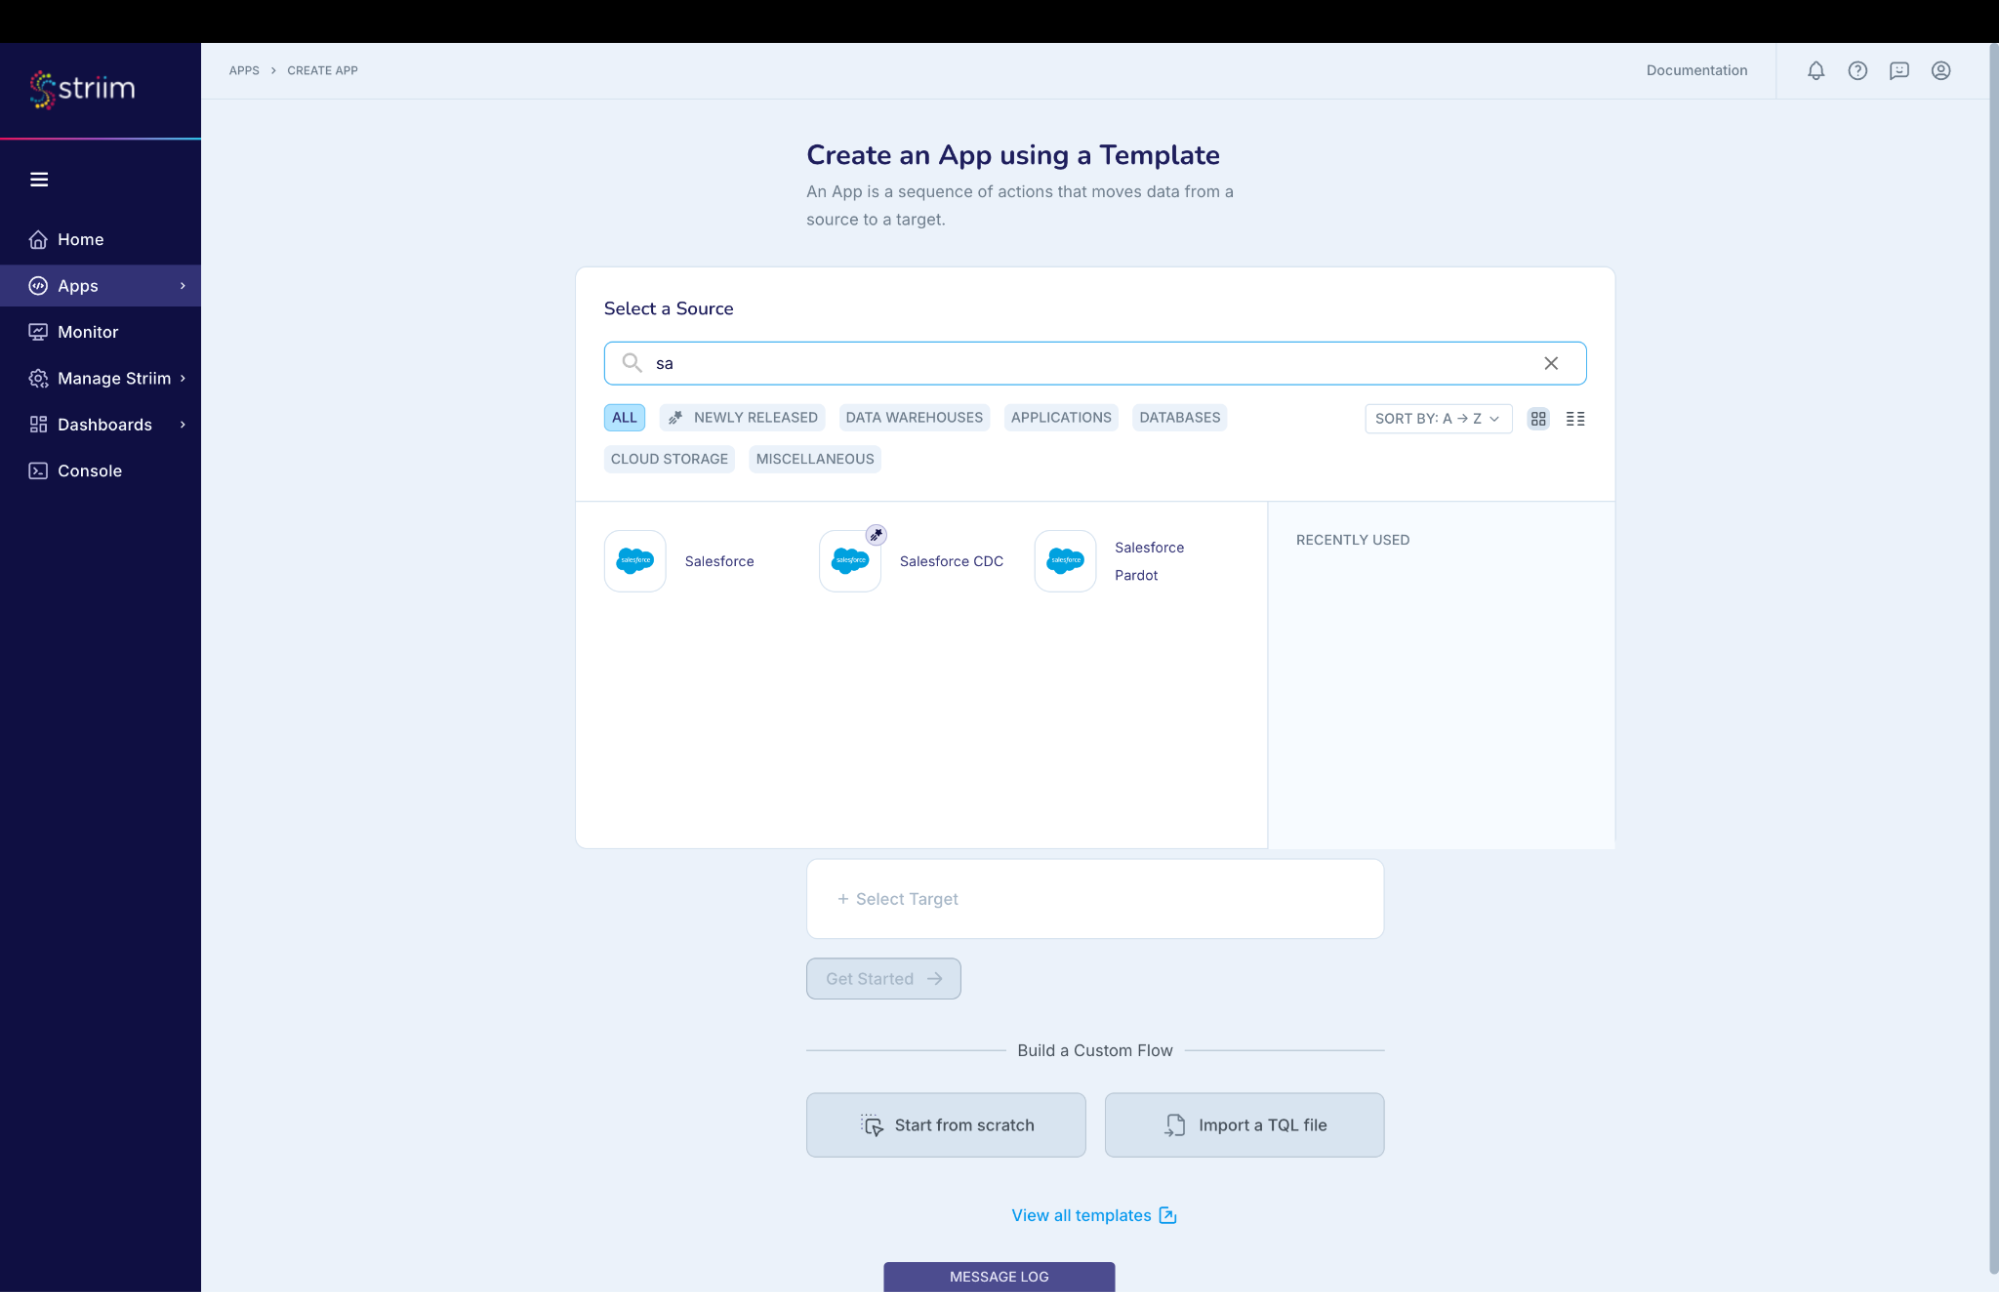
(Screenshot- 3 – Target selected is BigQuery and App type should be “Automated”)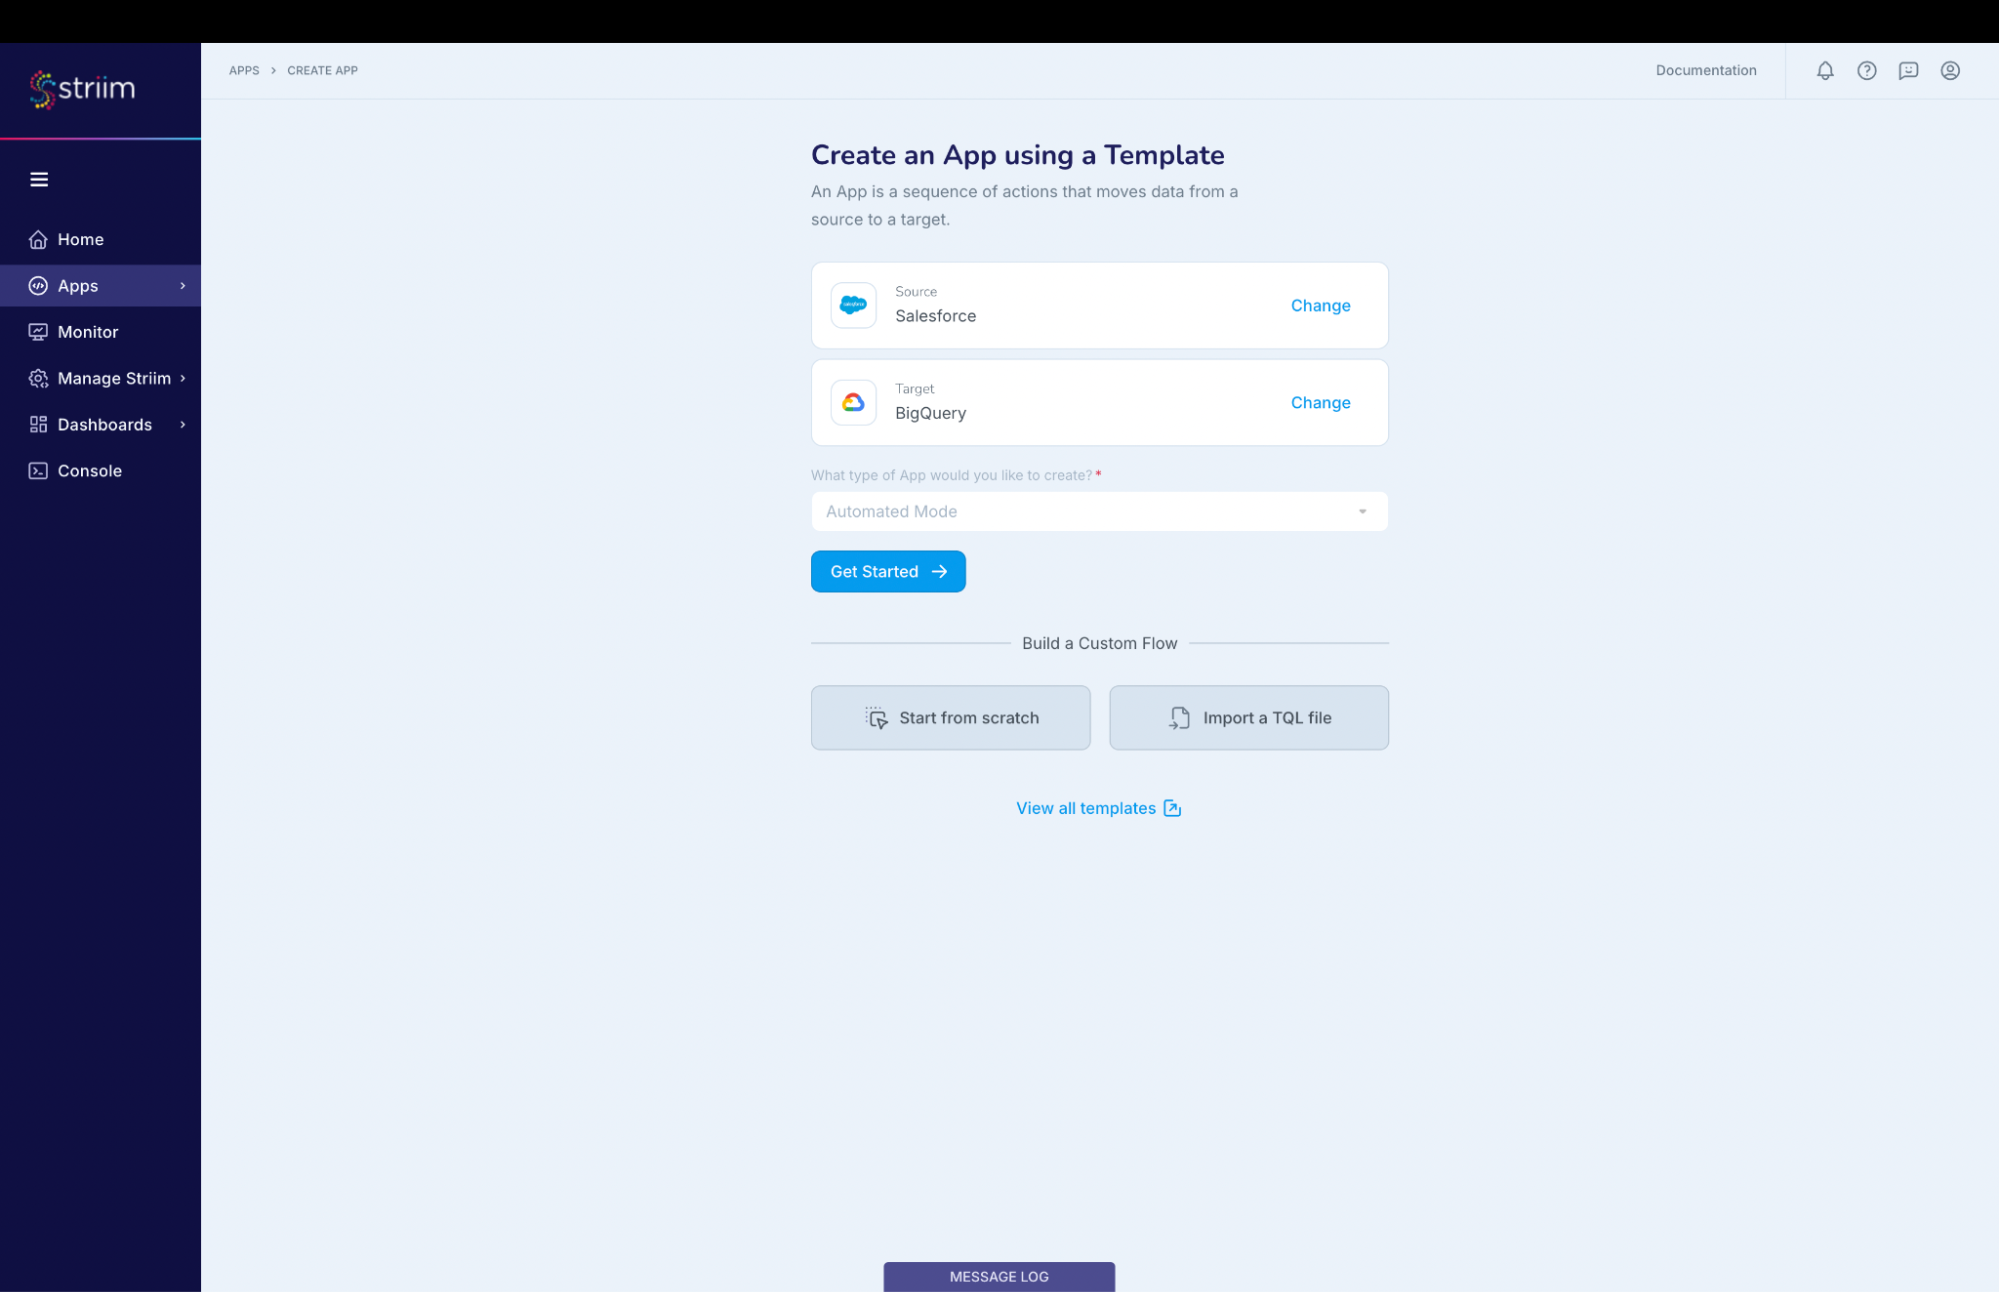
- Provide a name for your application
- Create a new namespace
- Click the “Next” button
(Screenshot- 4 – Striim App Creation)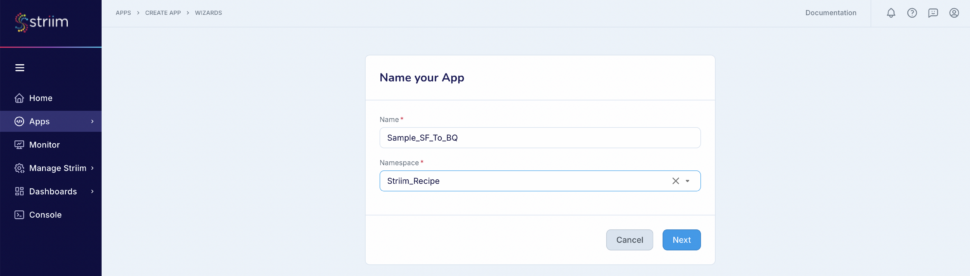
Step – 3 – Configuring Salesforce as Source
Before we jump into the connection to the source, lets understand Connection Profile and Target schema creation that are required for our pipeline creation.
- Connection Profile – Connection profile allows you to specify the properties required to connect to an external data source once and use that set of properties in multiple sources and/or targets in multiple applications. The authentication types supported by Connection profiles are OAuth for Salesforce and ServiceAccount for Big Query.
- Target Schema creation – Keep this enabled to experience the power of Striim where all the required schemas and tables are created for you by Striim (if they don’t exist already). Note – Permissions are the only key requirement that you need to make sure of. For this recipe you will need to provide the service account key which is also mentioned in the next step.
(Screenshot- 5 Gathering source details to connect)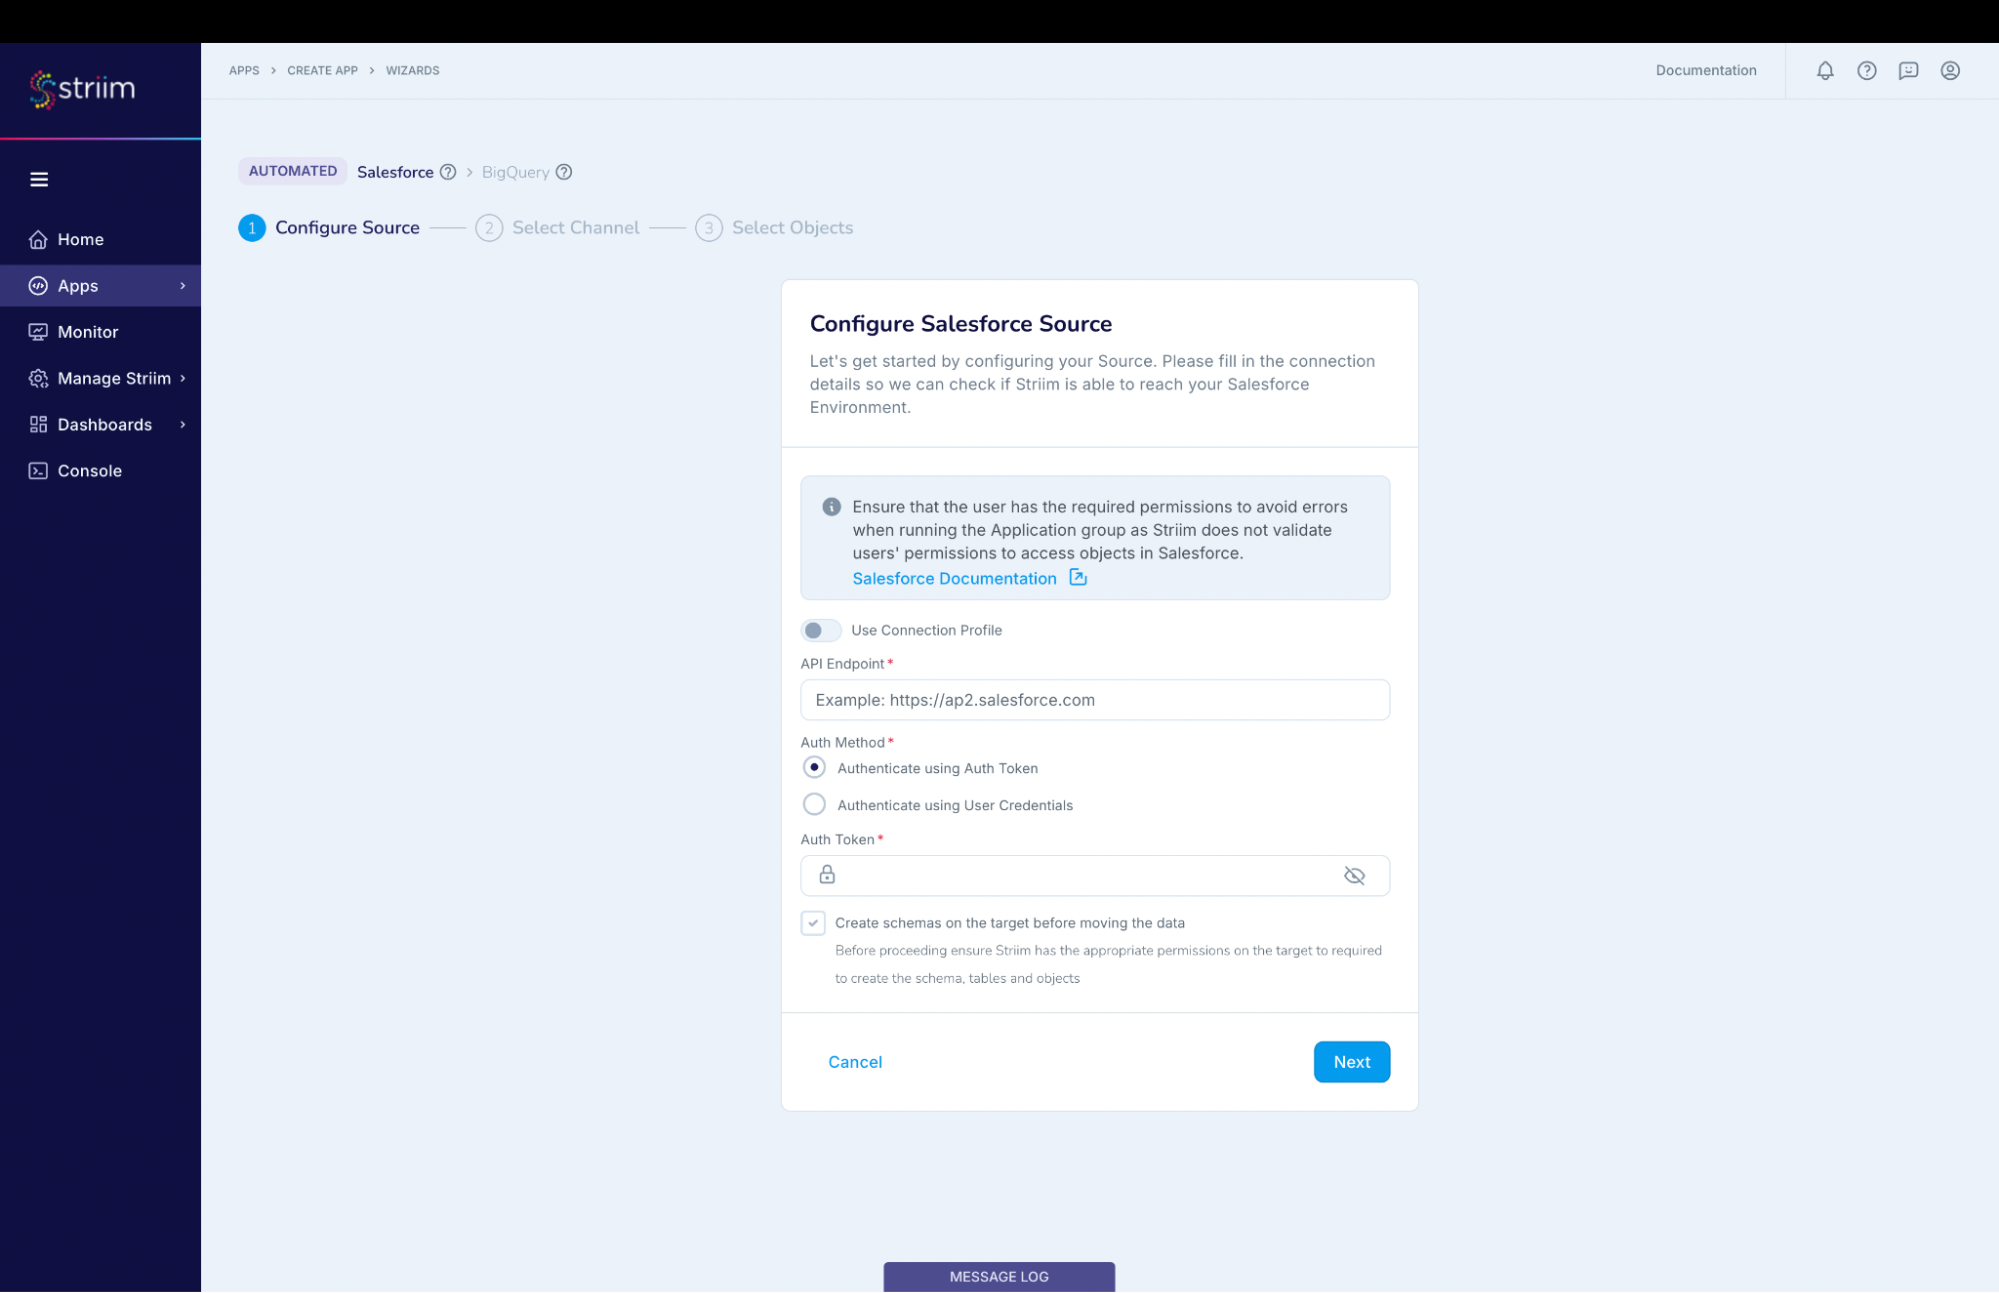
Enable “Use Connection Profile”
(Screenshot- 6 – Connection Profile creation)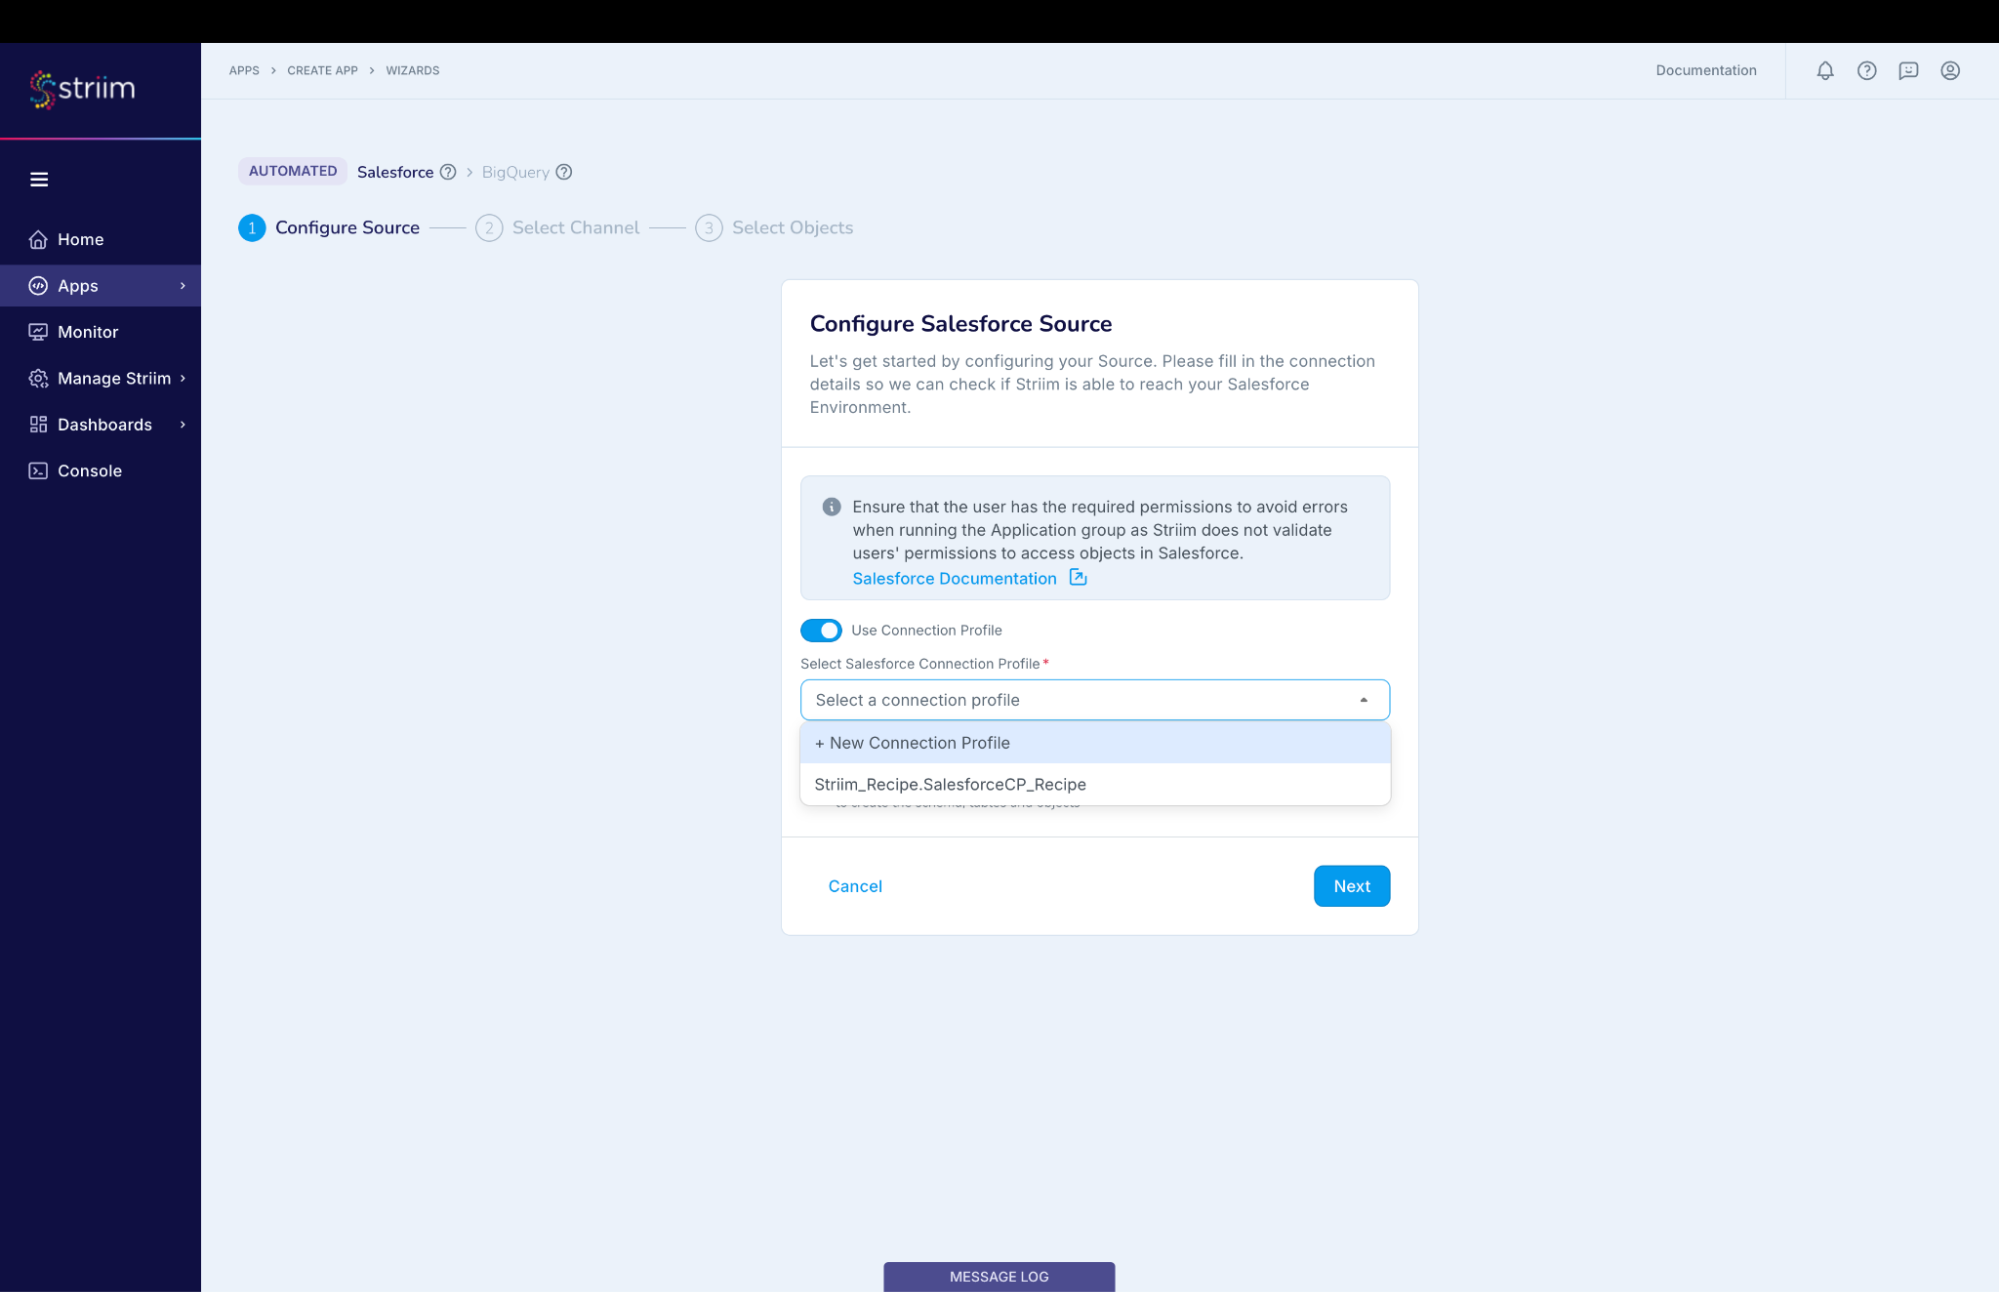
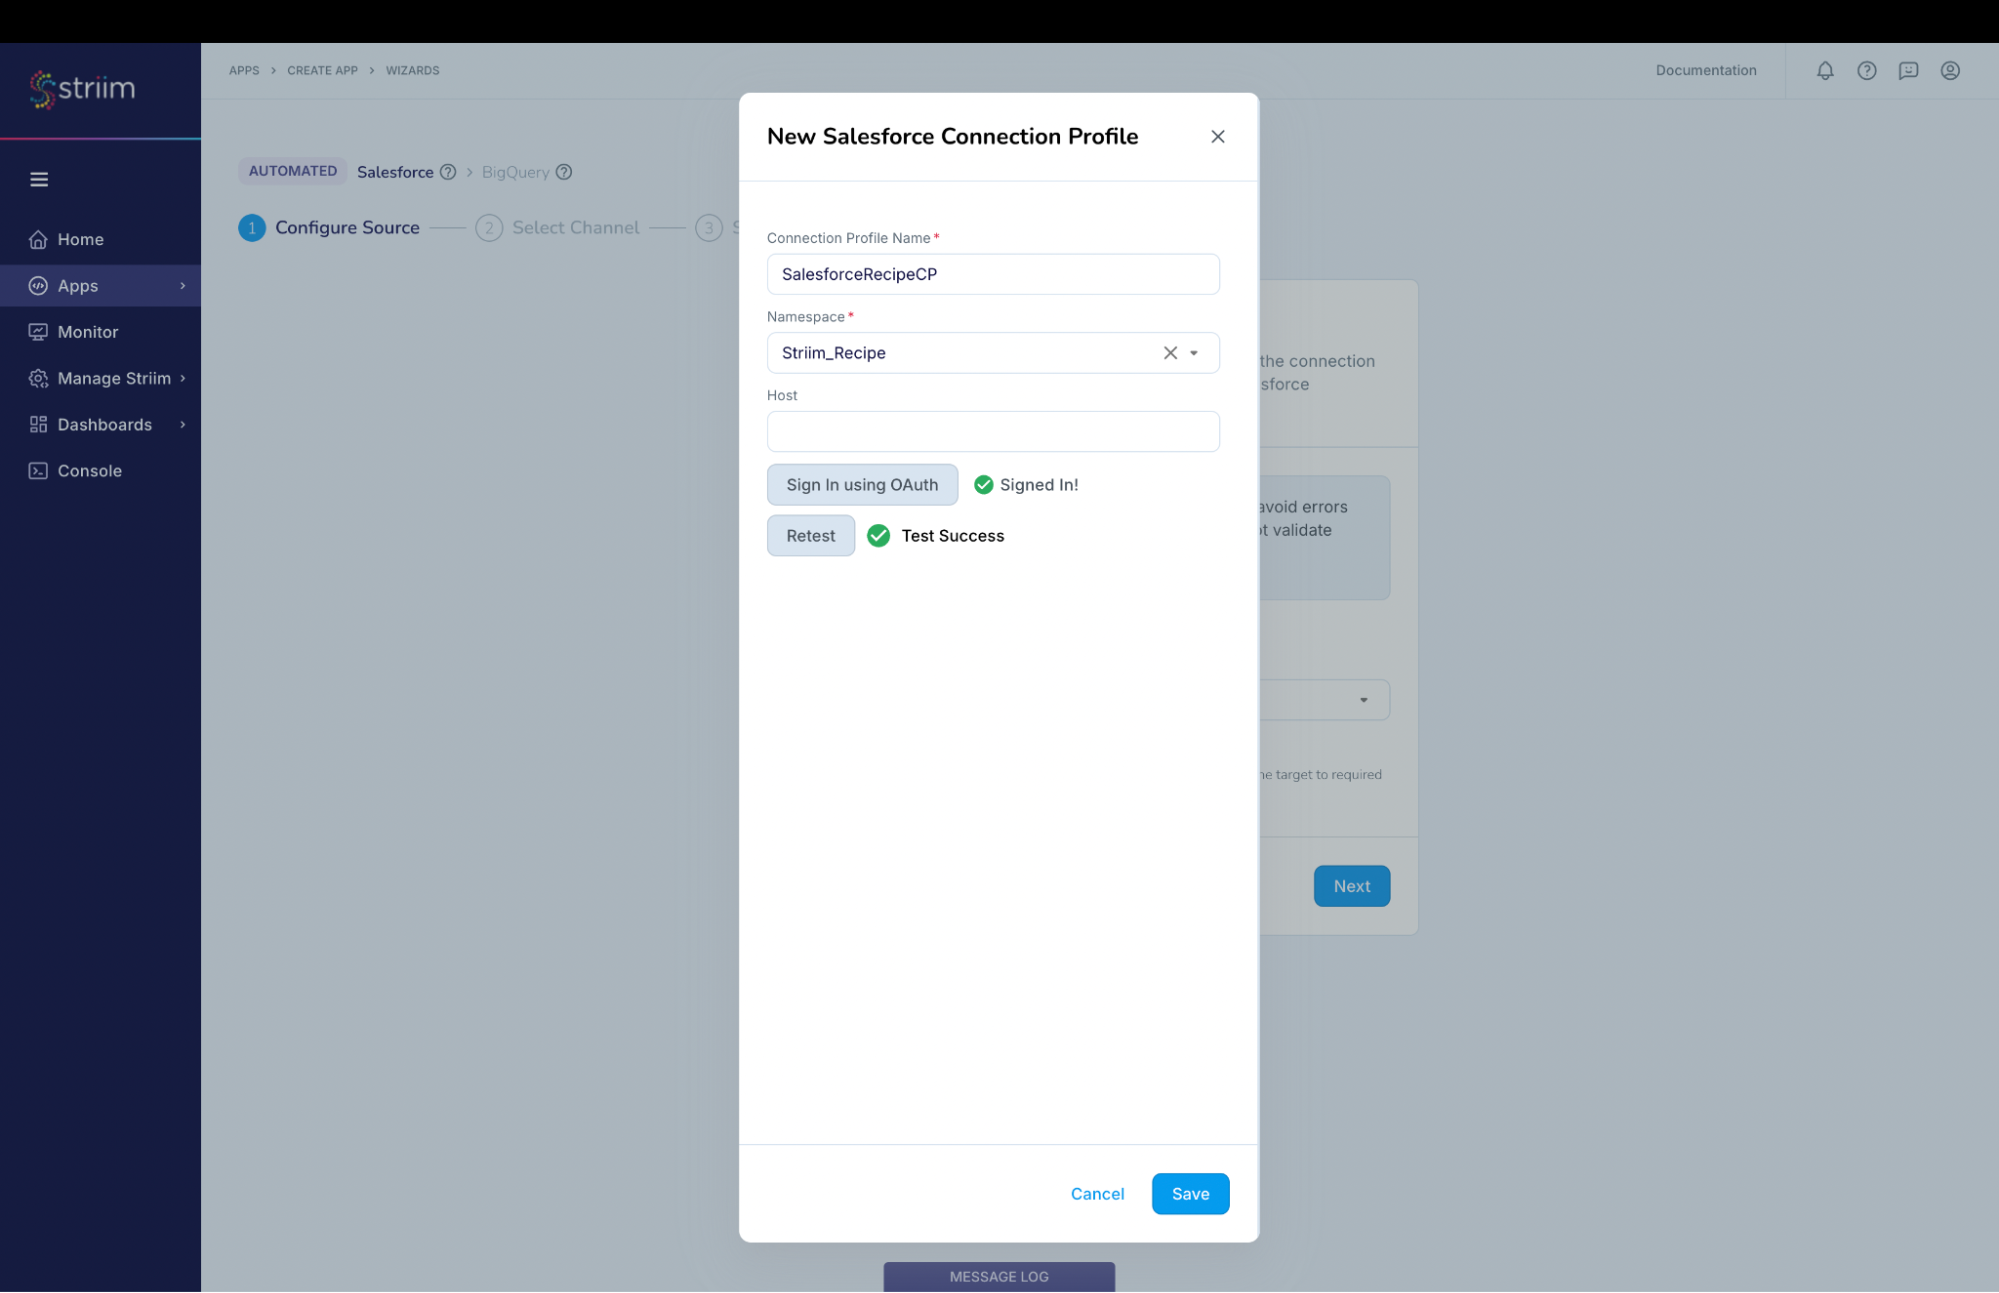
In the “New Salesforce Connection Profile” dialog:
- Connection Profile Name – provide a name to identify this connection
- Namespace – Select the namespace. In this case we have used the namespace where the App is created and you can do the same.
- Host – We are connecting to the Prod instance and hence it is not required. If you are connecting to a non-prod account like sandbox, then provide the host (for example: striim–ferecipe.sandbox.my.salesforce.com ). Note: Please do not specify https:// in the host field.
(Screenshot-7- Creation of Connection Profile for Salesforce)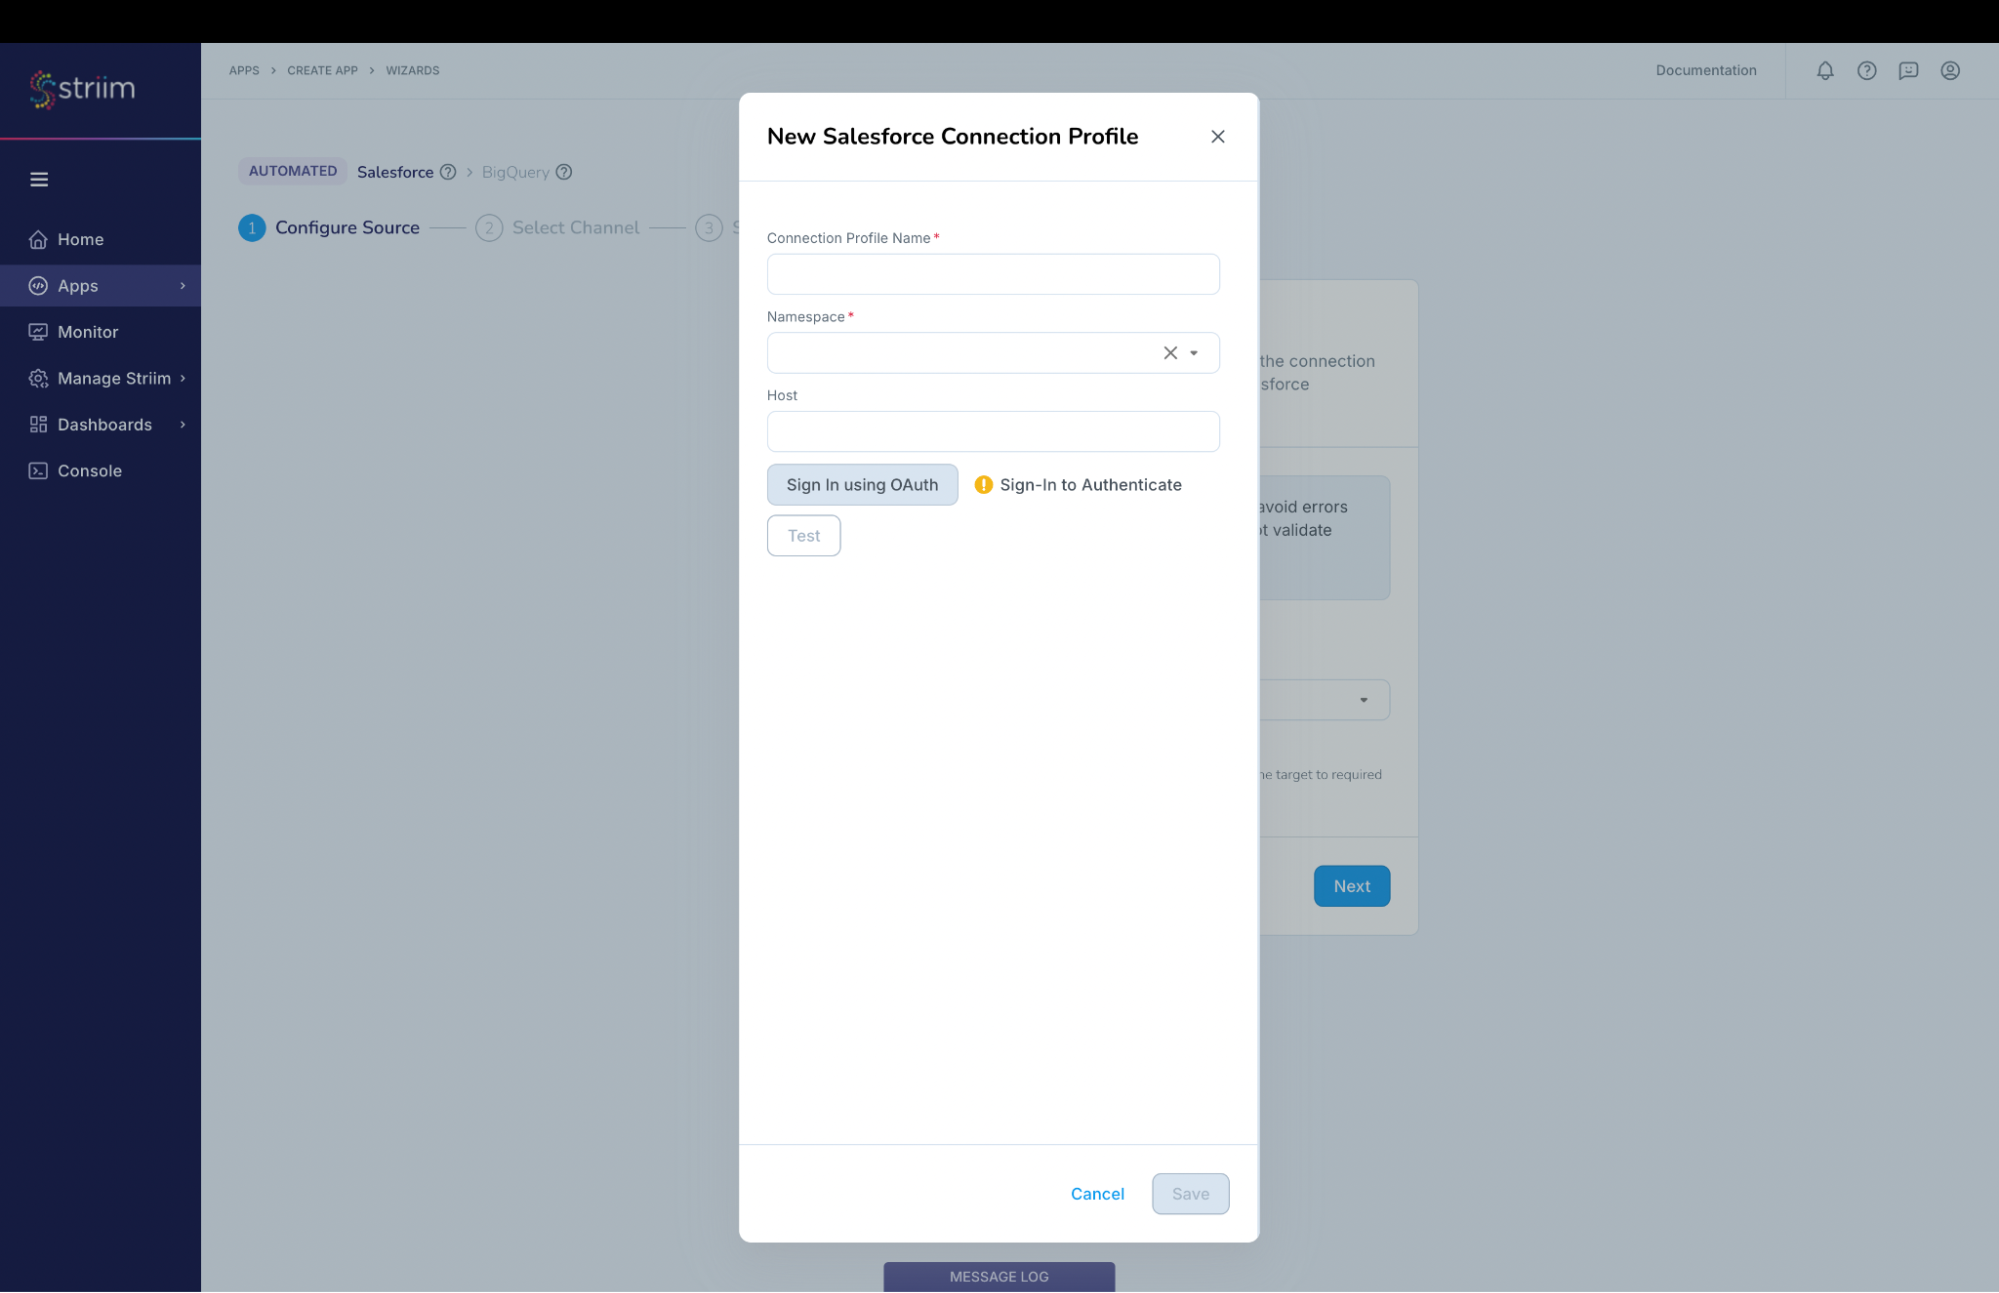
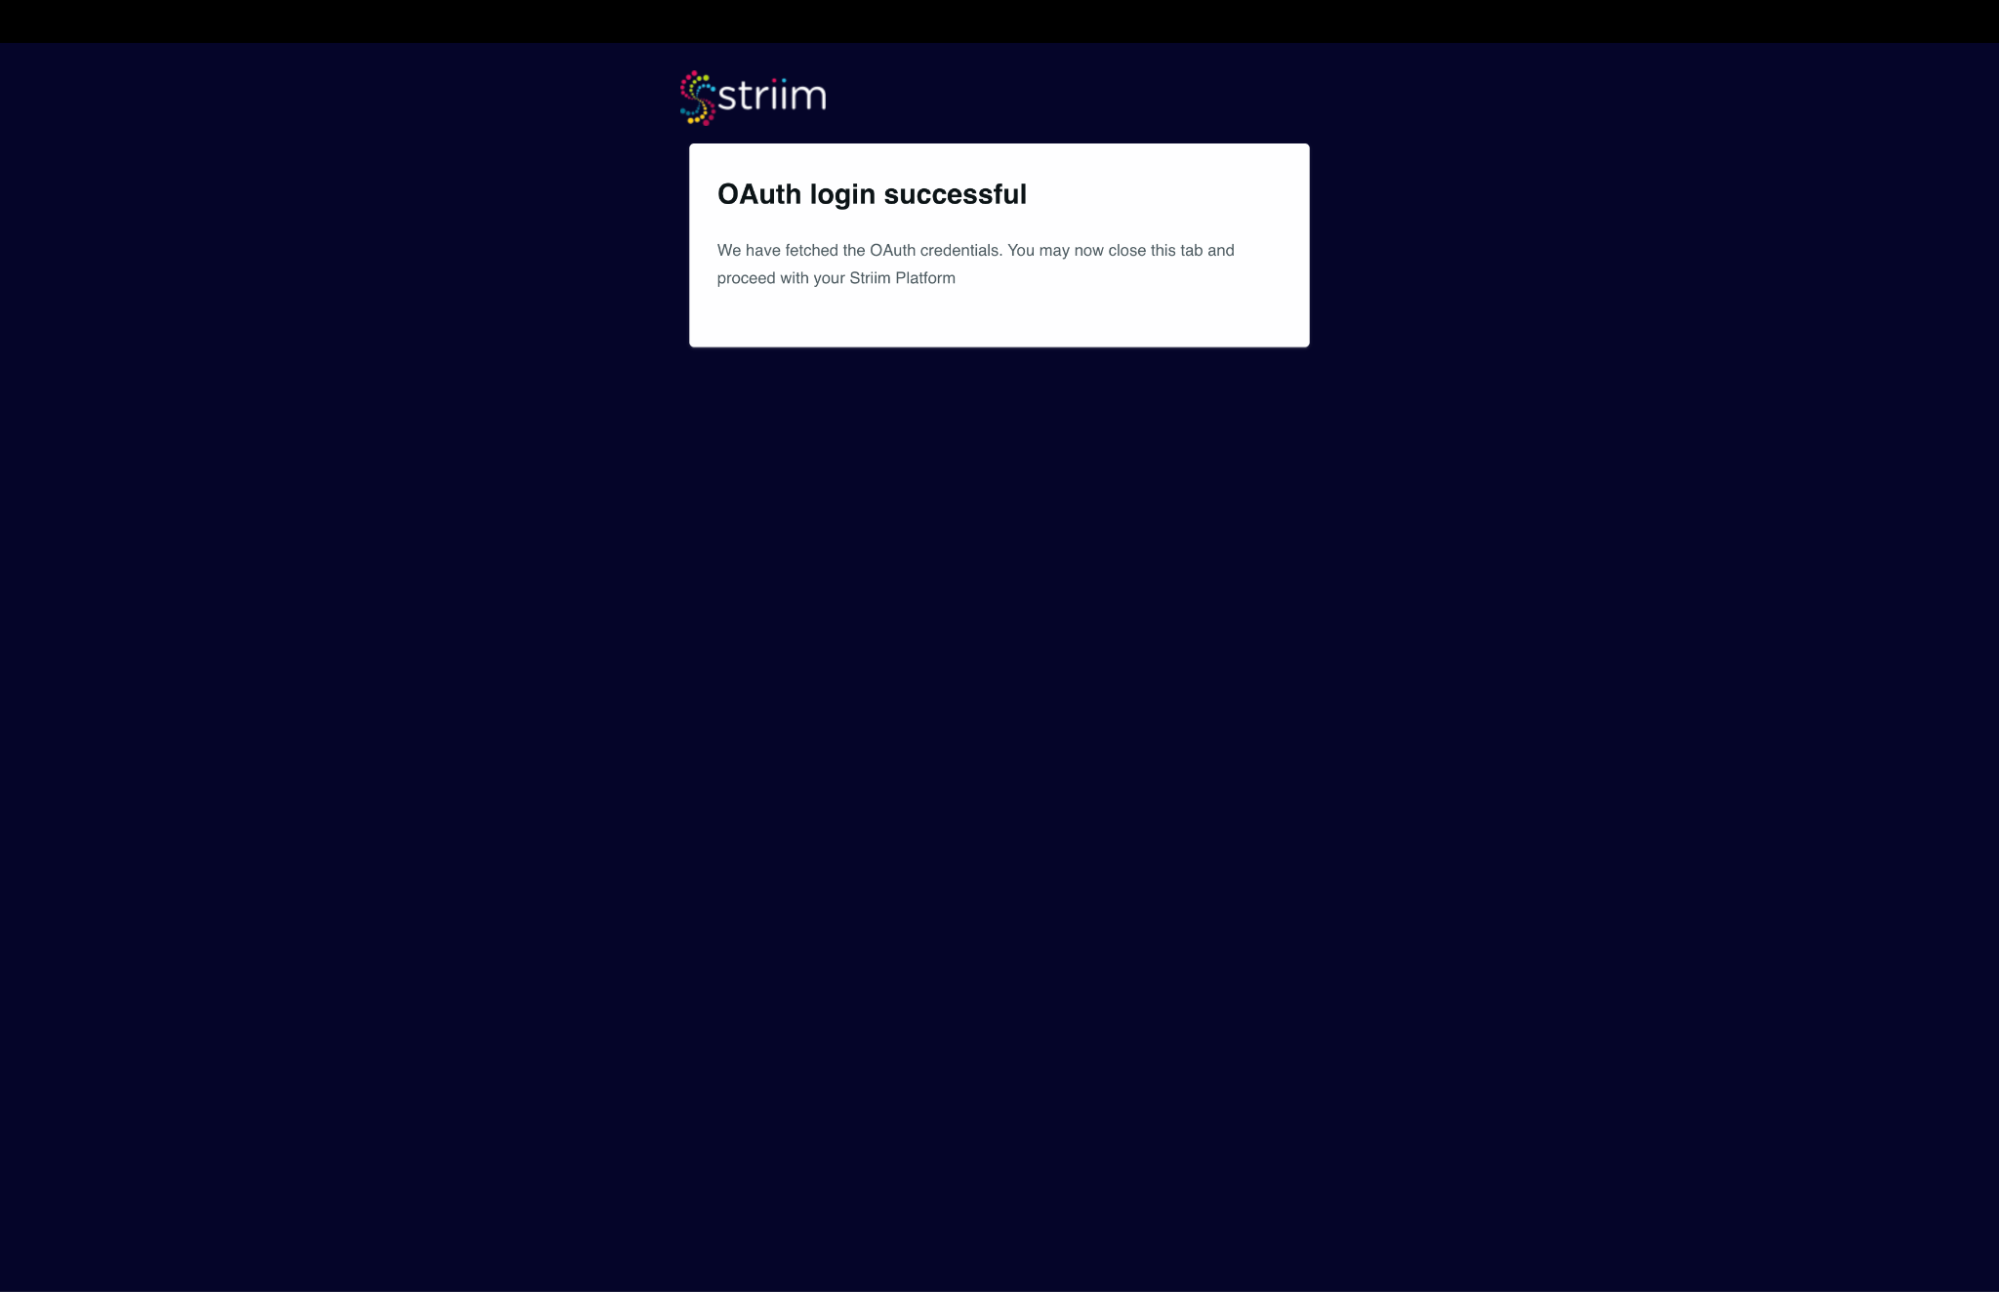
Click on “Sign in using OAuth”
- You will be redirected to the Salesforce login page where you can provide your credentials.
- After successfully logging in you will see the below – screenshot-8
(Screenshot- 8 – Salesforce account authenticated)
- The Connection profile dialog should have success messages for the connection and Test. (refer Screenshot-9 below)
- Click on Save.
(Screenshot- 9 – Successful creation of Connection profile for Source)
- Striim will check on the source and environment access and then enable the “Next” button.
- In the next screen, select the Salesforce object(s) that you want to move into Big Query and click “Next”.
(Screenshot- 10 – Source Object selection)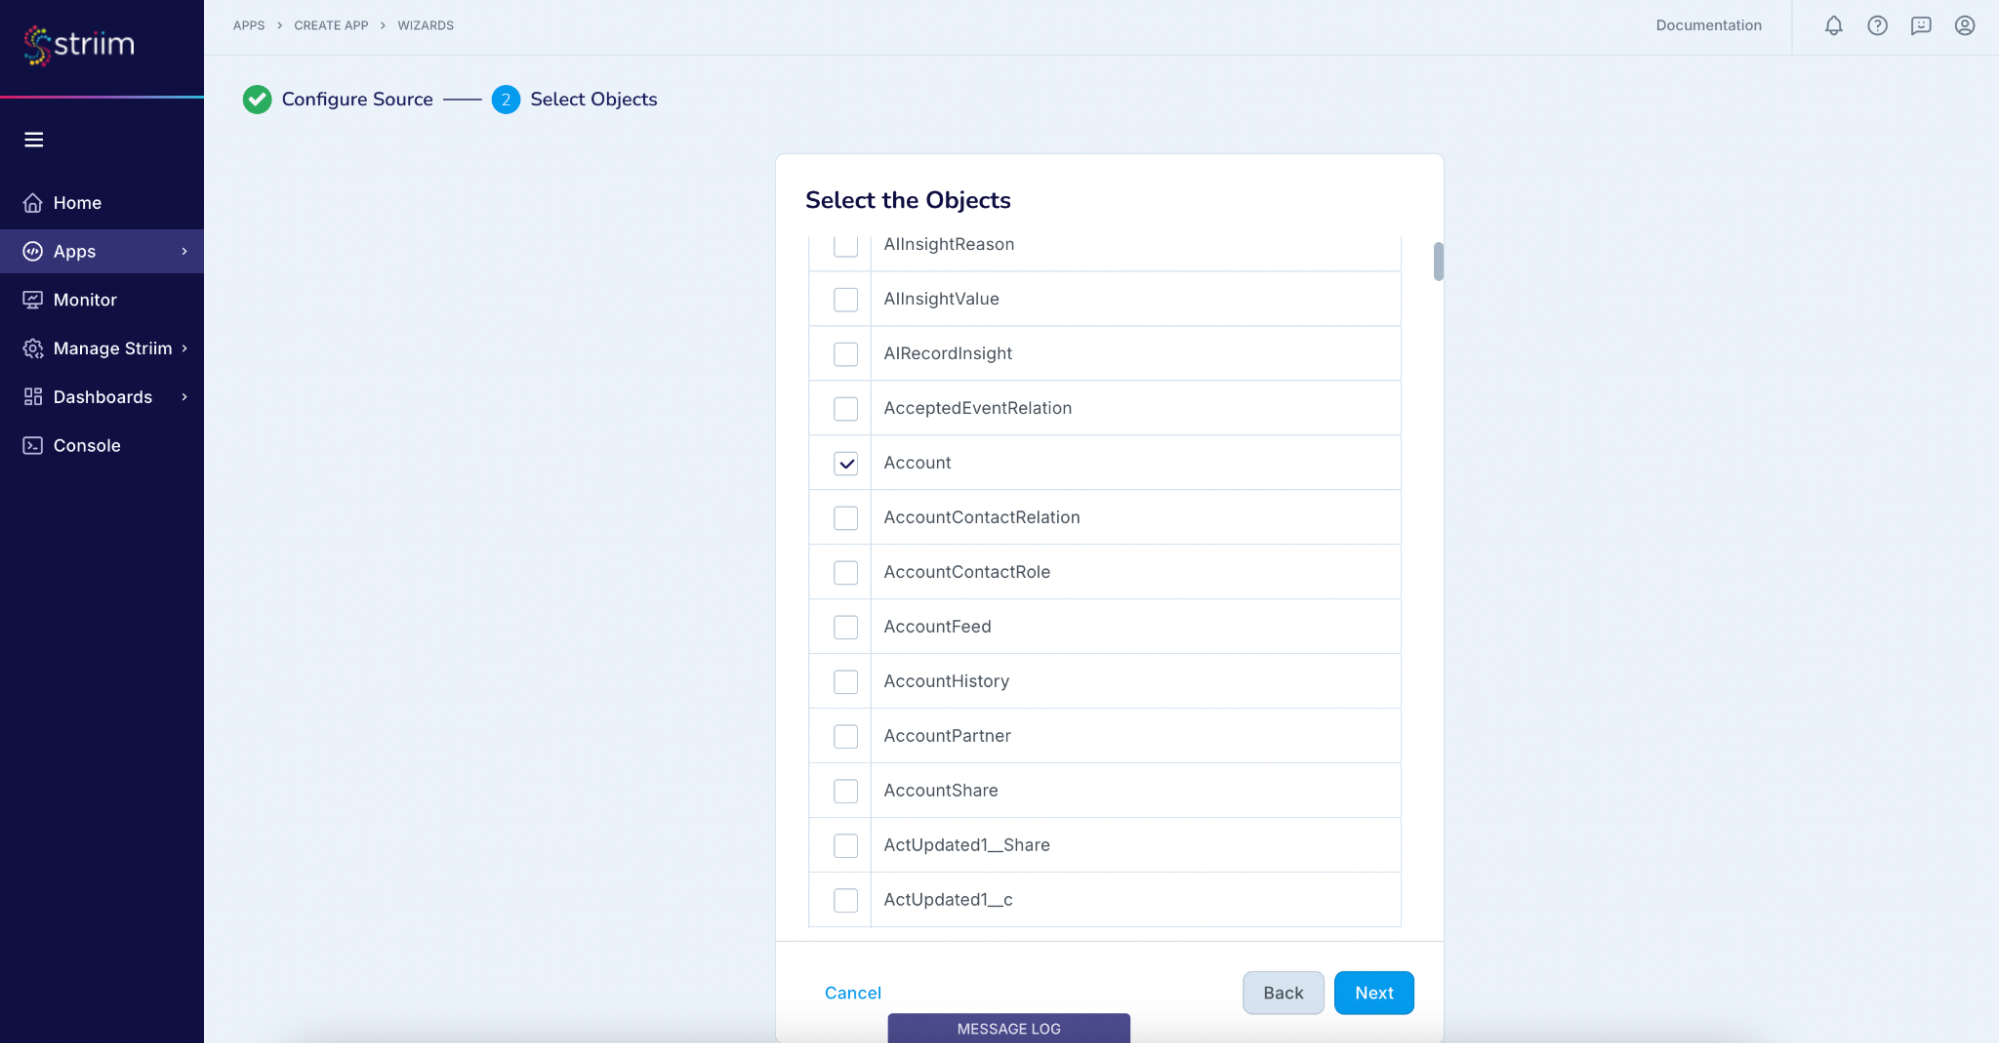
Step – 4 – Configuring BigQuery as Target
- Choose the service account key.
- The “Project ID” will get auto-populated from the service account key. (Screenshot-11, 12)
(Screenshot-11 – BigQuery credential upload)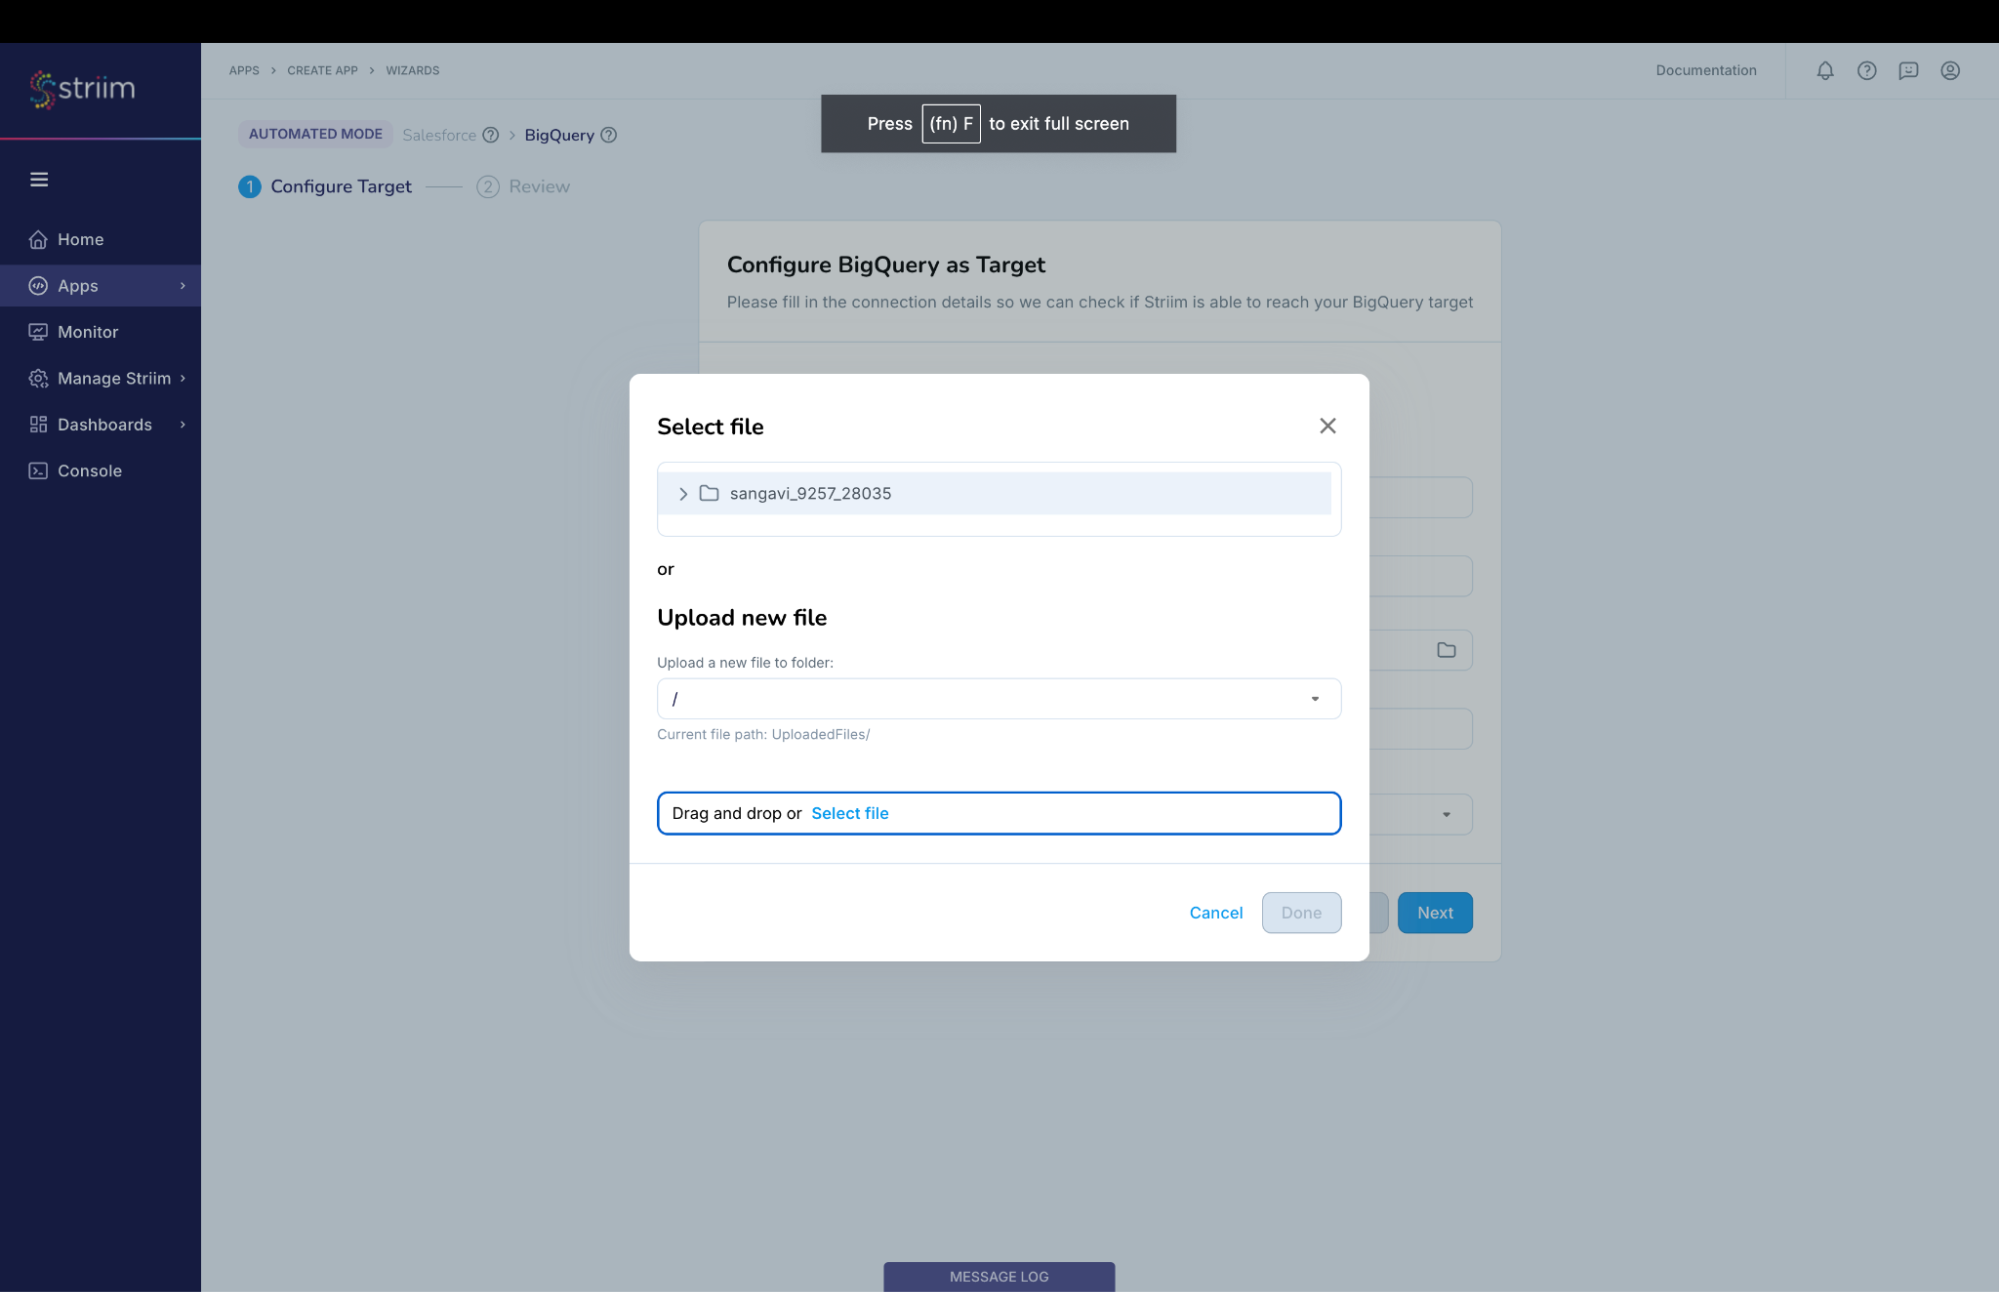
- Either select an existing data set or create a new one. For this recipe we have created a new data set.
- Click on “Next” button
(Screenshot-12 – Target Configuration)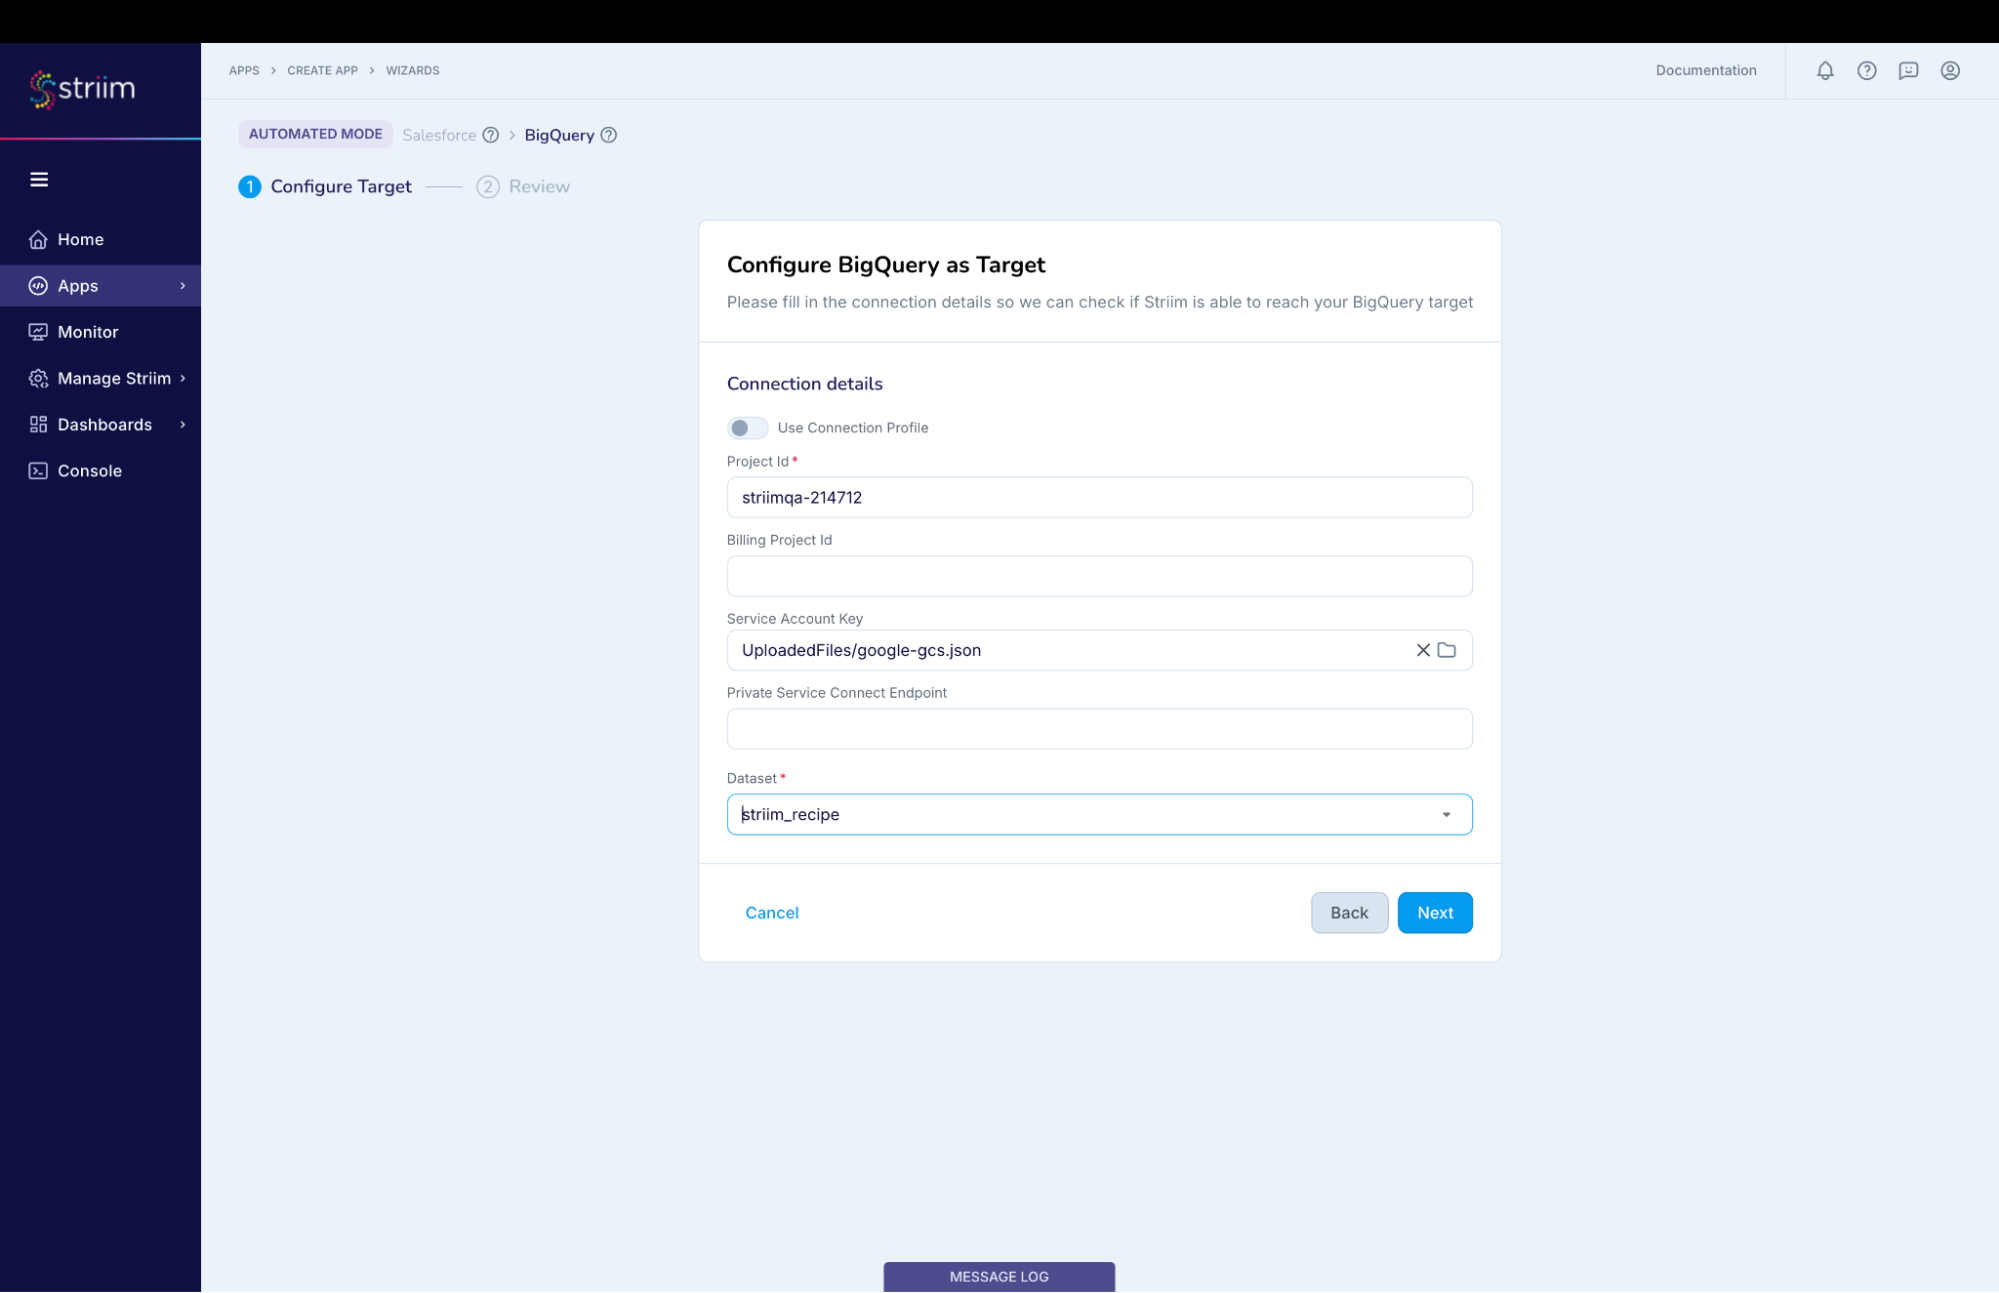
Striim will validate the target connectivity and enable the “Next” button.
(Screenshot- 13 – Target checks and validation)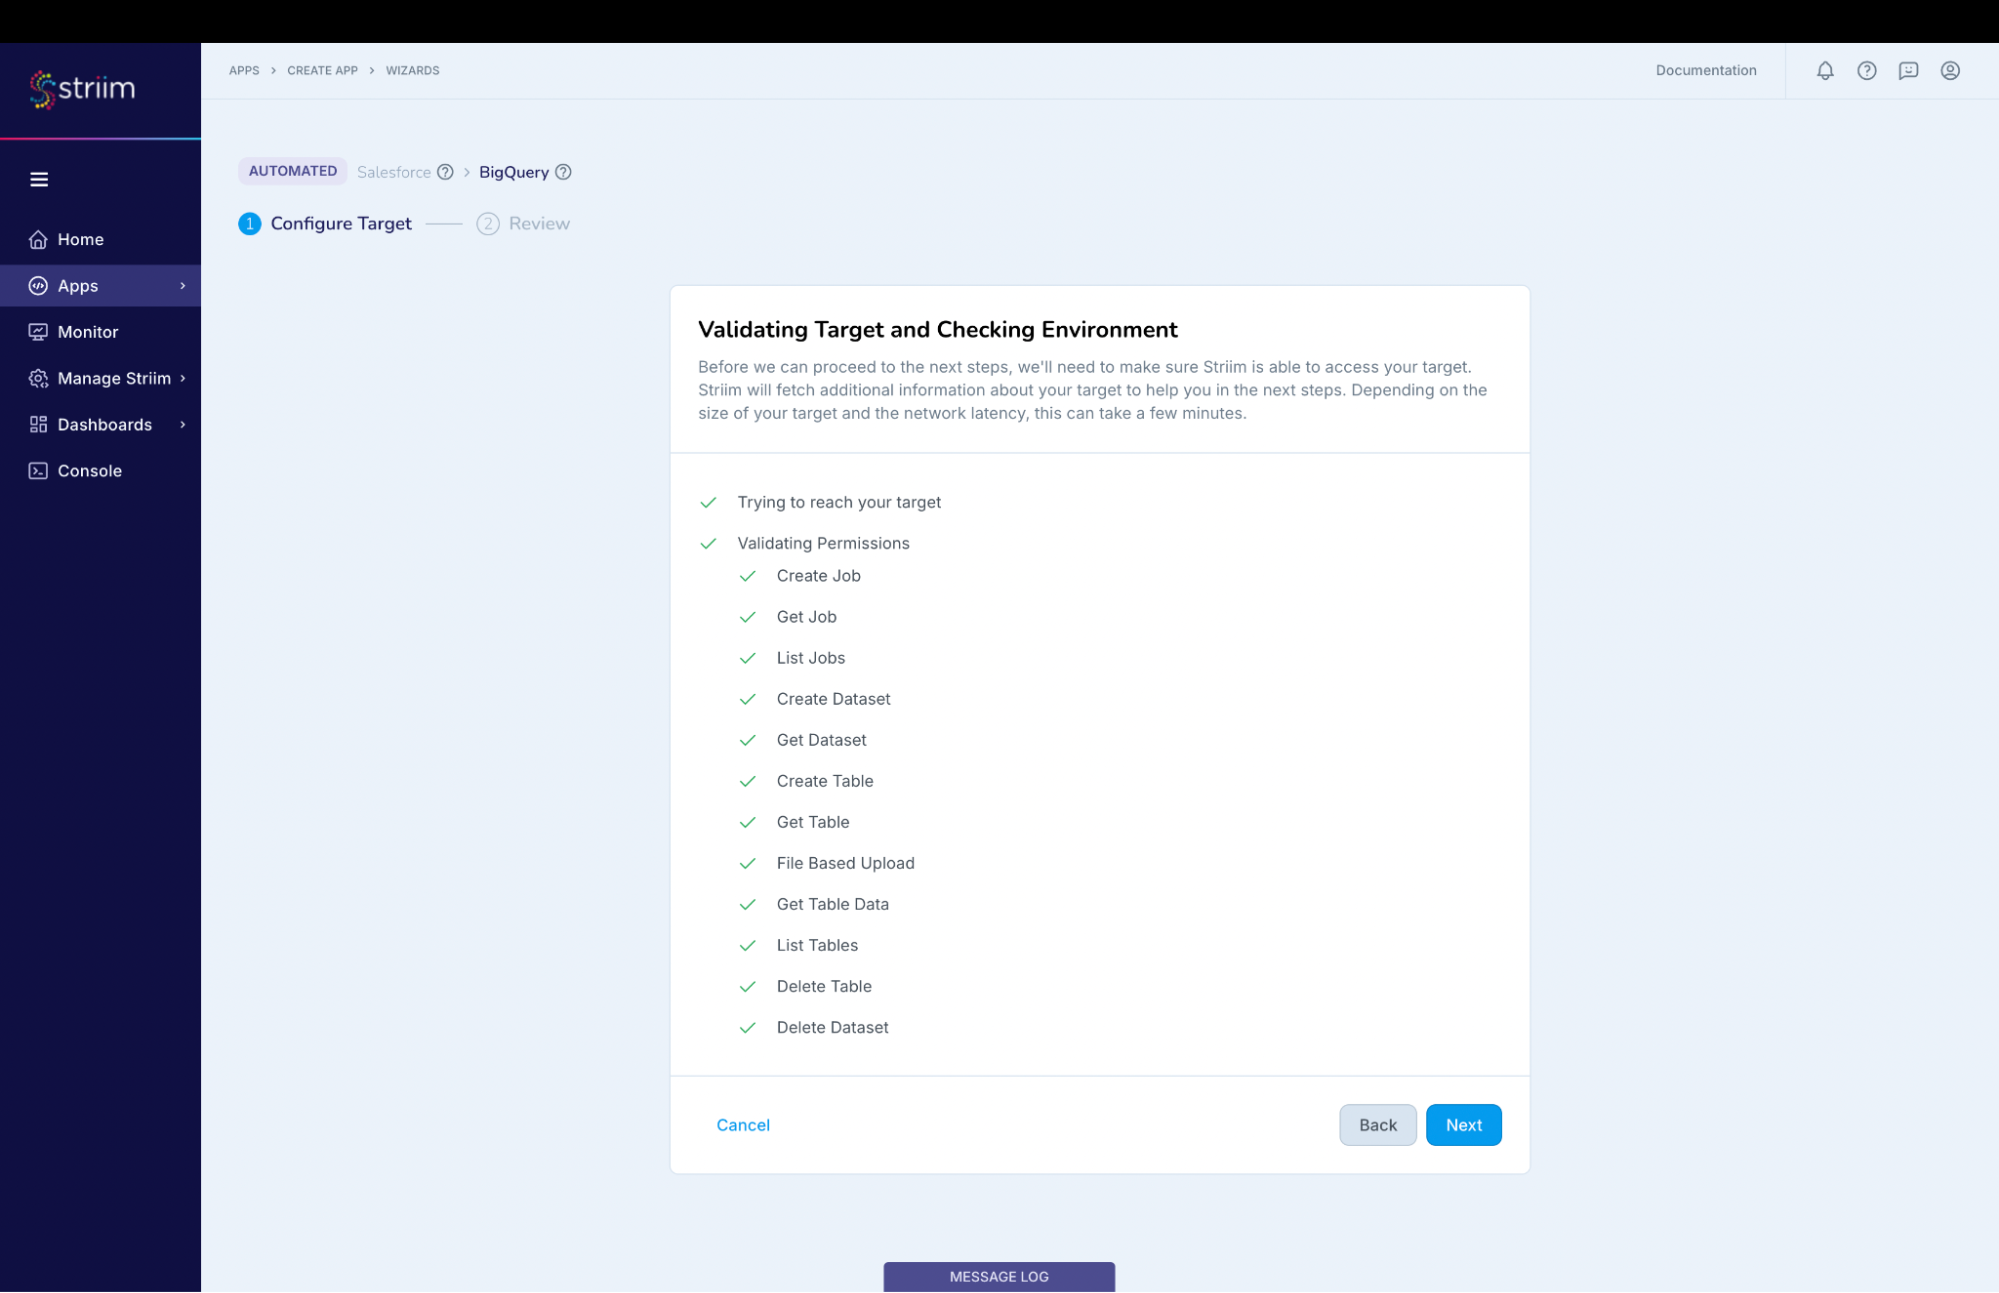
Review all the details of the data pipeline that we just created and click on “Save & Start”.
(Screenshot- 14 – Pipeline Review)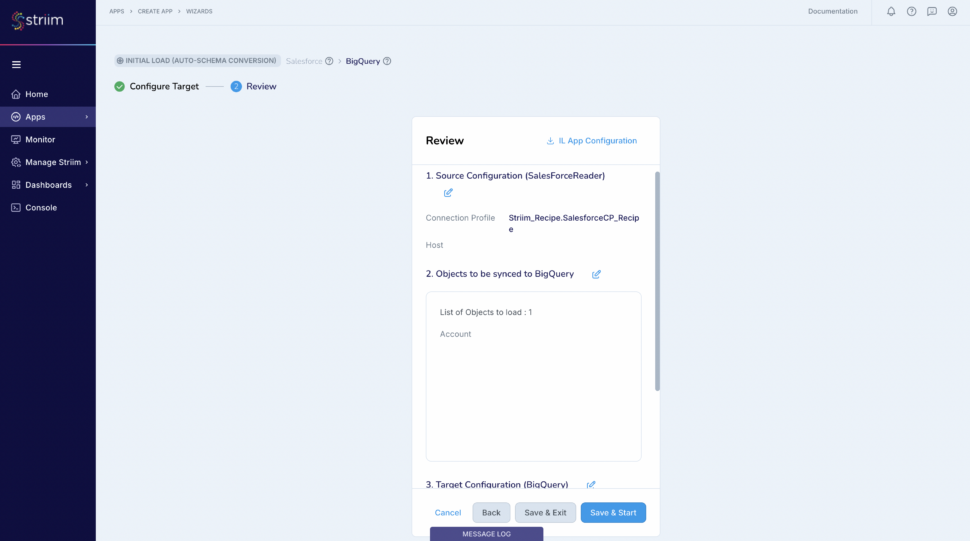
You have successfully created an app that will move your Salesforce data into Google BigQuery!
(Screenshot- 15 – Successful App Creation)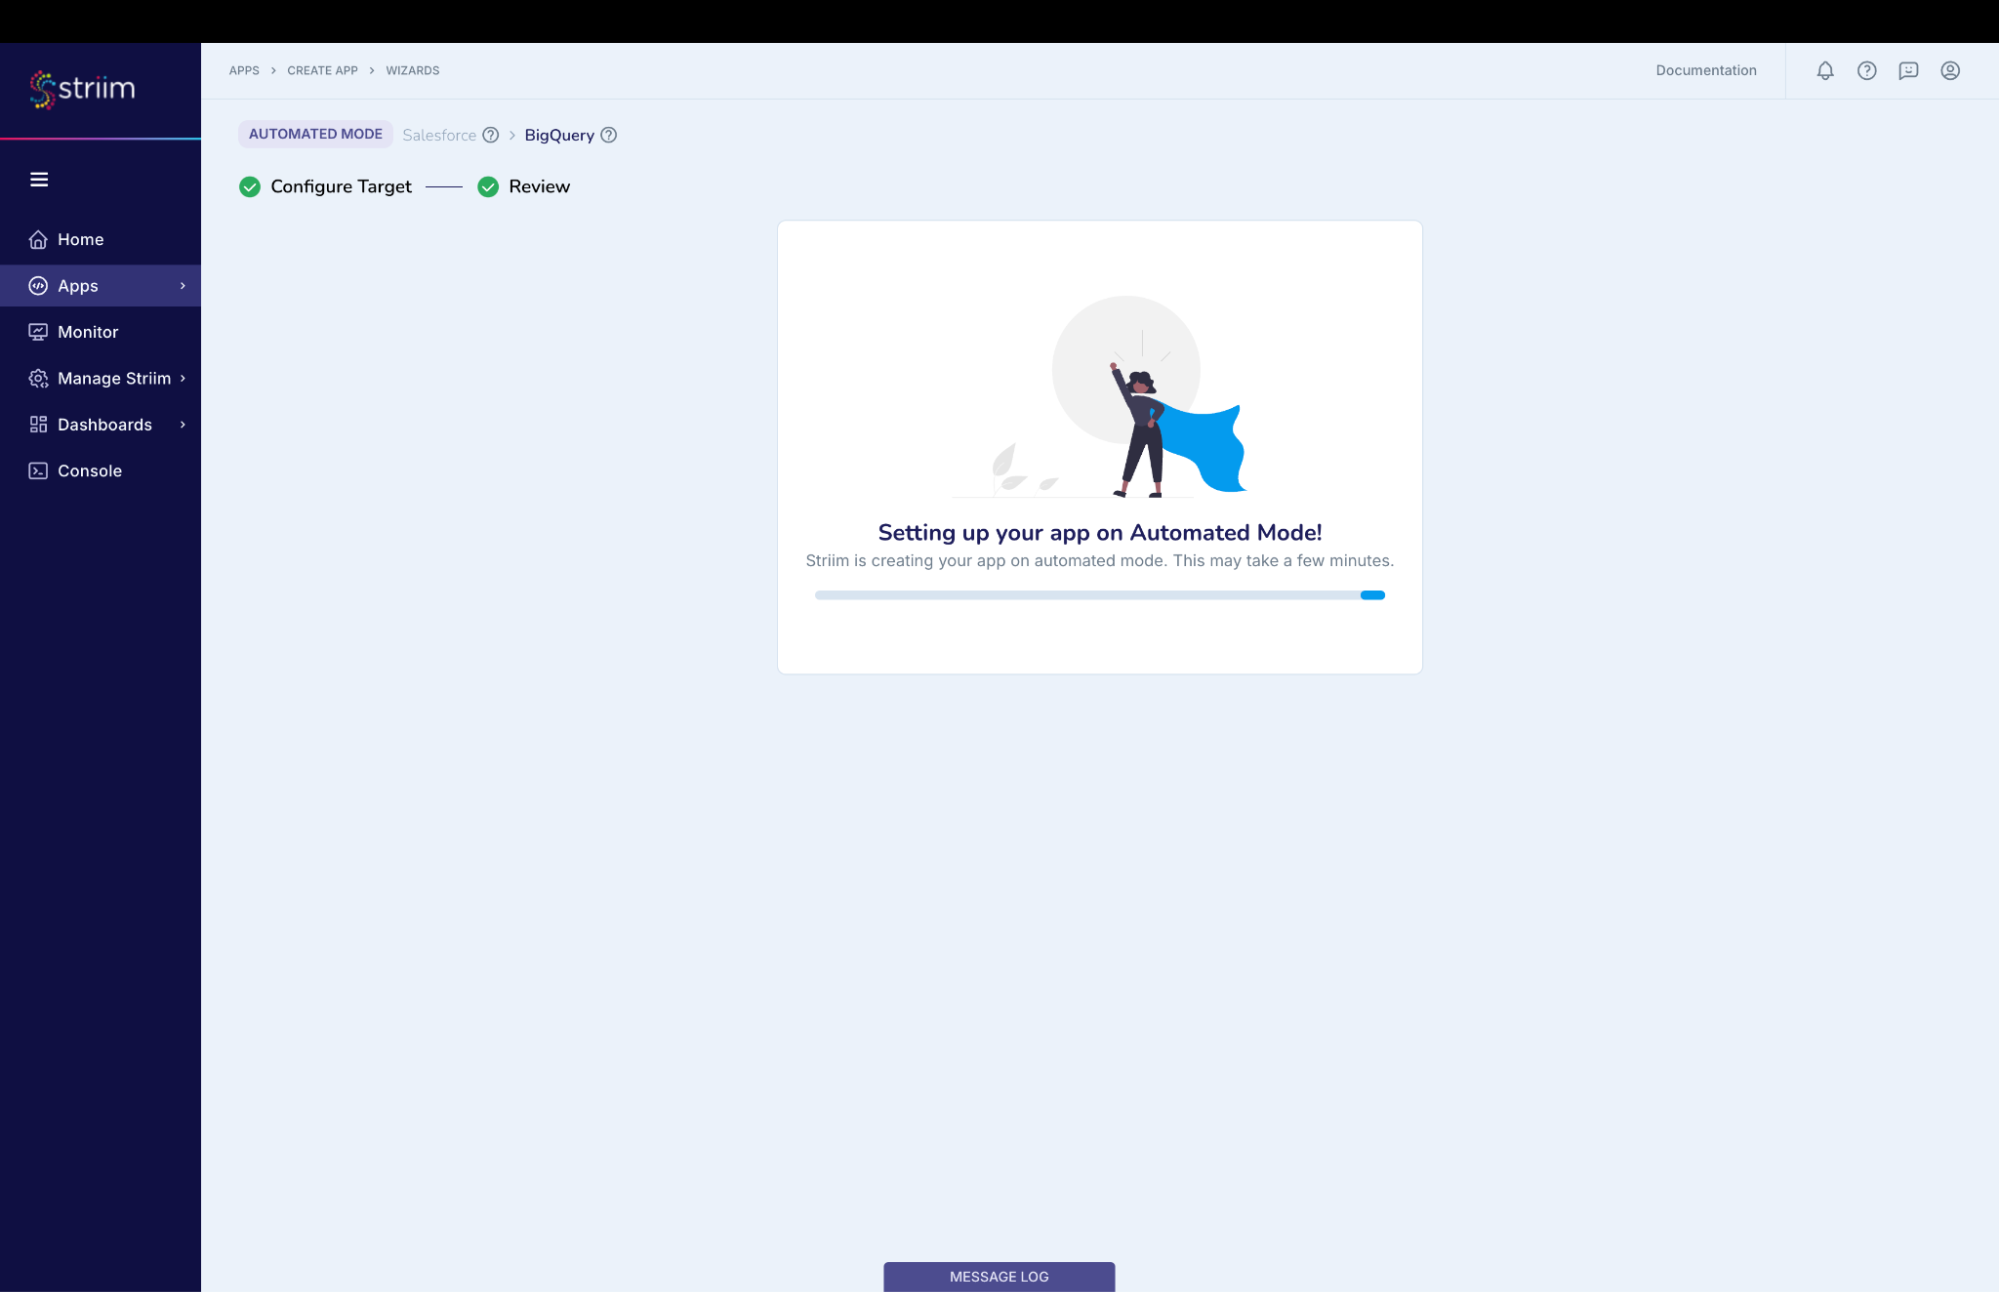
Step – 5 – Running and Monitoring your application
As the Striim App starts running,the dashboards and monitors (screenshot- 16,17) show the real-time data movement along with various metrics (ex- memory and CPU usage) that we capture. Refer to our documentation for more details on monitoring.
(Screenshot- 16 – Monitoring Dashboard)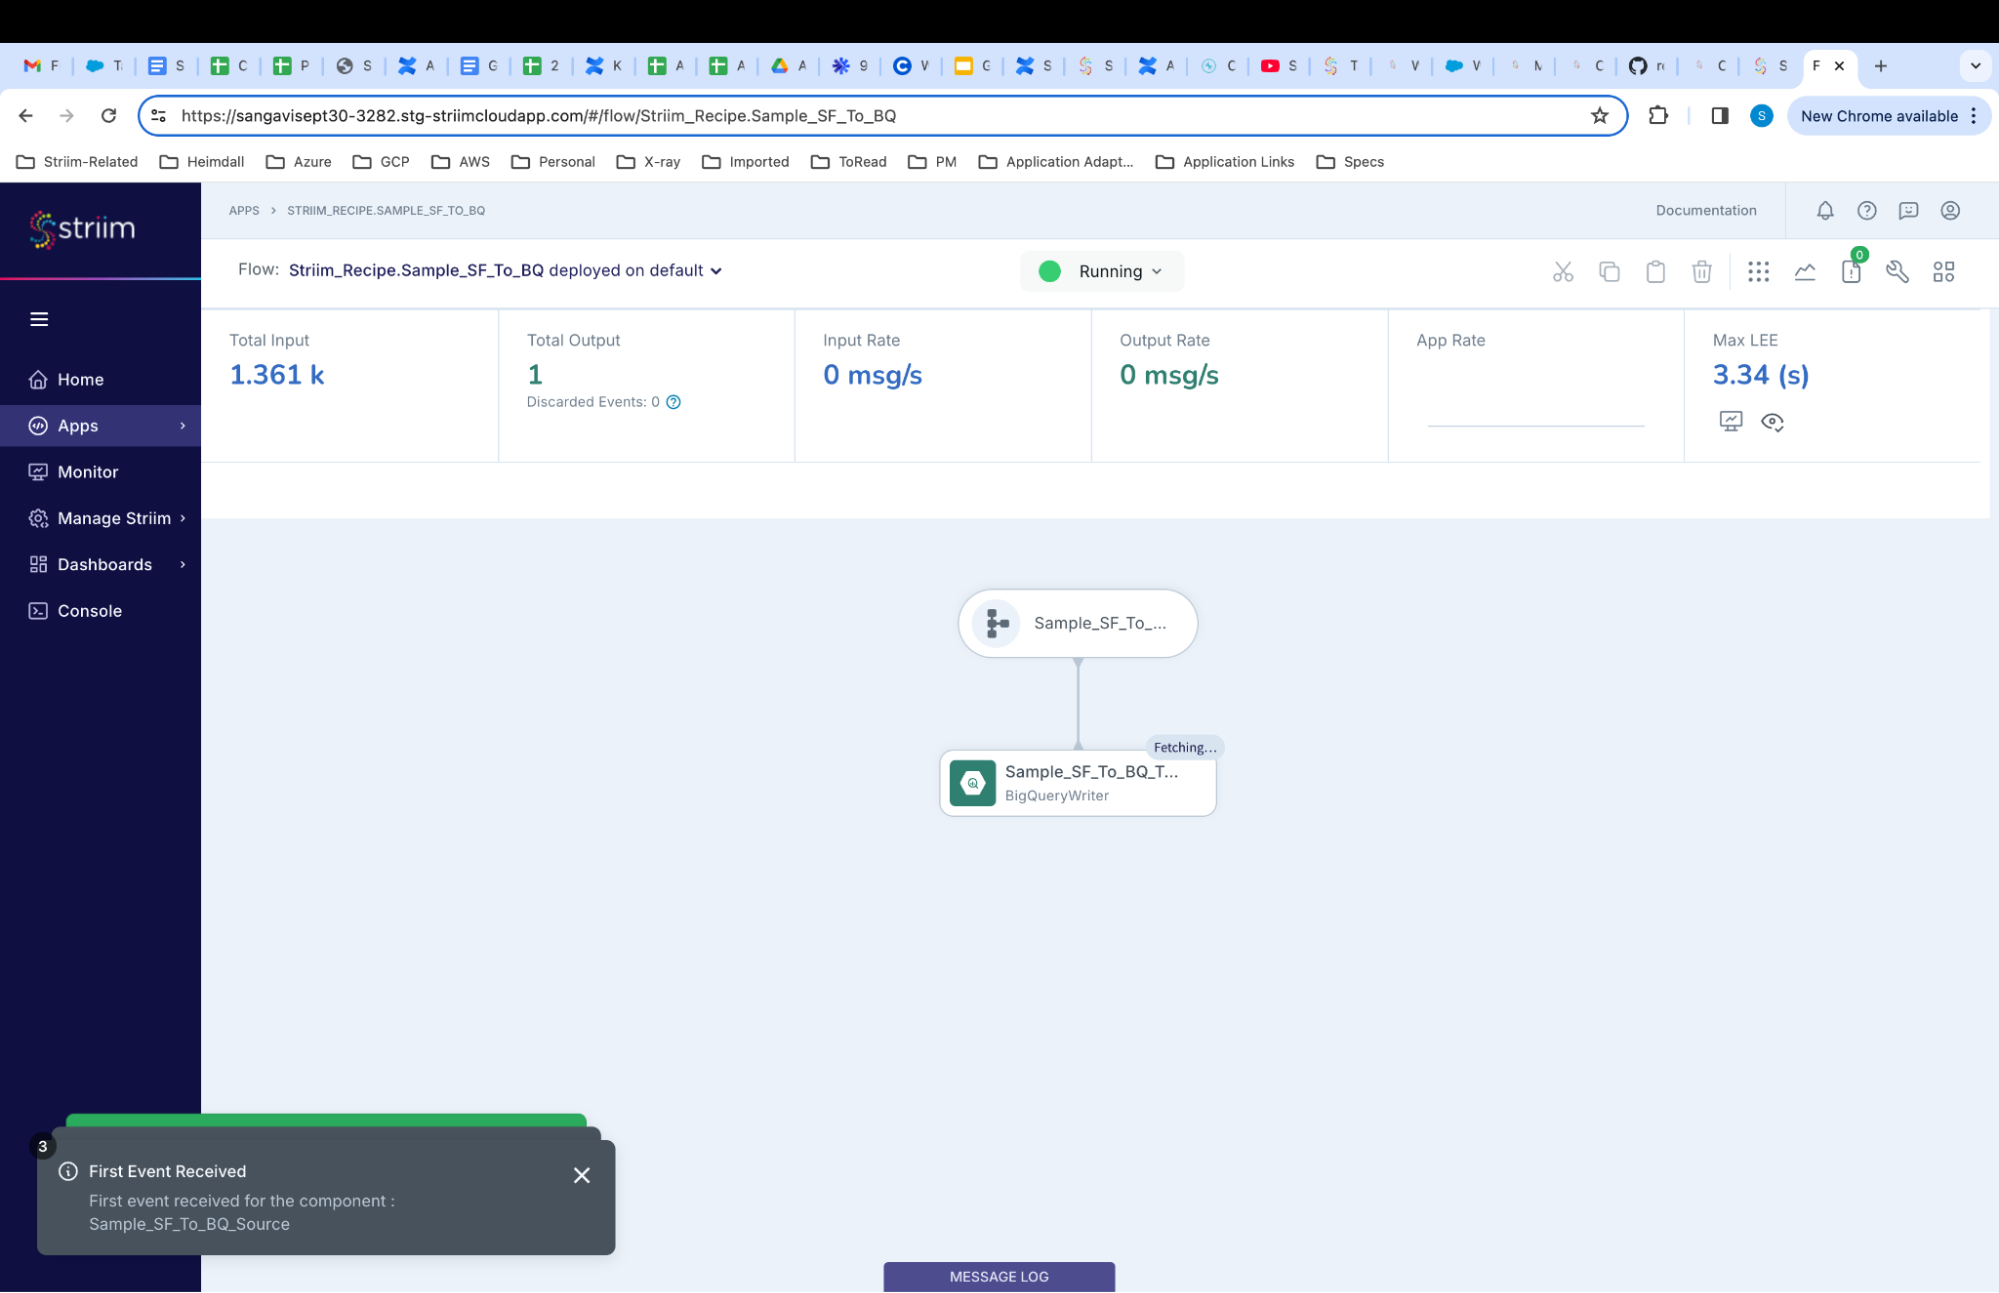
(Screenshot-17 – Metrics overview)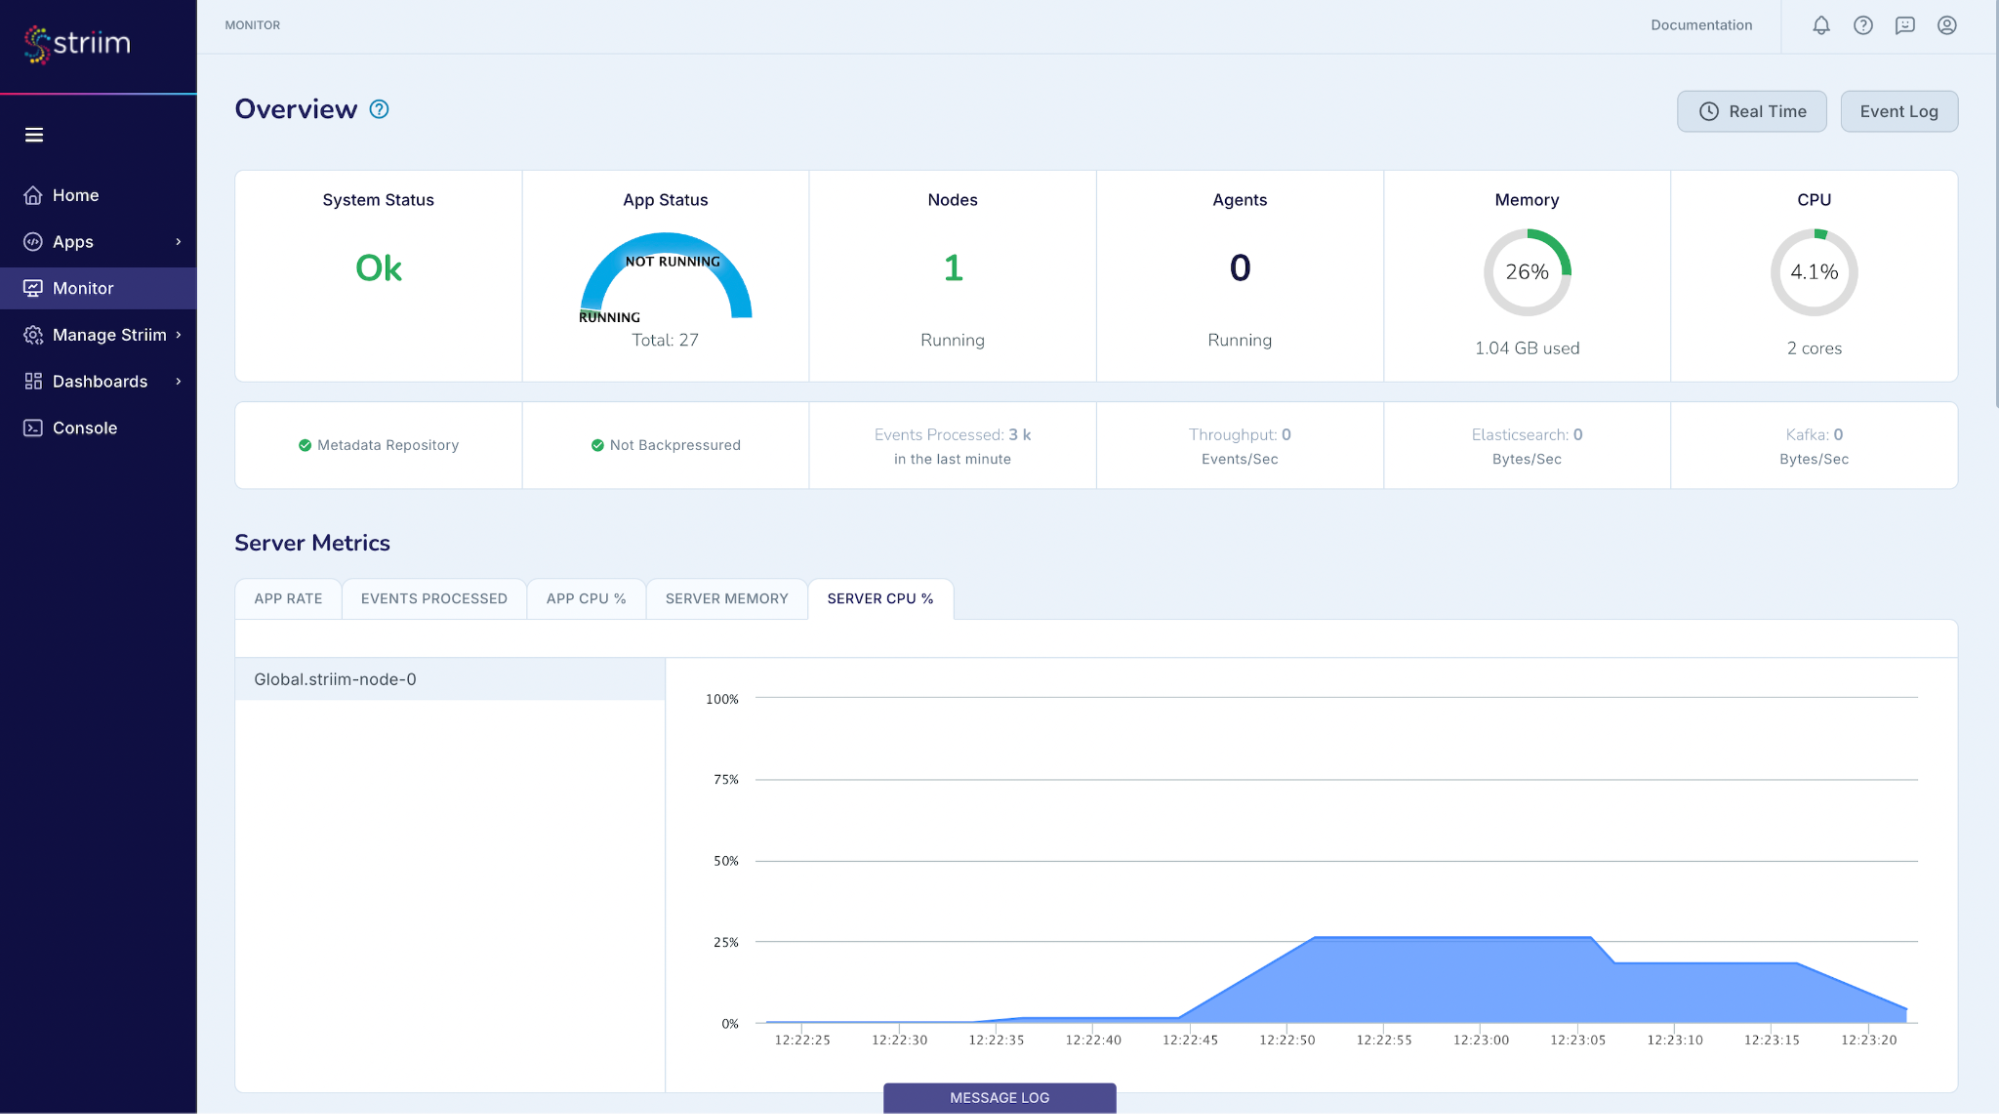
In the application that we just created you will be able to experience the real-time data movement into the target thereby being able to predict, automate, and react to business events as they happen, not minutes or hours later. The data from Big Query is then joined with our Hubspot data to create Looker reports.
Related Information
- In addition to the Salesforce Reader, Striim offers other Salesforce related adapters – Salesforce CDC, Salesforce Writer, Salesforce Pardot, Salesforce Platform Event Reader and Salesforce Push Topic Reader.
- You can also look into another Salesforce recipe where we read from Salesforce and write into Azure Synapse.
- Learn more about data streaming using Striim through our other Tutorials and Recipes.
- More details about increasing throughput using parallel threads and recovery are here.
Conclusion
While this recipe has provided you steps to create a pipeline for your Salesforce data, do check all the application adapters that Striim supports to read from and write to.
If you have any questions regarding Salesforce adapter or any other application adapters reach out to us at applicationadapters_support@striim.com