Initial setup for Microsoft Dynamics 365 Business Central Reader
This section describes how to configure Microsoft Dynamics 365 Business Central for use with the Striim Dynamics 365 Business Central Reader. You must register an application in Azure Active Directory (Azure AD), assign API permissions, and generate a client secret or certificate. These steps ensure Striim can securely authenticate and access your Business Central instance.
Pre-requisites for accessing Microsoft Dynamics 365 Business Central data
The key scopes required to access Business Central data are:
user_impersonation– Required for delegated access to Business Central.https://<your-org>.businesscentral.dynamics.com/.default– Used for app-only (client credentials) access.offline_access– Enables the use of refresh tokens for long-lived access.
For more information on scopes, refer to Microsoft documentation here.
Note
Striim uses TLS 1.2 to encrypt the connection.
Registering the application in Azure AD
Create an app in Azure AD to authenticate and interact with Business Central.
Log in to
https://entra.microsoft.com/using your Microsoft Dynamics credentials.Click App registrations in the left main menu.
Click New registration under App registrations.
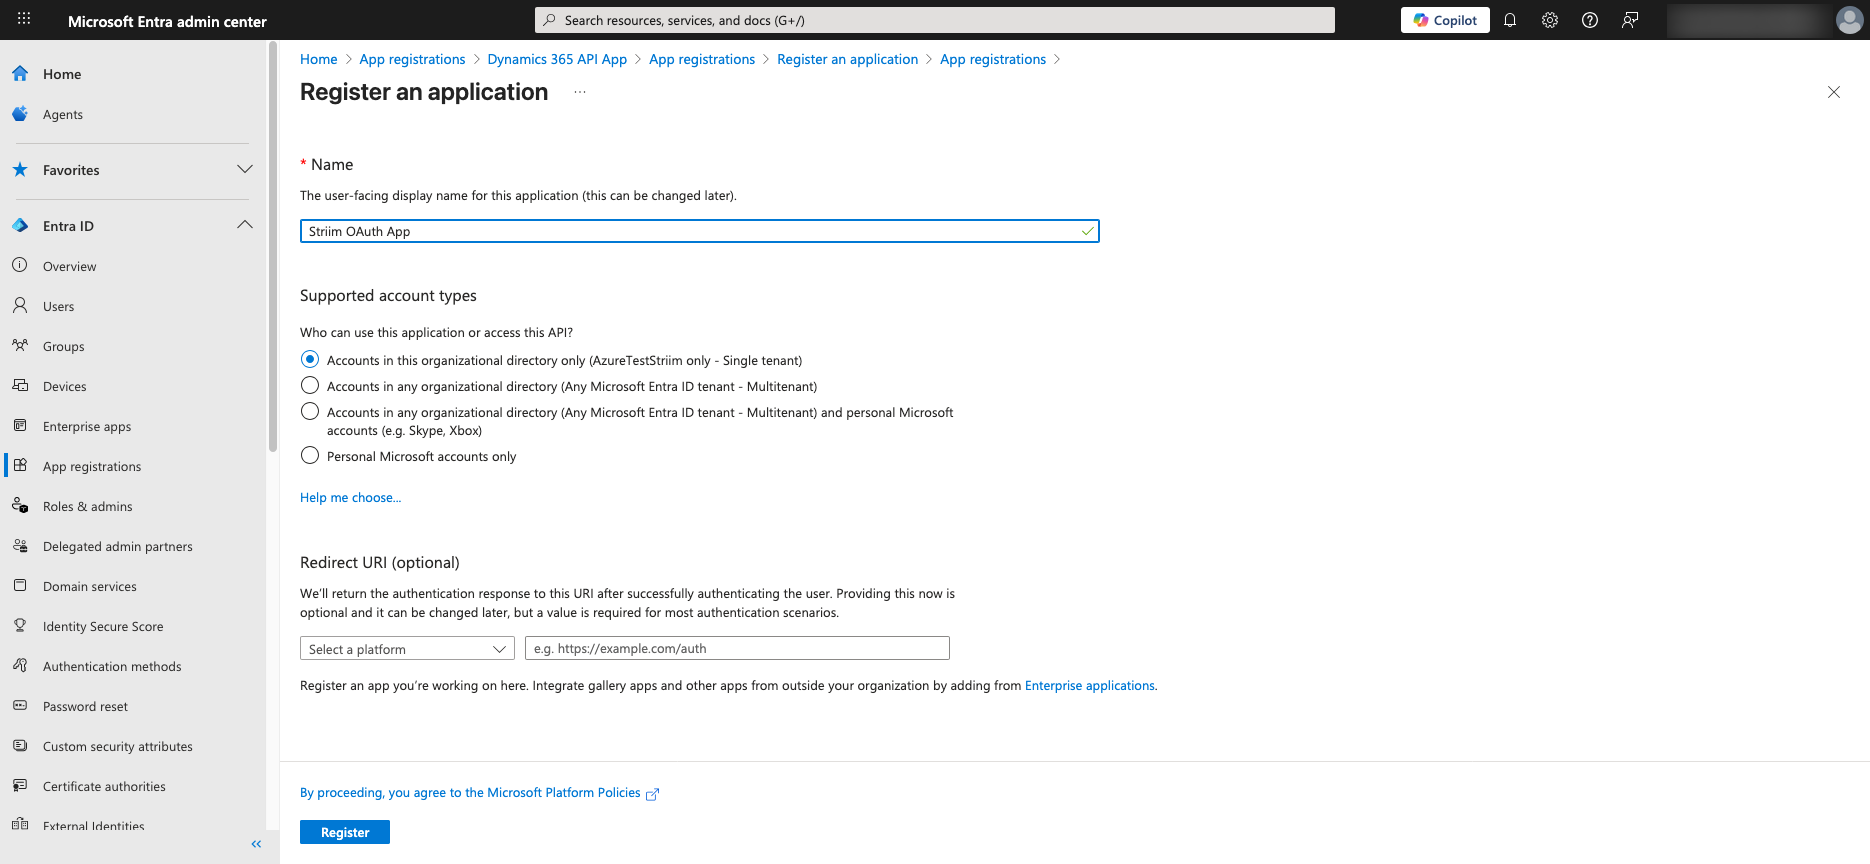
Specify the types of accounts this application should support:
For private use applications, select Accounts in this organization directory only.
For distributed applications, select one of the multi-tenant options.
Note: If you select Accounts in this organization directory only (default), then you must set Tenant Id to the Id of the Azure AD Tenant. Otherwise, authentication fails.
Click Register to complete the new App registration. Your new App is now created.

For more information, see Microsoft documentation on registering an application in Azure AD.
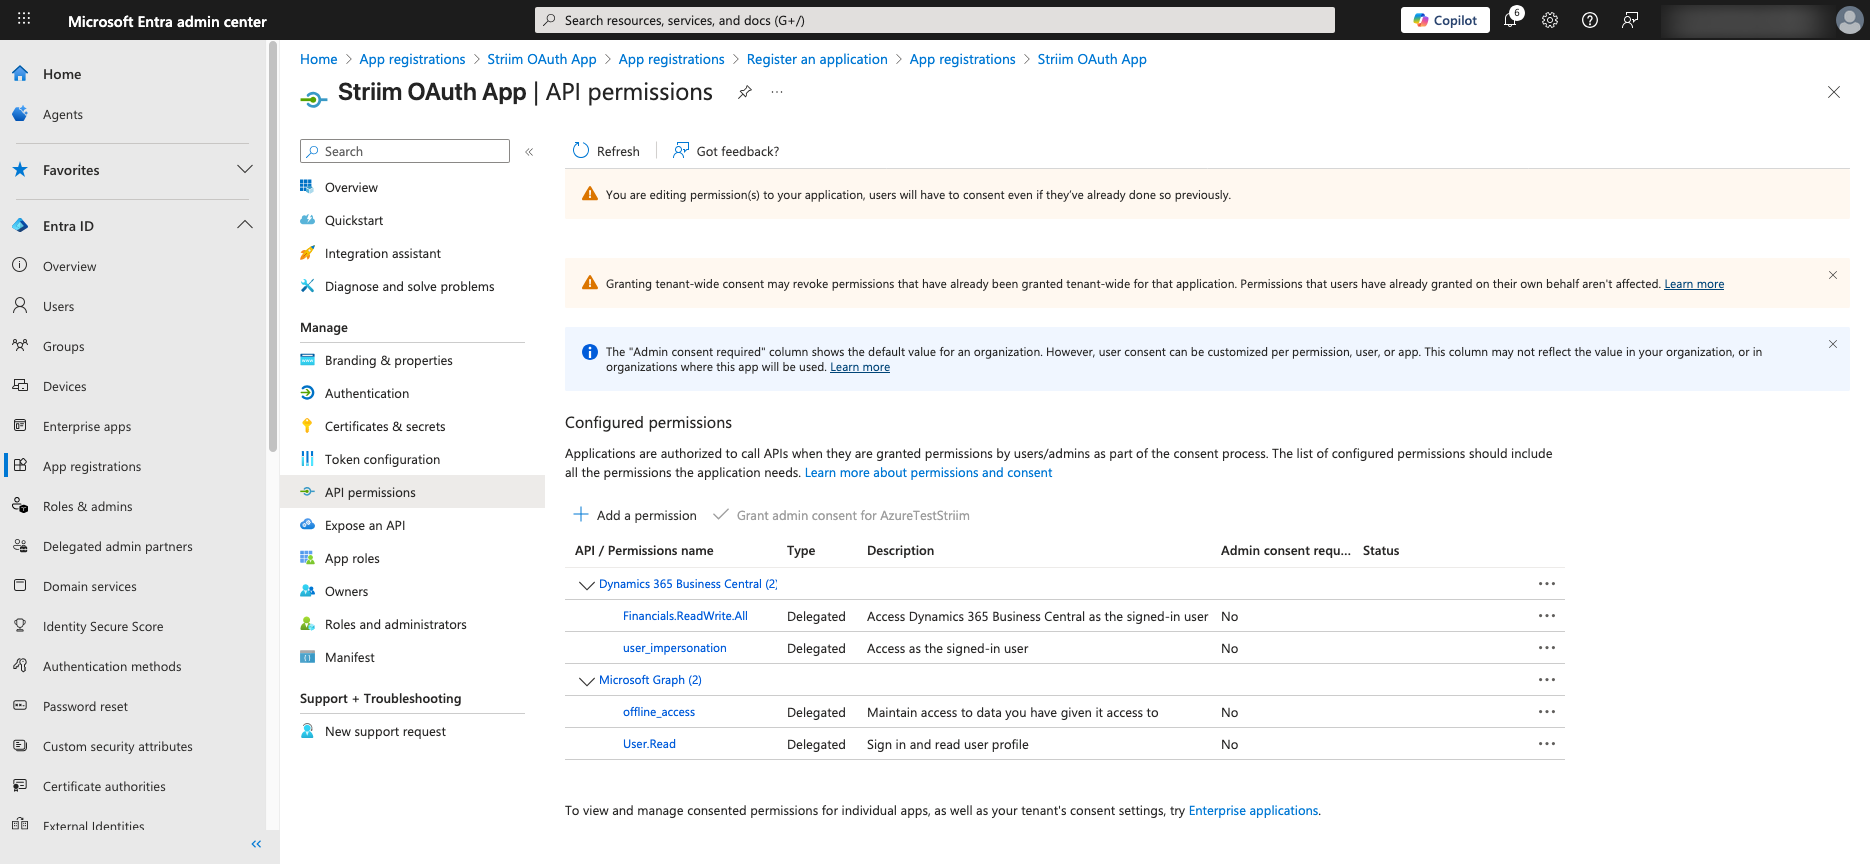
Setting API permissions for Business Central
Grant necessary API permissions (e.g., Business Central → user_impersonation).
Click API permissions in the second-level menu for the App.
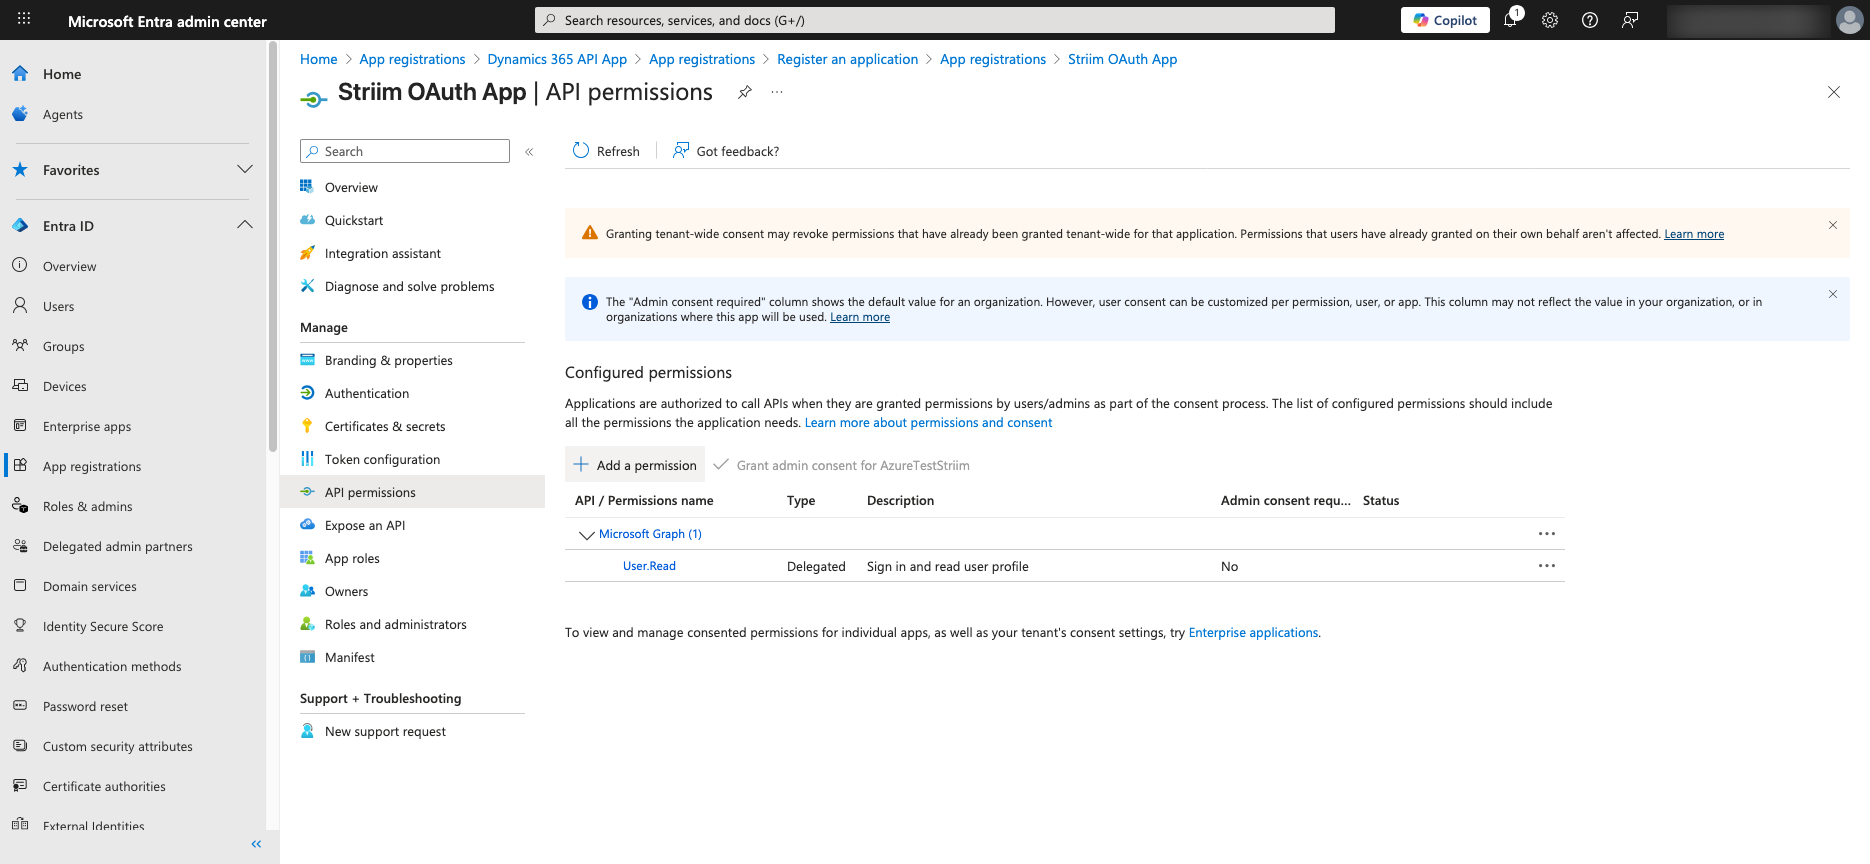
In the right-side widget, locate and click on Dynamics 365 Business Central group of permissions.
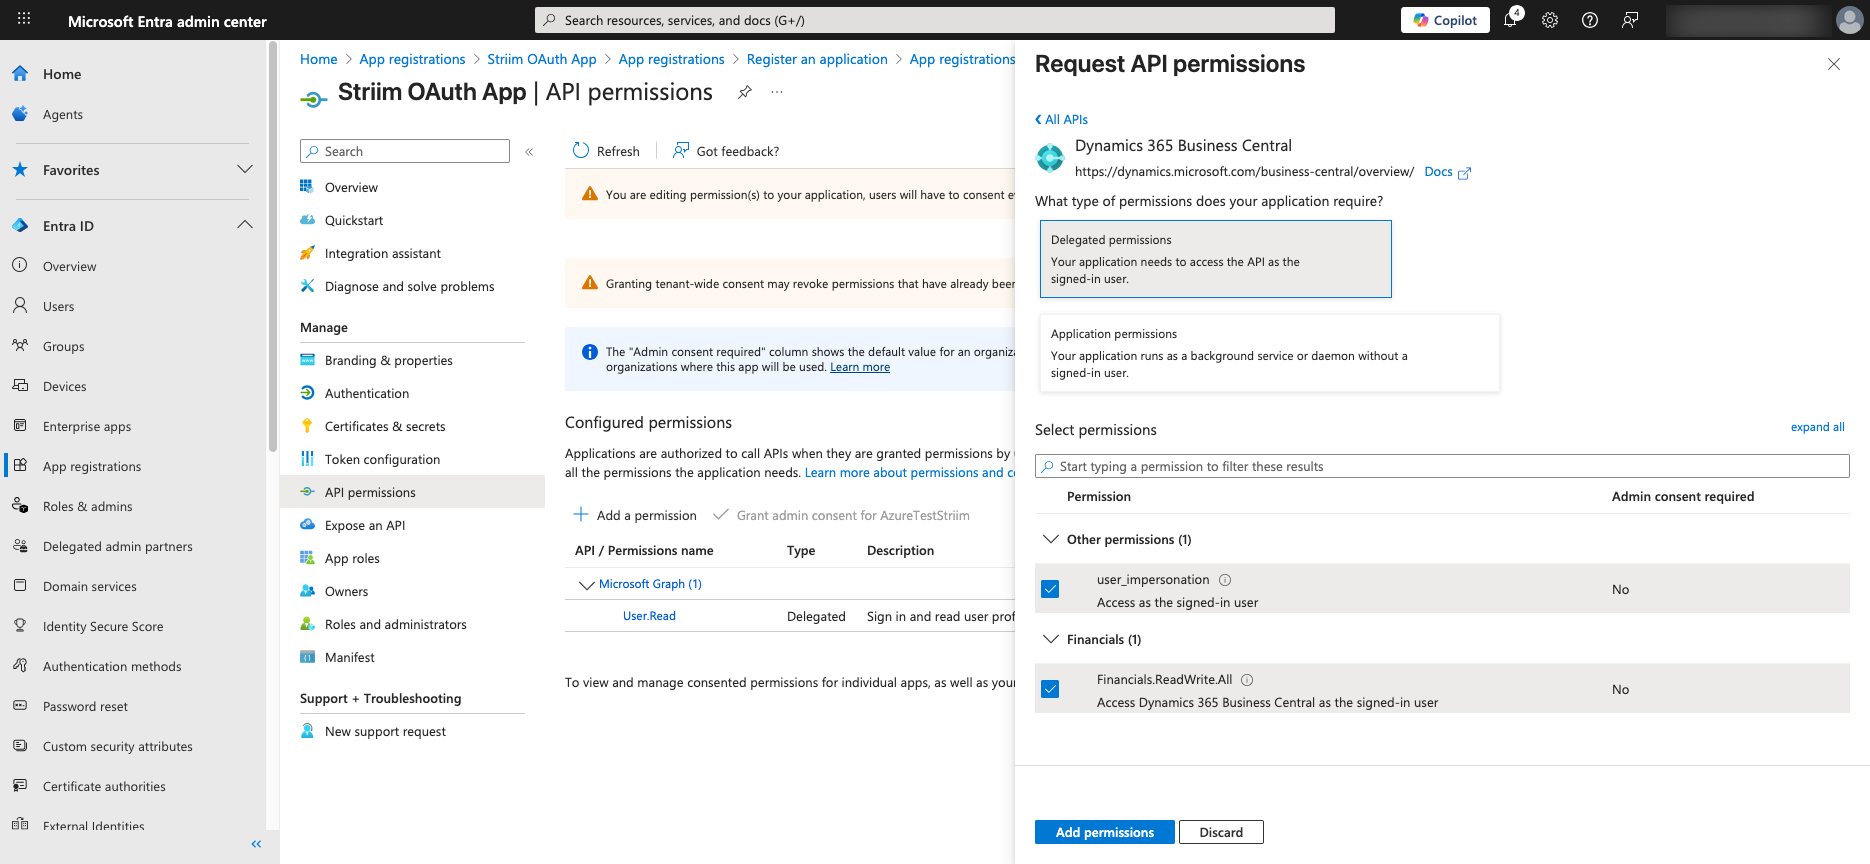
Add the following permissions:
user_impersonation– Required for delegated access to Business Central.offline_access(in the Microsoft Graph group) – Enables the use of refresh tokens for long-lived access.
Review the newly added permissions.
For more information, see Microsoft documentation on setting API permissions.
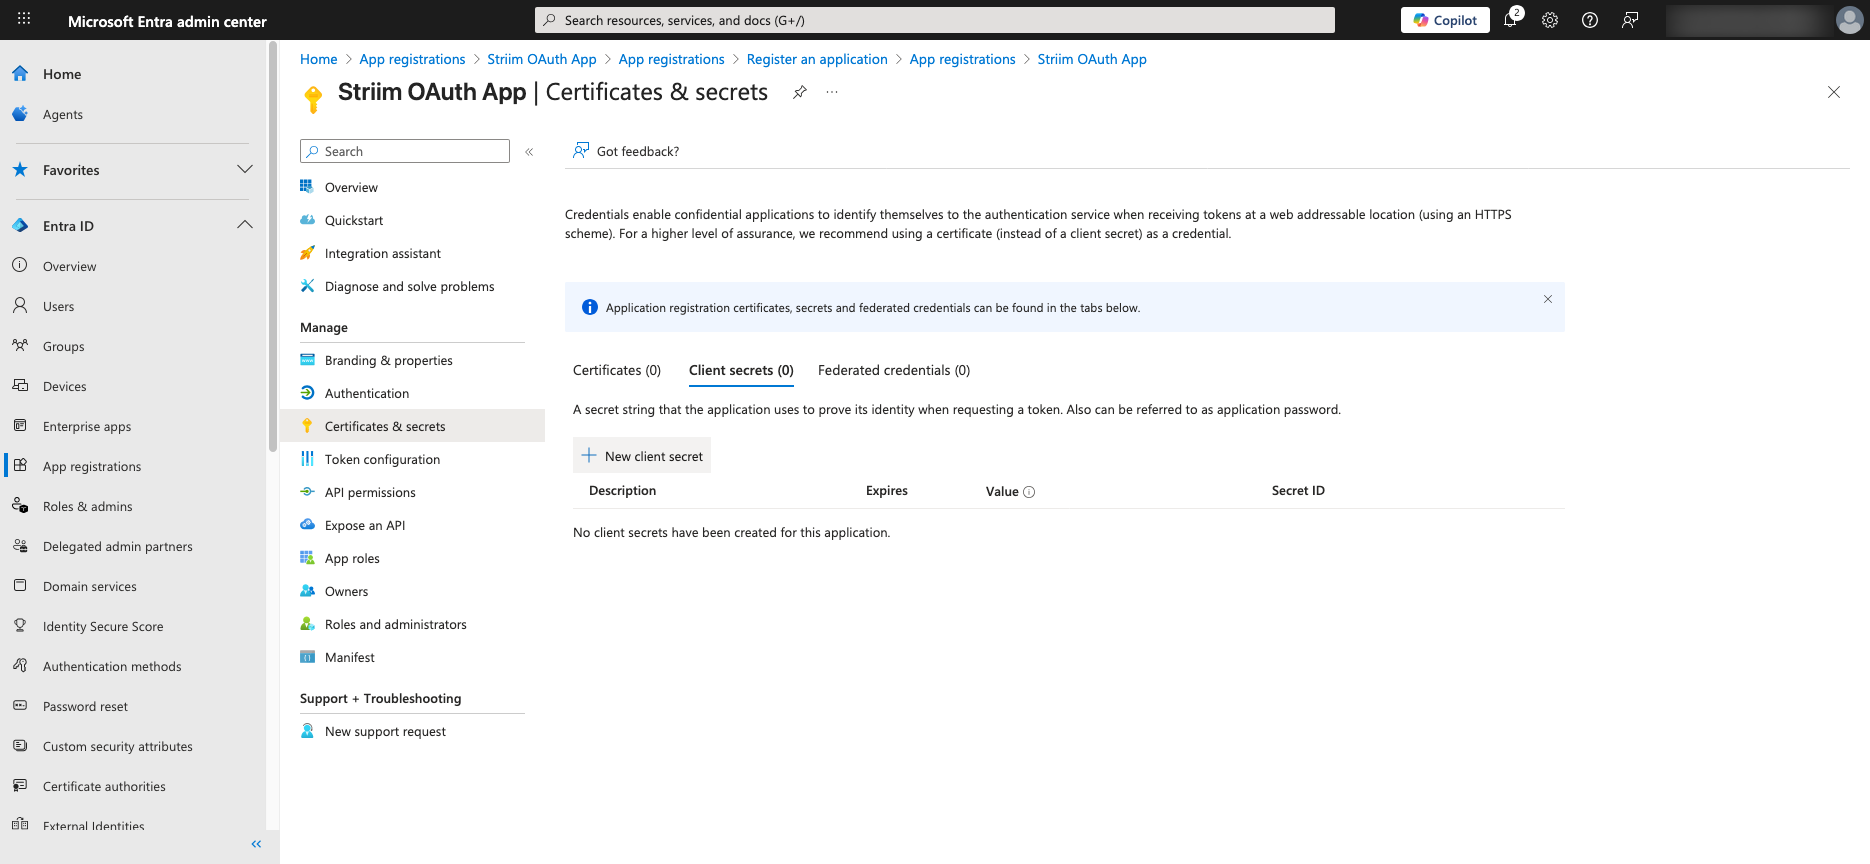
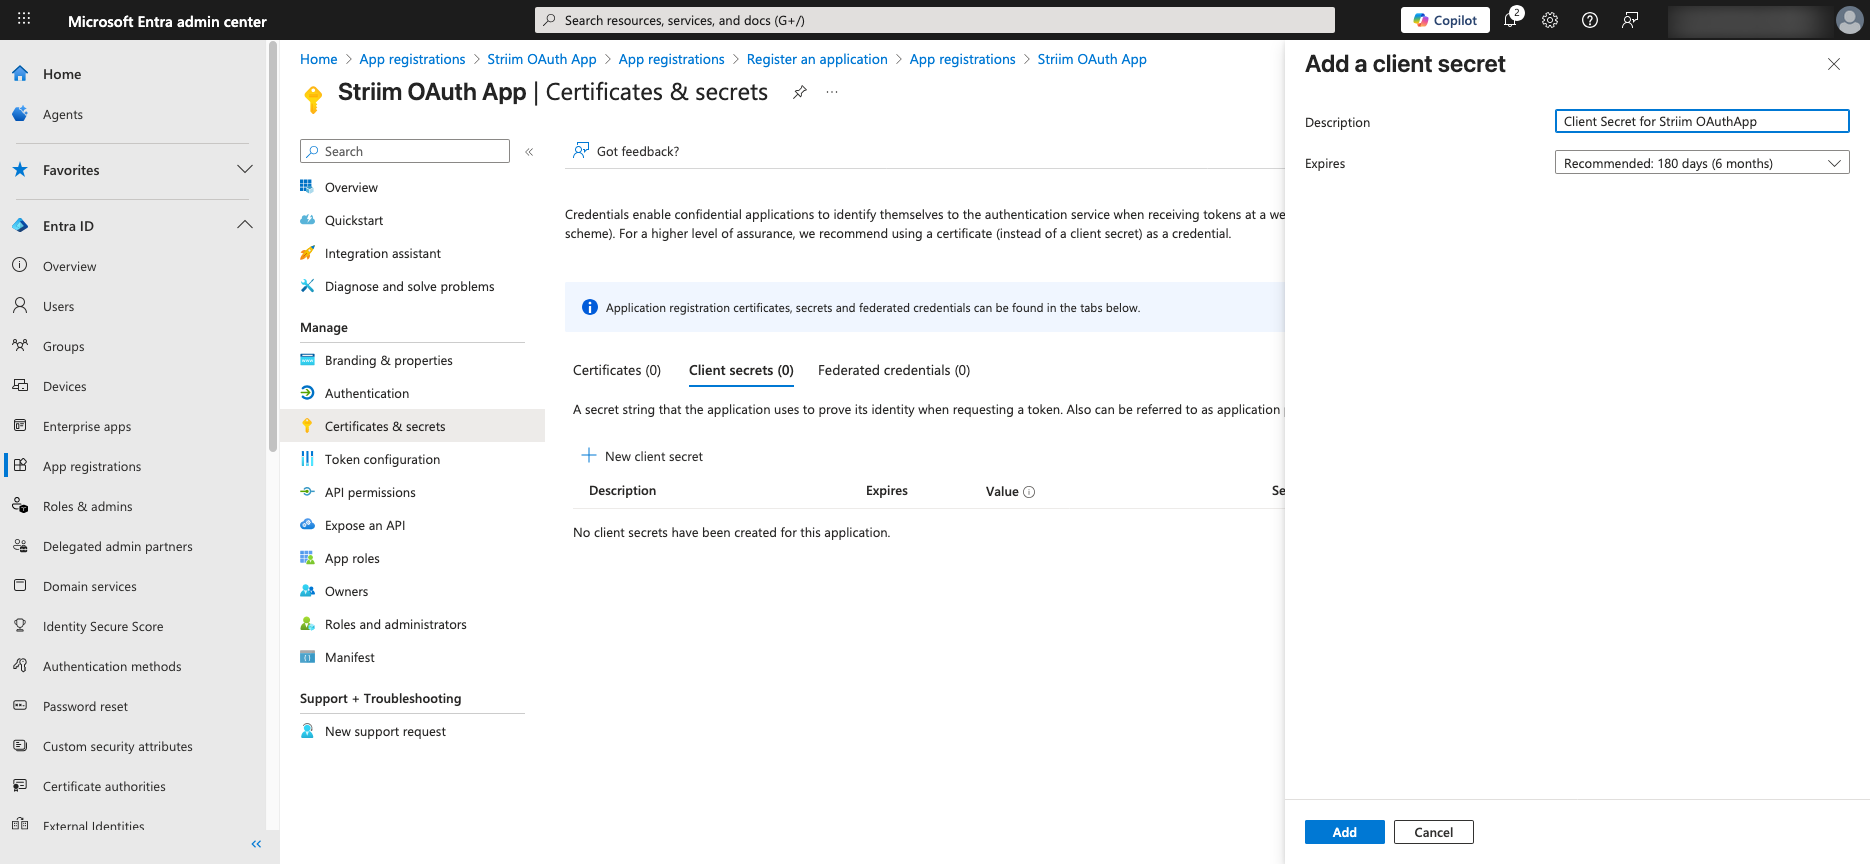
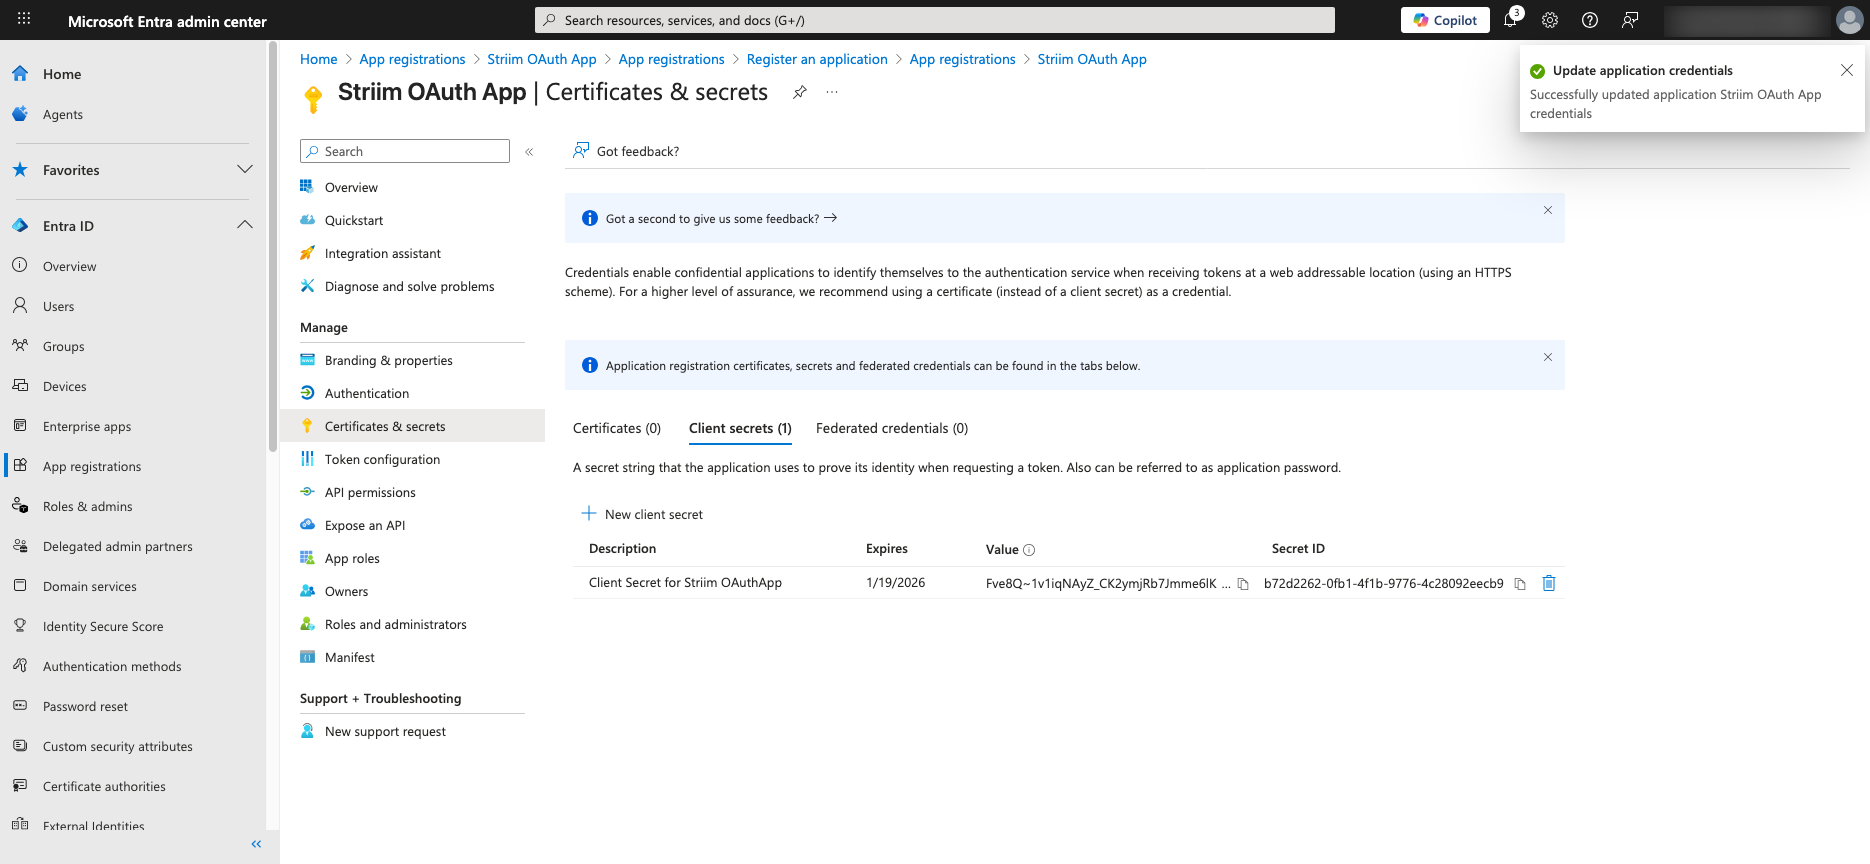
Generating a client secret or certificate
Create a client secret under Certificates & secrets for secure authentication.
Click Certificates & secrets in the second-level menu for the App.
Add a description to the secret and click Add.
Review the newly created certificate or secret.
After completing all steps, review the configuration summary.
For more information, see Microsoft documentation on creating a client secret.
Obtain access token (OAuth 2.0 Authorization Code Flow)
Use these steps to manually obtain an access token for testing or custom integrations.
Direct the user to the Azure AD authorization endpoint to get an authorization code:
https://login.microsoftonline.com/{tenant}/oauth2/v2.0/authorize?
  client_id=your-client-id&
  response_type=code&
  redirect_uri=https://your-redirect-uri&
  scope=https://<yourorgname>.businesscentral.dynamics.com/.default offline_access&
  state=random-state-string
Exchange this code for an access token by making a POST request to the token endpoint:
https://login.microsoftonline.com/{tenant}/oauth2/v2.0/token
  client_id=your-client-id&
  client_secret=your-client-secret&
  code=authorization-code-received&
  redirect_uri=https://your-redirect-uri&
  grant_type=authorization_code
For more details, see Microsoft OAuth 2.0 authorization code flow documentation.
Obtain the organization URL
To find your Microsoft Dynamics 365 Business Central organization’s URL:
Sign in at
https://m365.cloud.microsoft/apps/with your credentials.Select the Dynamics 365 Business Central App you wish to connect to. The organization’s URL will appear in the browser’s address bar and looks like:
https://<yourorgname>.businesscentral.dynamics.com/Example:
https://org00000000.businesscentral.dynamics.com/
Setting up a connection profile in Striim
A connection profile stores the authentication details required to connect Striim components to external systems. By creating a reusable profile, you can avoid re-entering credentials and simplify endpoint configuration across multiple applications.
Authentication for Microsoft Dynamics 365 Business Central
Striim uses OAuth 2.0 for authenticating Microsoft Dynamics 365 Business Central connections. This method leverages Azure Active Directory for secure token-based access. To configure OAuth, you must register an application in Azure AD and provide credentials such as the Tenant ID and the Server Root URL. These details allow Striim to request access tokens for authorized communication with Business Central APIs.
Create a connection profile for Microsoft Dynamics 365 Business Central Reader
In the Striim console, navigate to Manage > Connection Profiles.
Click Add Connection Profile.
Enter a Profile Name that clearly identifies this connection (for example, BCWriterProfile).
Select Endpoint Type as Microsoft Dynamics 365 Business Central.
Provide the required authentication details:
Tenant ID: Your Microsoft Azure Active Directory tenant identifier.
Server Root URL: The Business Central instance URL (for example,
https://yourorg.businesscentral.dynamics.com).
Click Save to create the connection profile.
Once saved, this profile can be used when configuring the Microsoft Dynamics 365 Business Central Reader source in your Striim application.