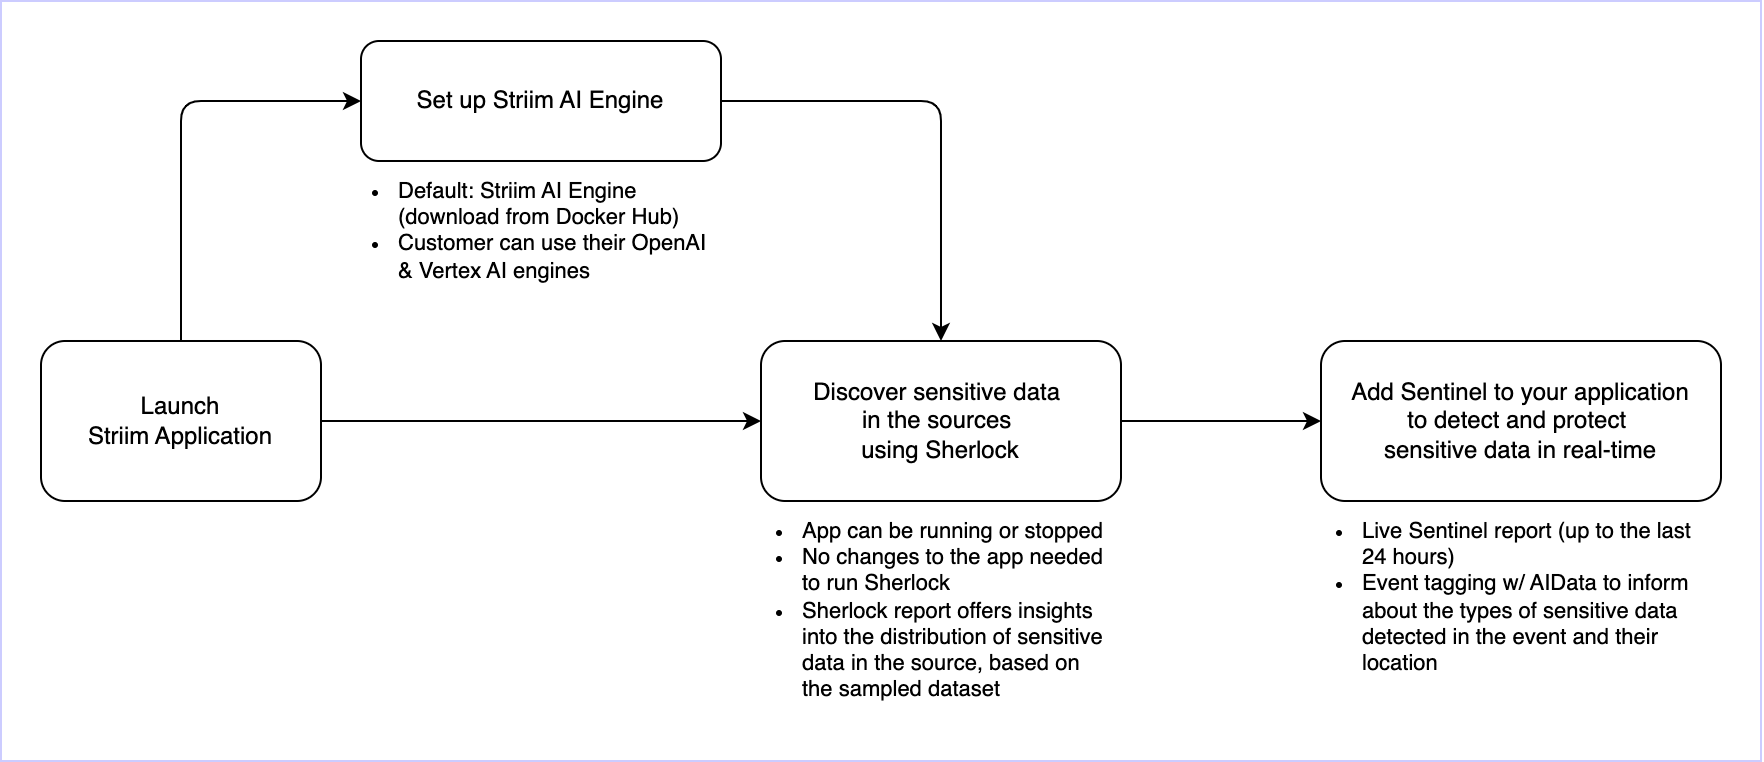
Example overview: Using Sherlock and Sentinel for sensitive data governance
In this example, we show how you can use Sherlock AI and Sentinel AI for sensitive data governance in your Striim applications. Here’s a high-level overview of the workflow.
Setting up the Striim AI Engine
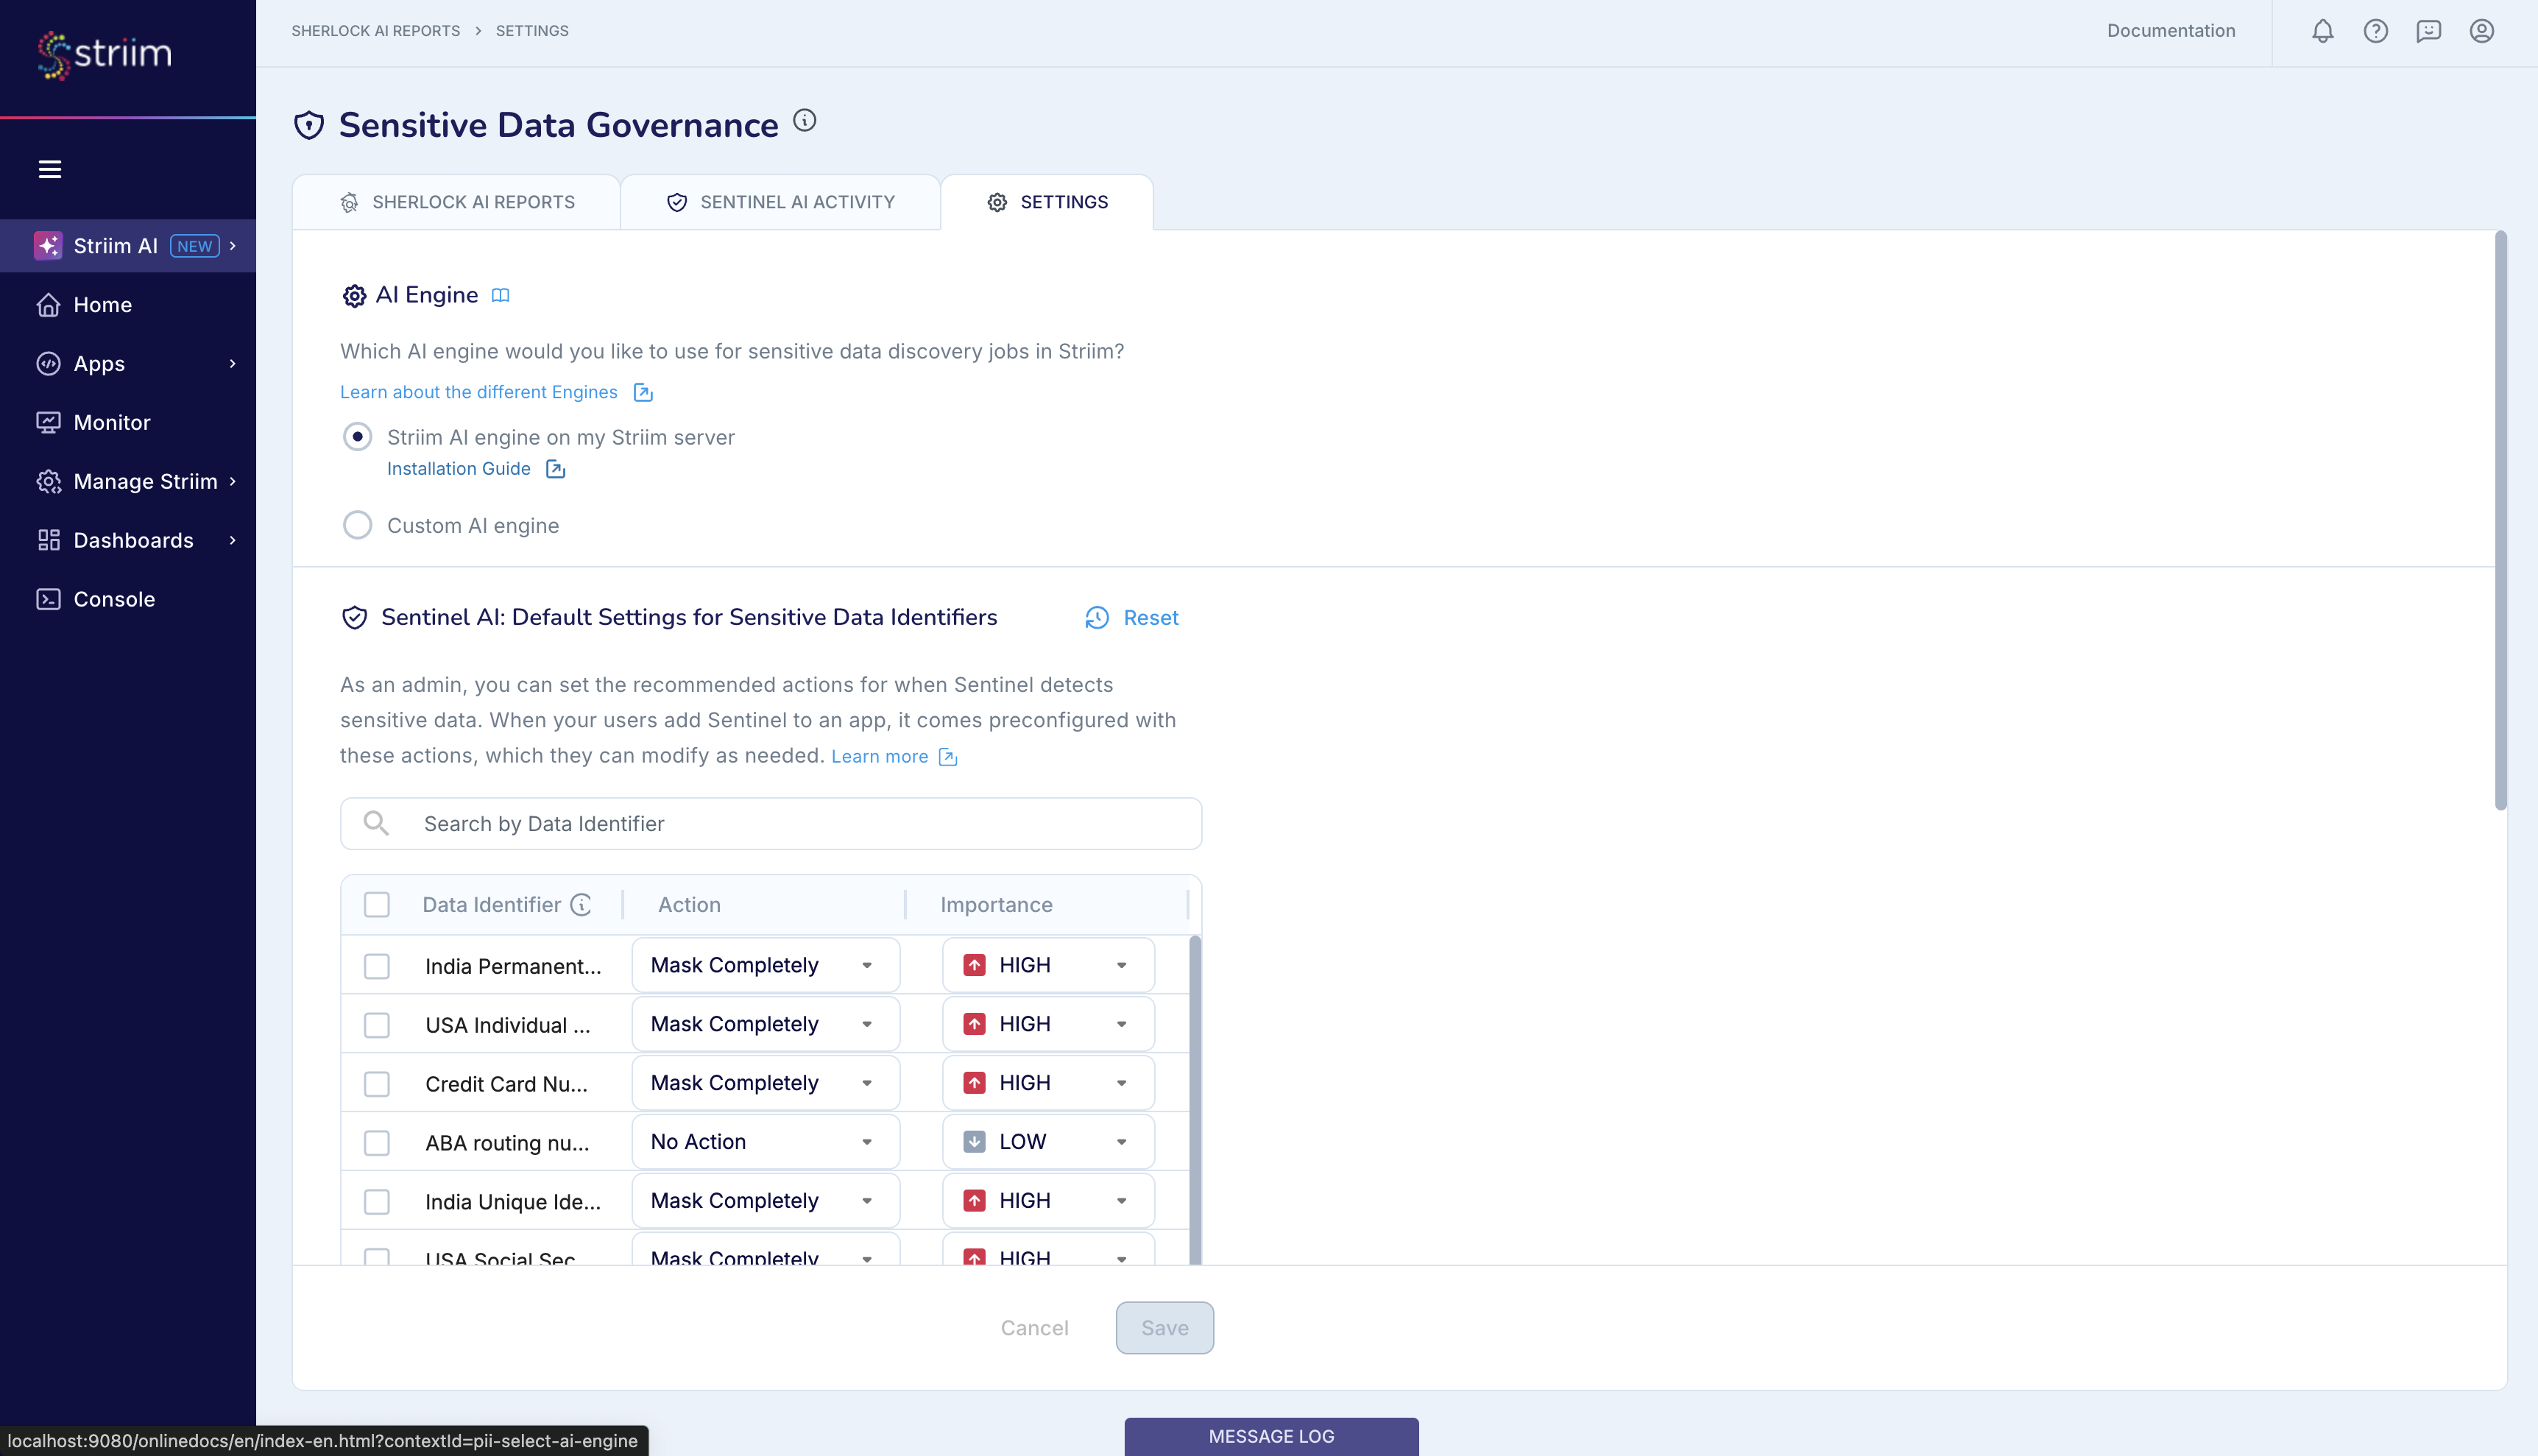
The first step is to set up the AI Engine for Sherlock and Sentinel. You can set up and use the default Striim AI Engine, or you can use your own OpenAI and Vertex AI Engines. If you have already set up the Striim AI Engine, you can skip this step.
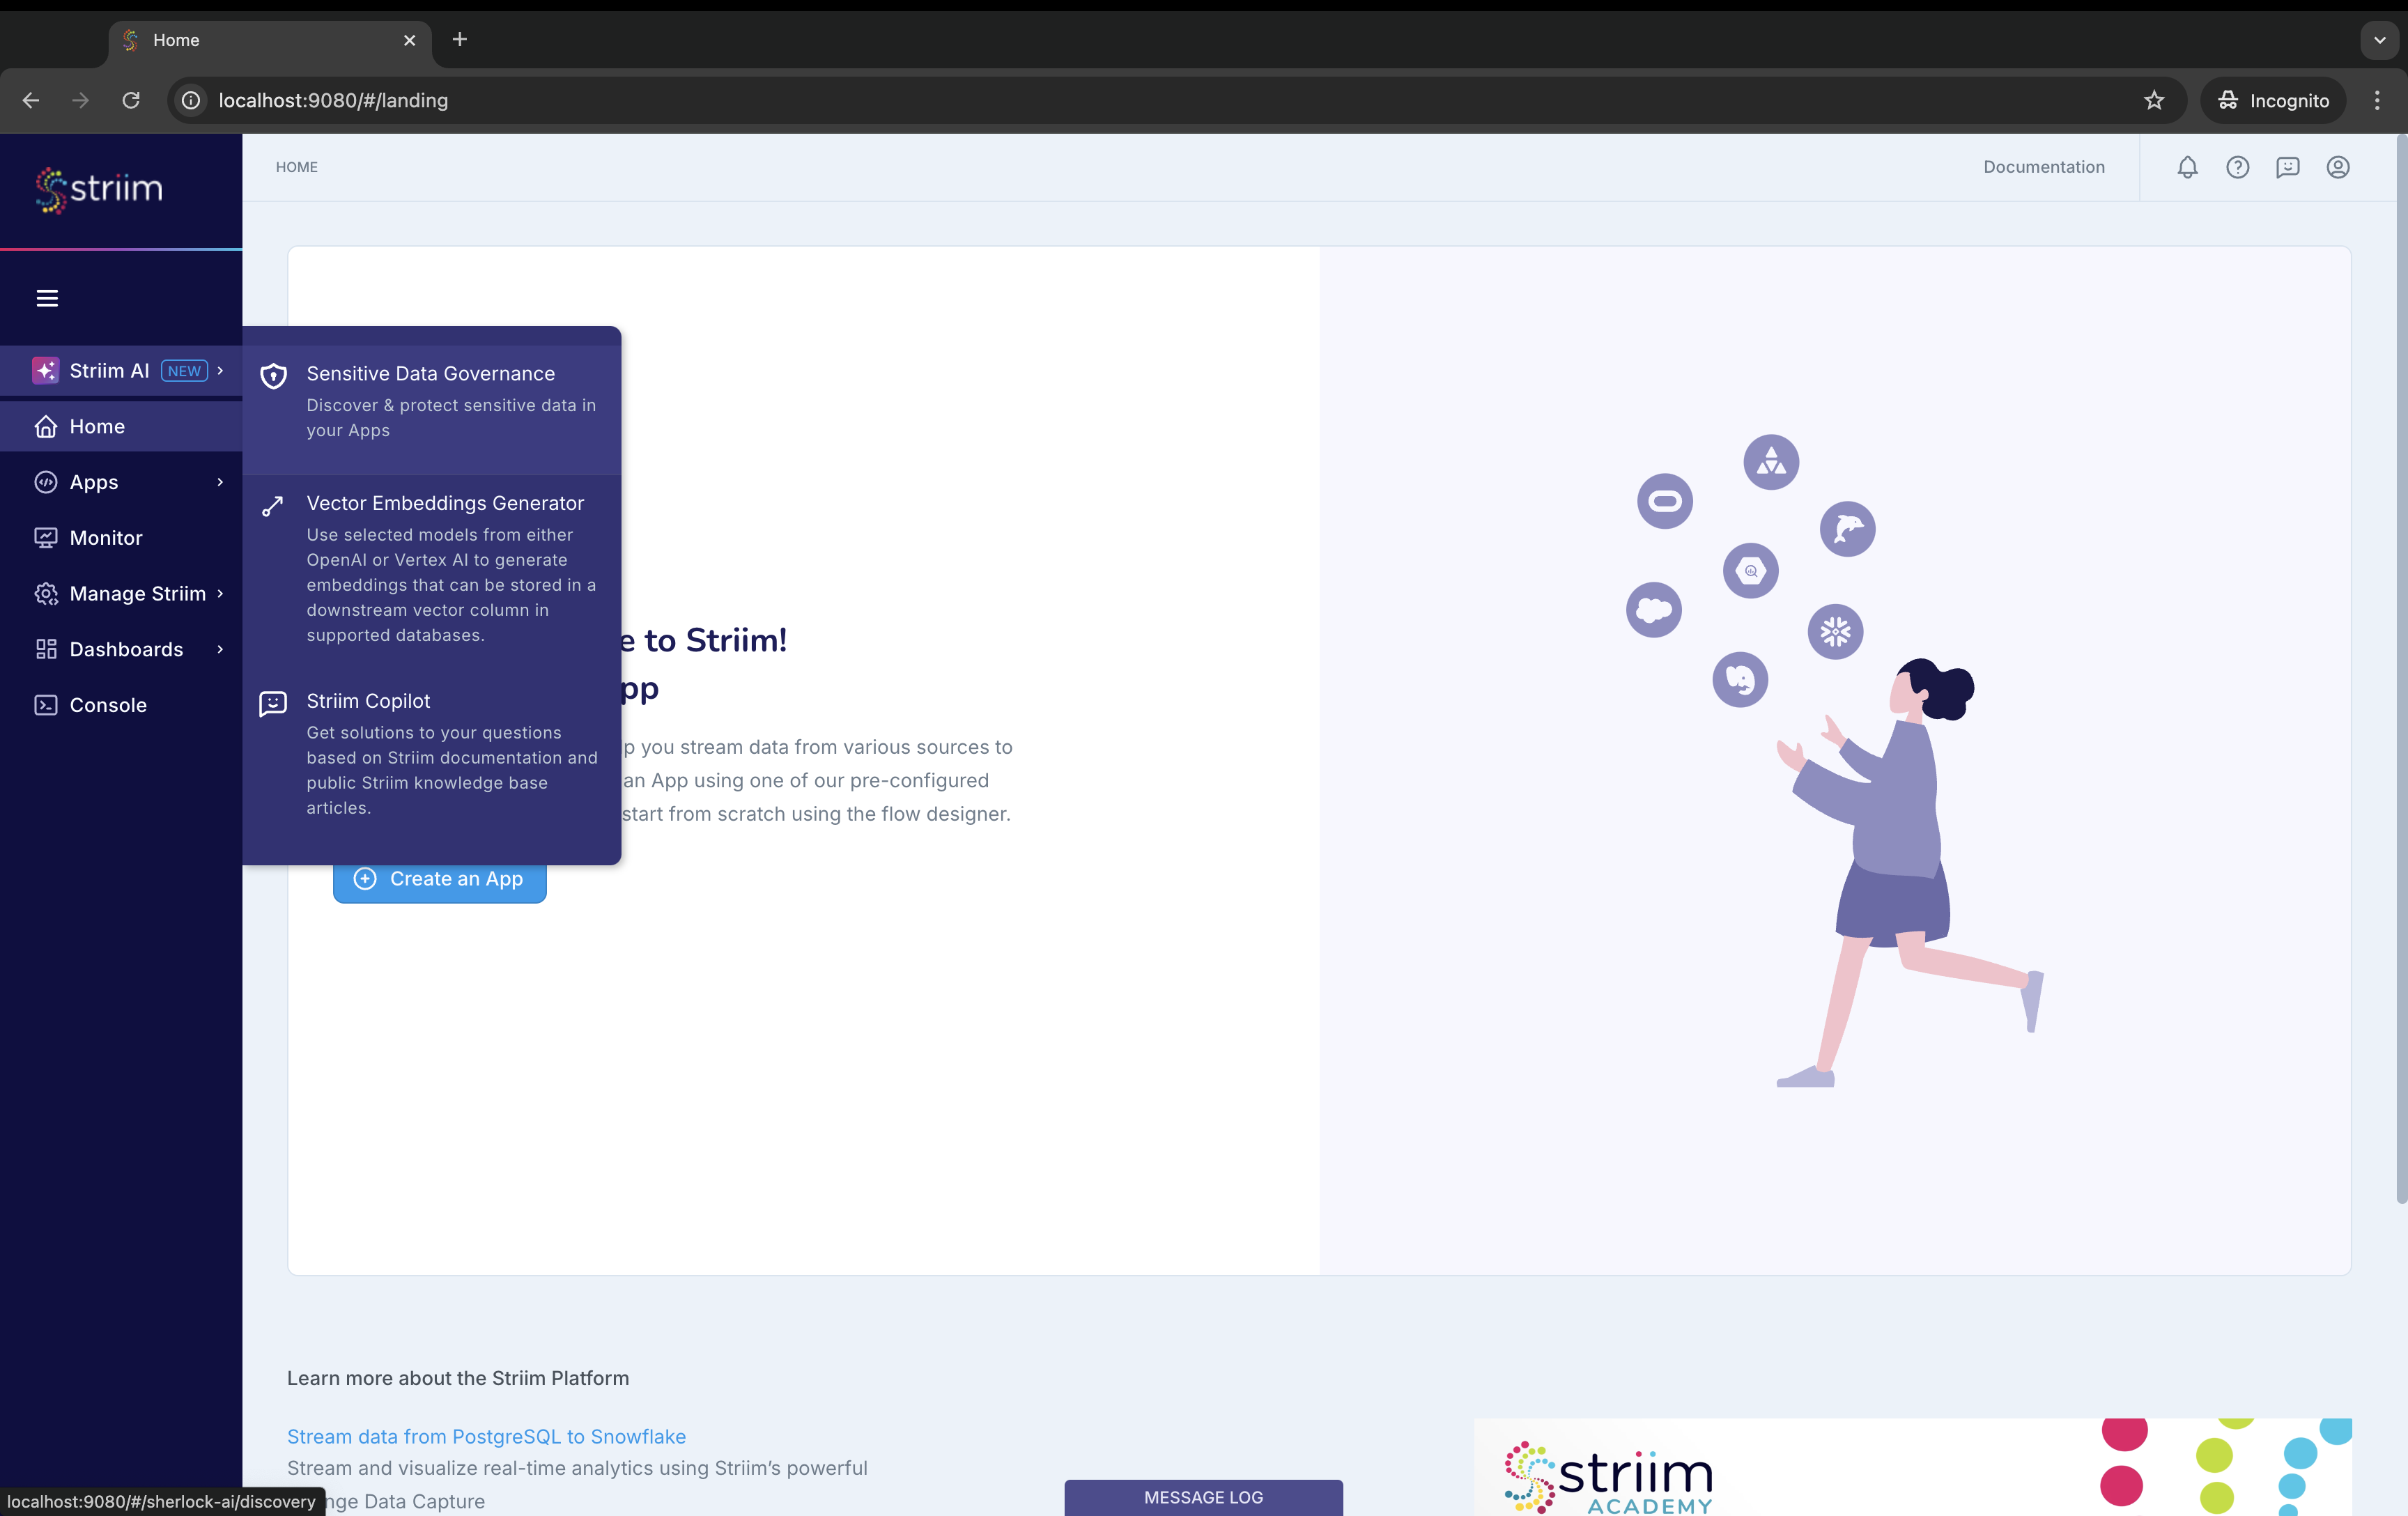
To set up the AI engines, you can go to the Striim AI menu and then to the Settings tab.
Sherlock for sensitive data discovery
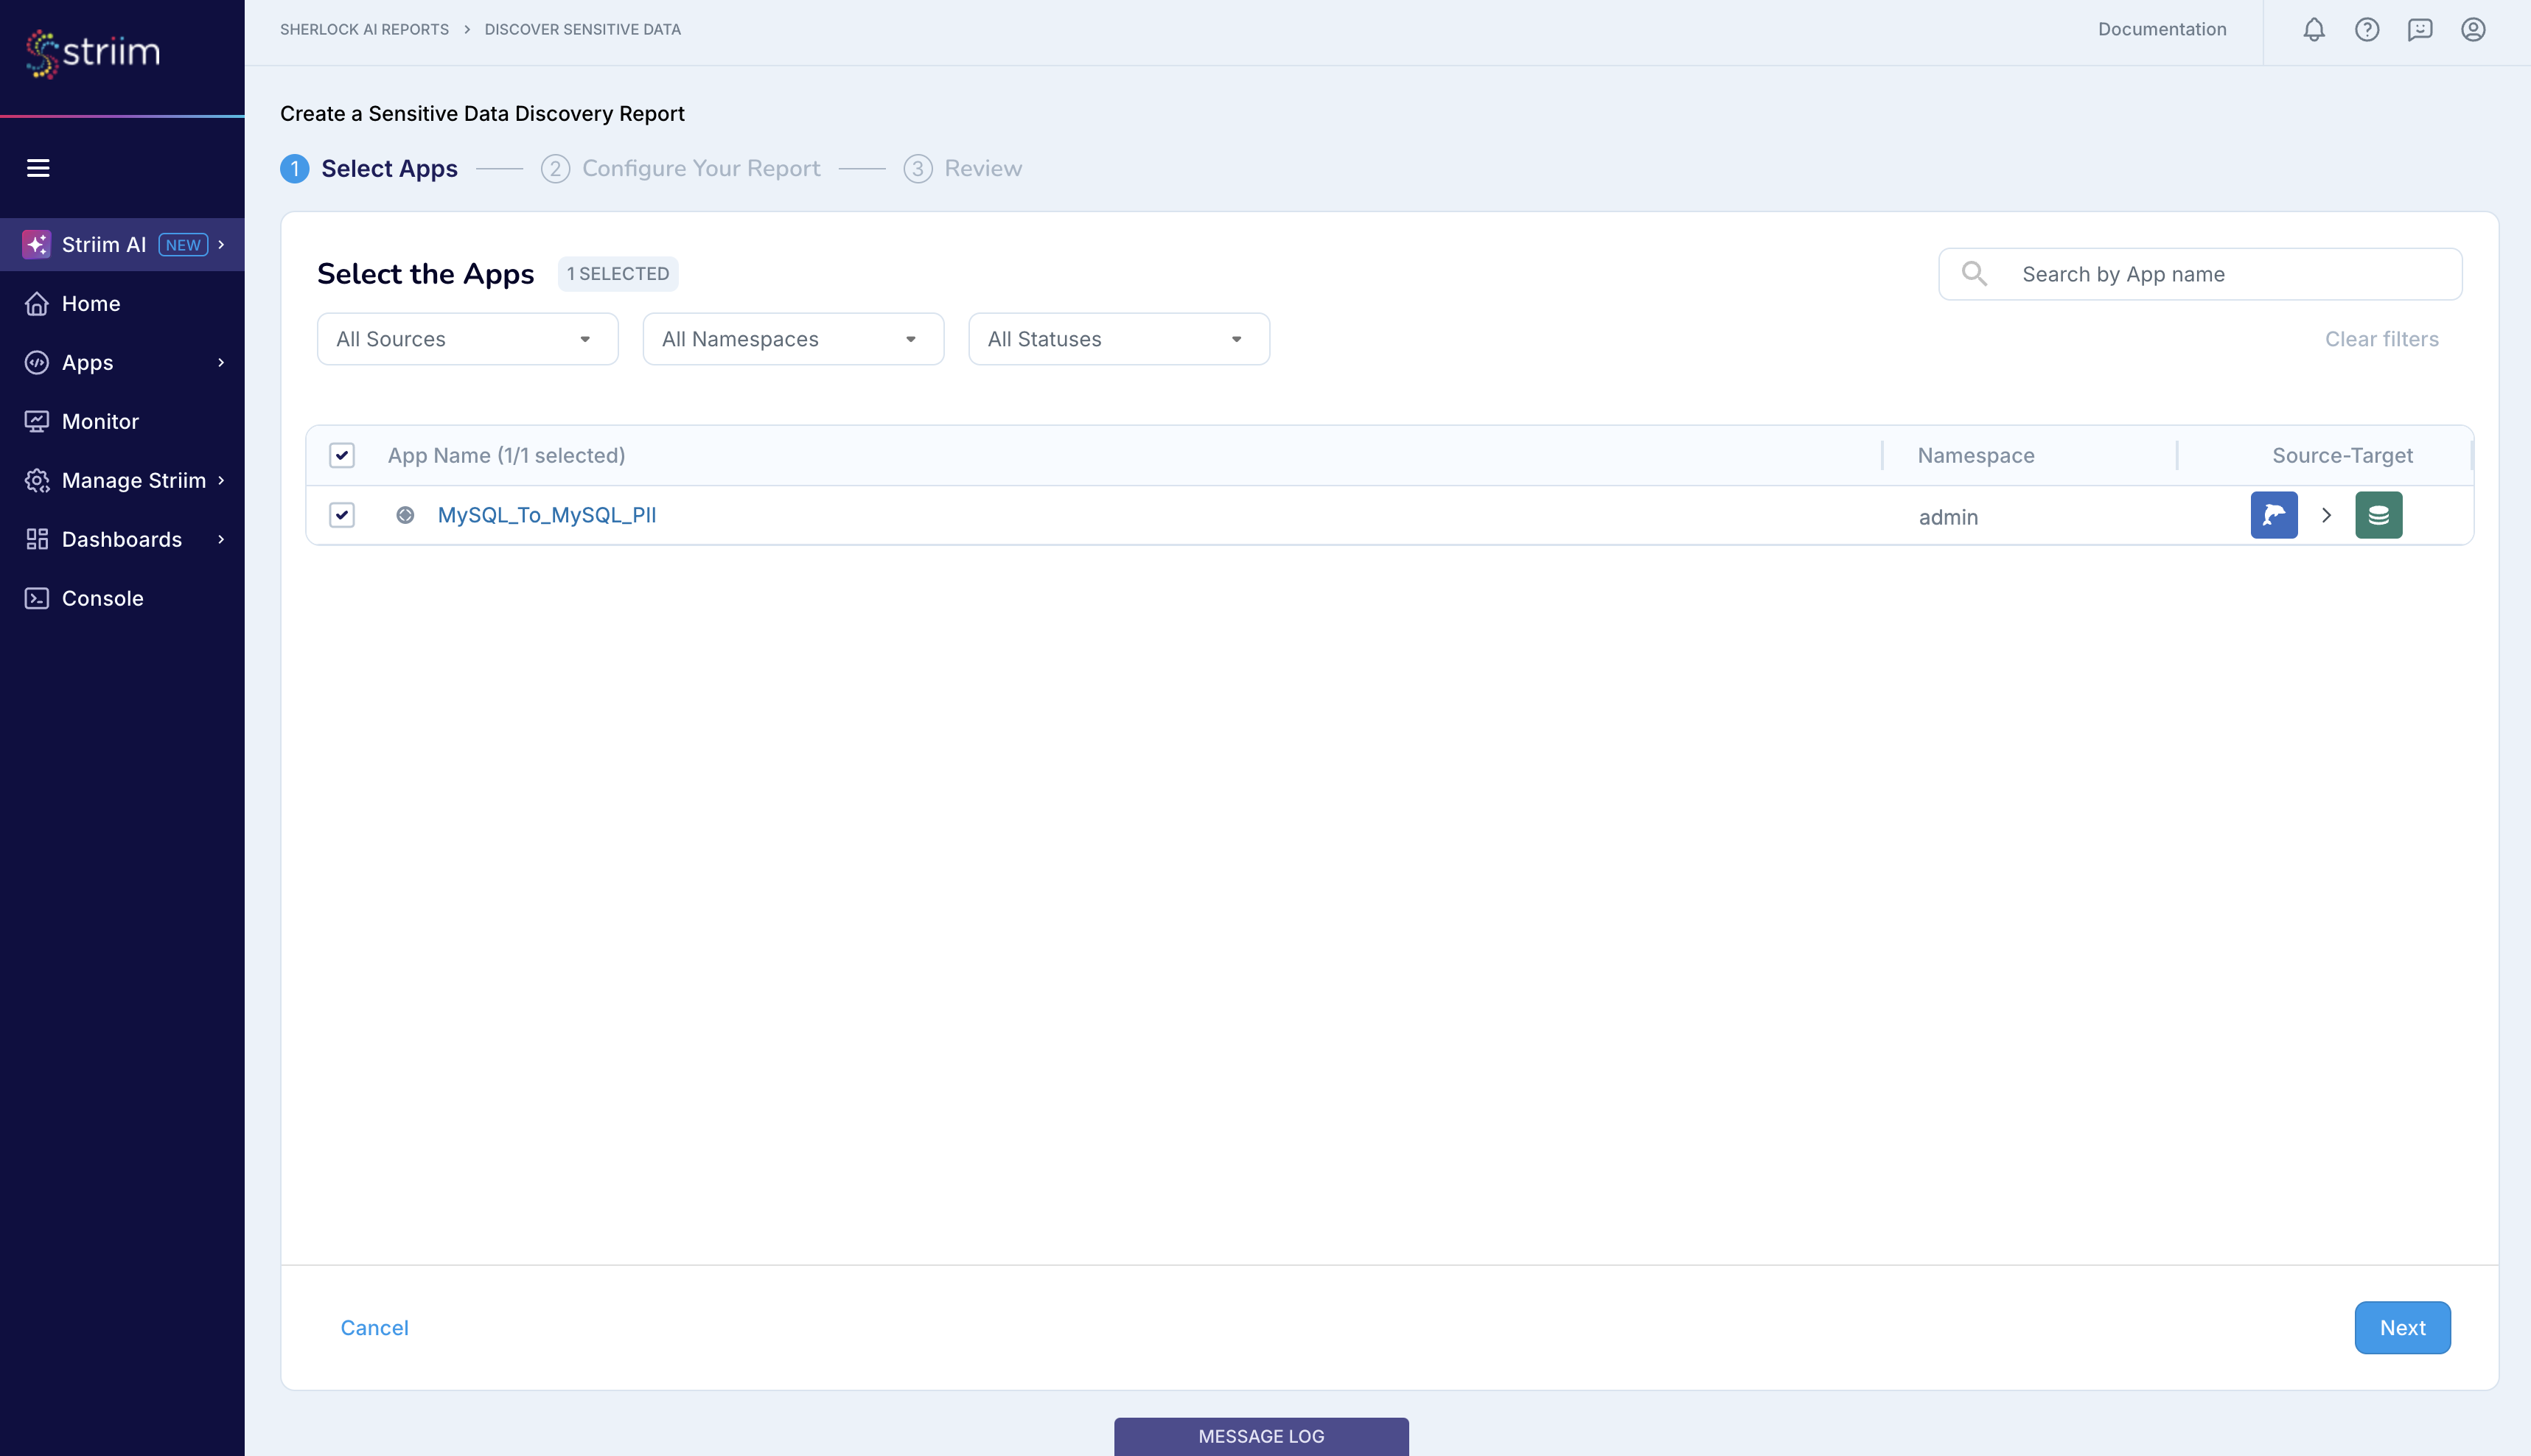
You can use Sherlock to discover sensitive data in the configured sources of your application in two ways - from the Striim AI menu and from the flow designer. In this example, our application name is MySQL_To_MySQL_PII.
Running Sherlock from the Striim AI menu
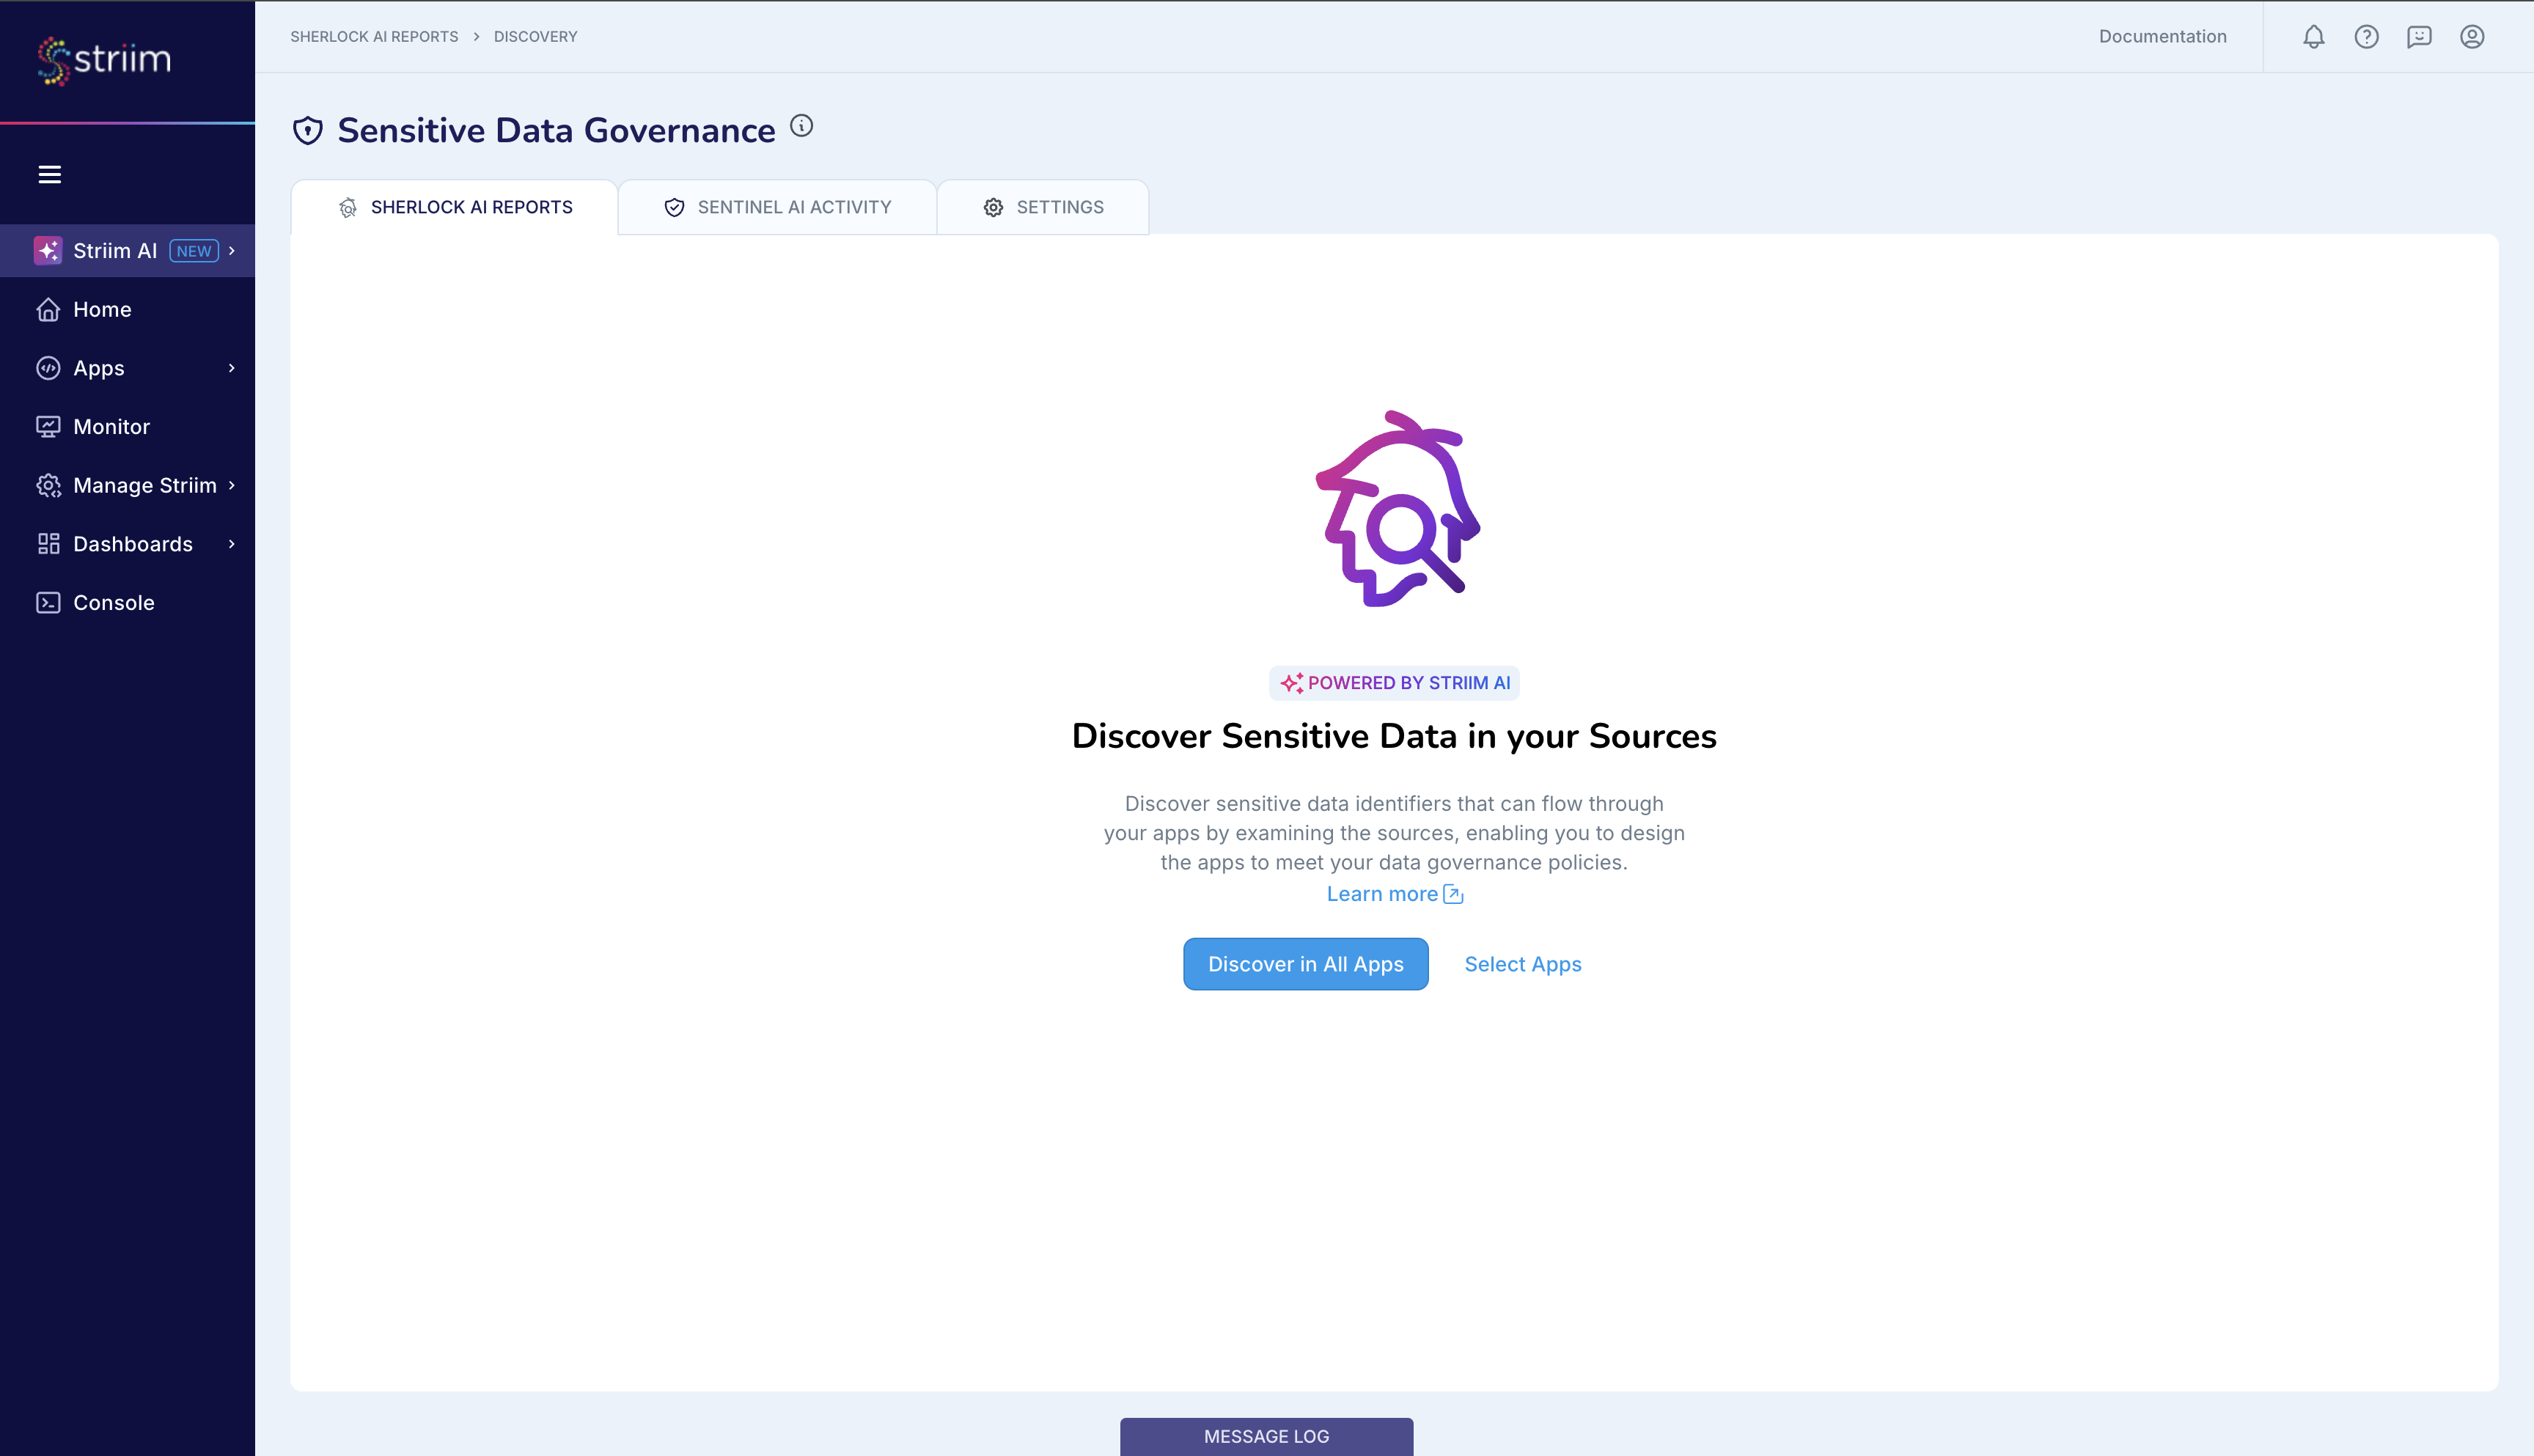
From the Striim AI menu, go to Sensitive Data Governance, and click Select Apps.
Configure Sherlock by selecting the MySQL_To_MySQL_PII app.
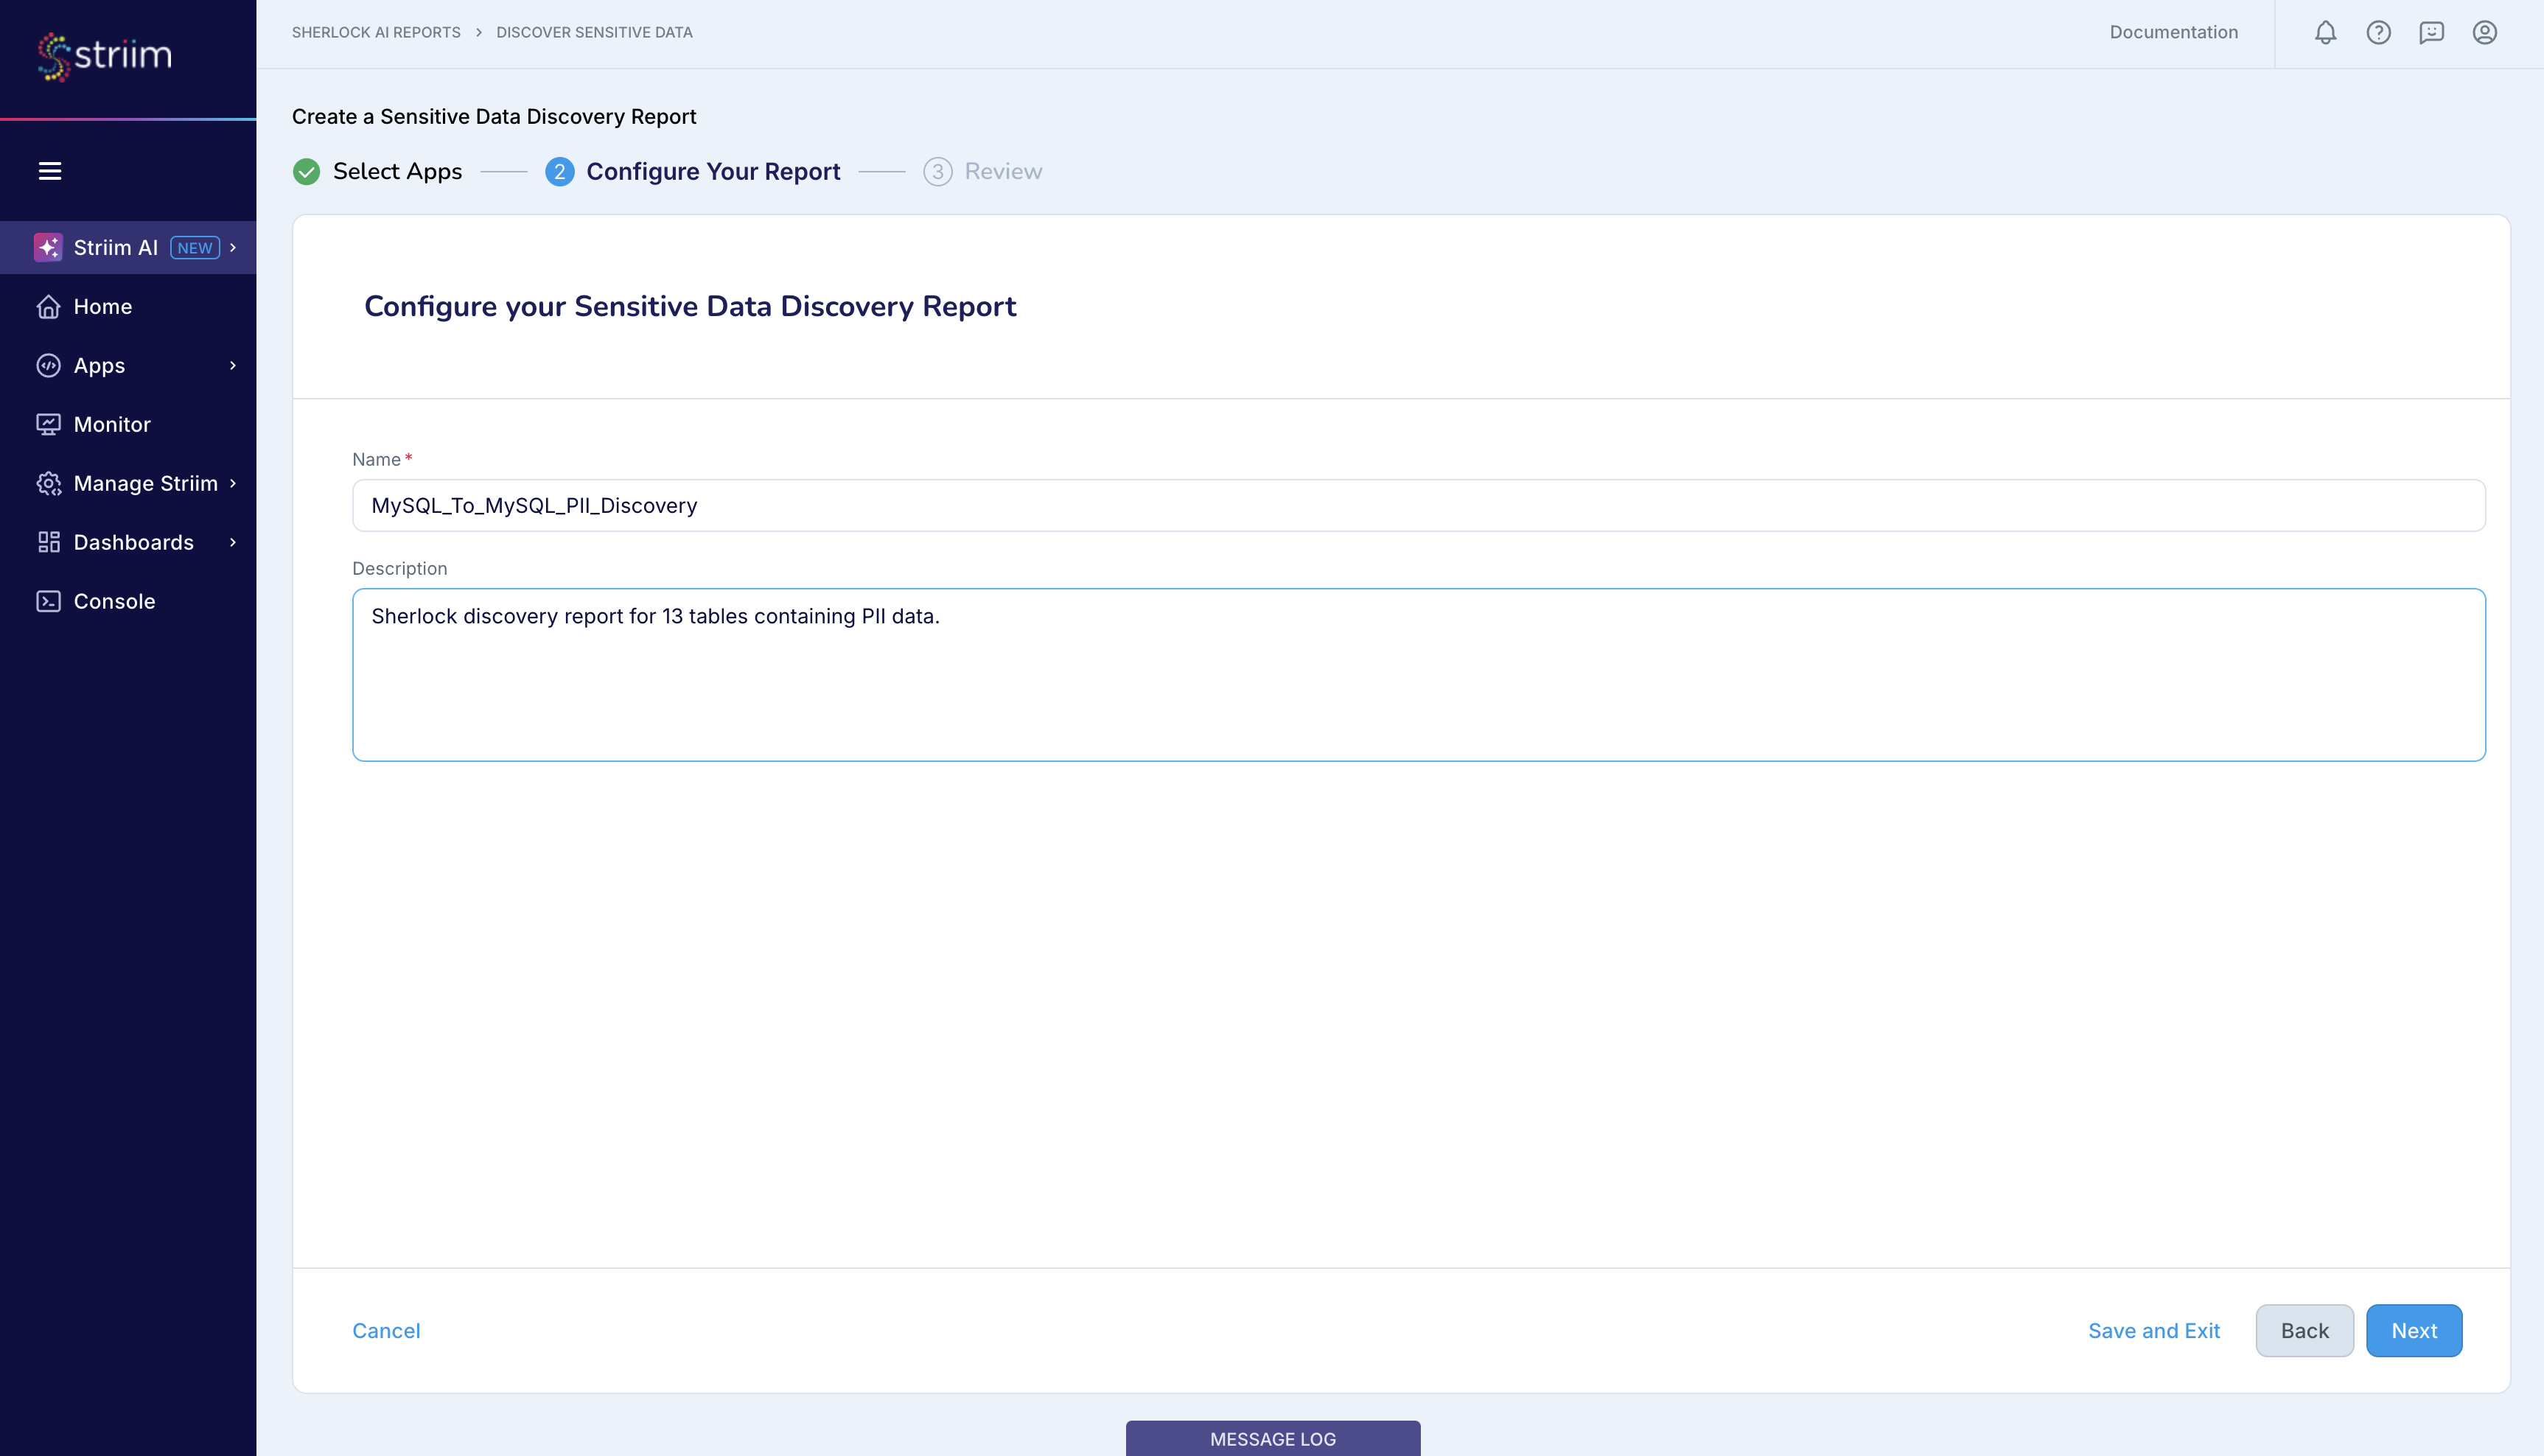
Provide a name for your Sherlock report. You can access this report anytime from the Striim AI menu and from the flow designer for the MySQL_To_MySQL_PII app.
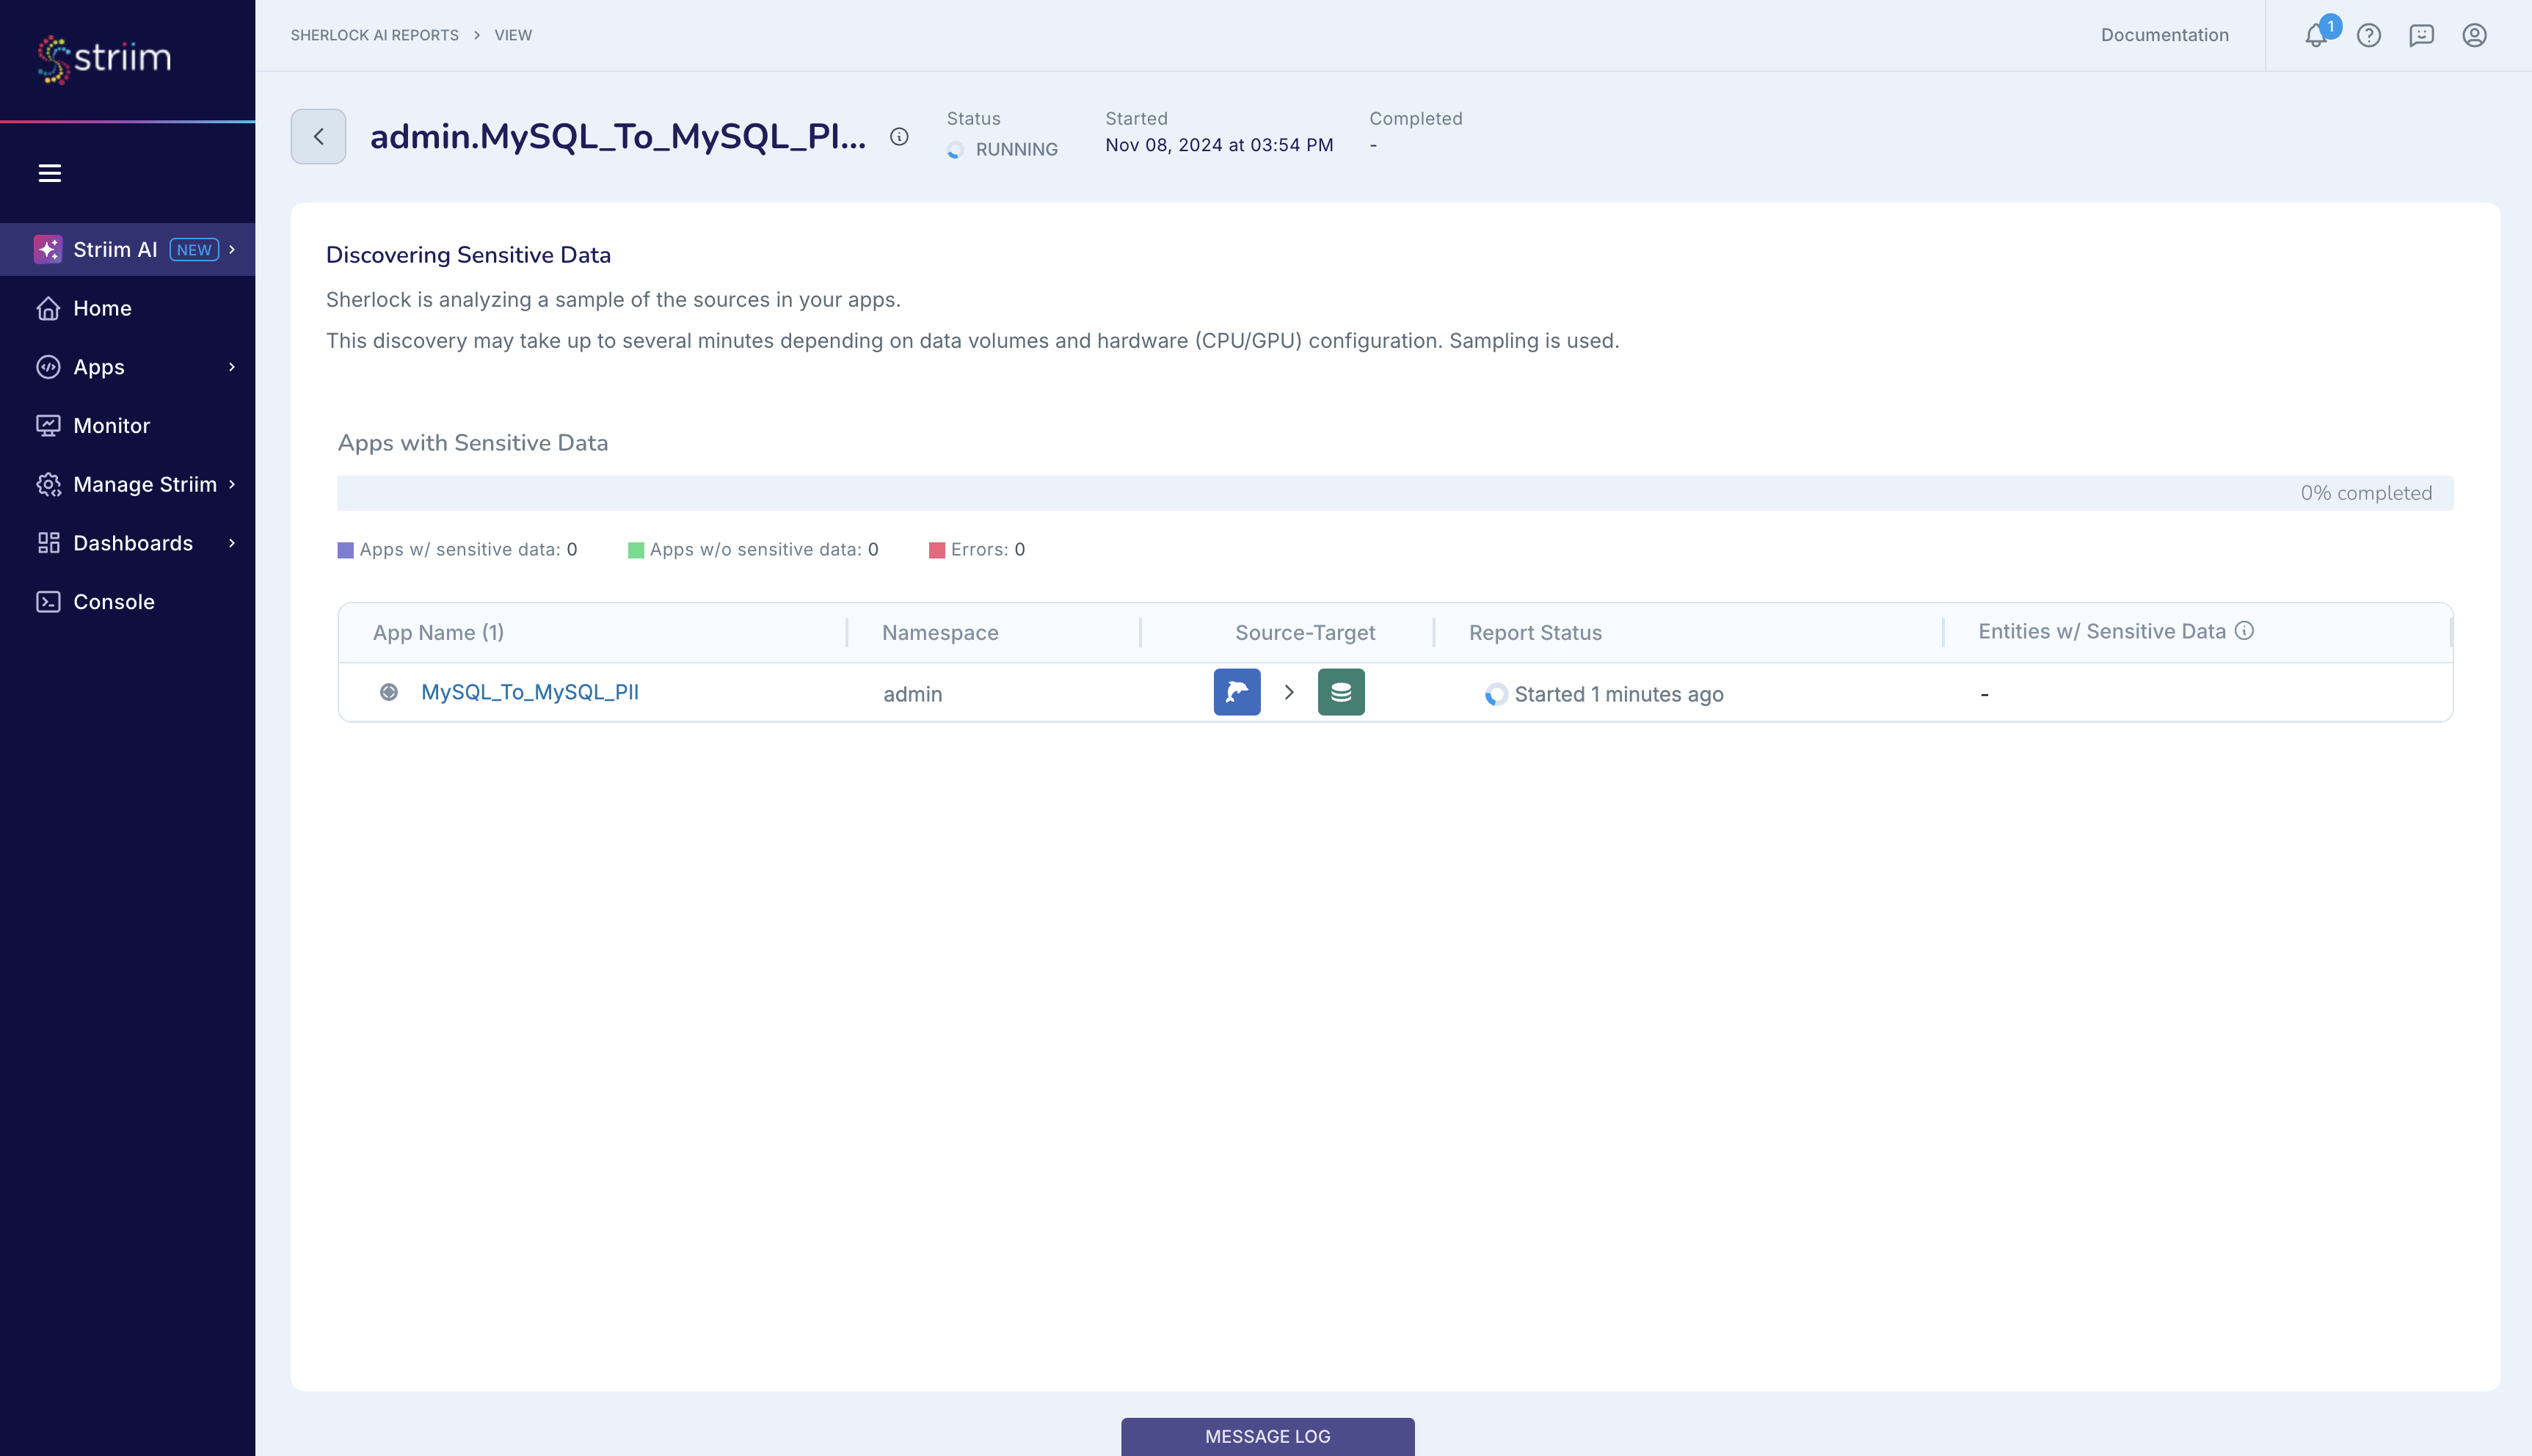
Complete the setup process and launch Sherlock. You can always see the status of your Sherlock jobs Striim AI menu, as shown below.
As described here, Sherlock takes a sample of your configured dataset and analyzes it for sensitive data. Sherlock limits its detection to datasets mentioned in the source configuration. You can see the types of sensitive data that Sherlock can detect in this page on Sensitive Data Identifiers. If the MySQL_To_MySQL_PII app were a CDC app, then Sherlock would be able to sample data only from tables where the source published updates during Sherlock’s sampling time window.
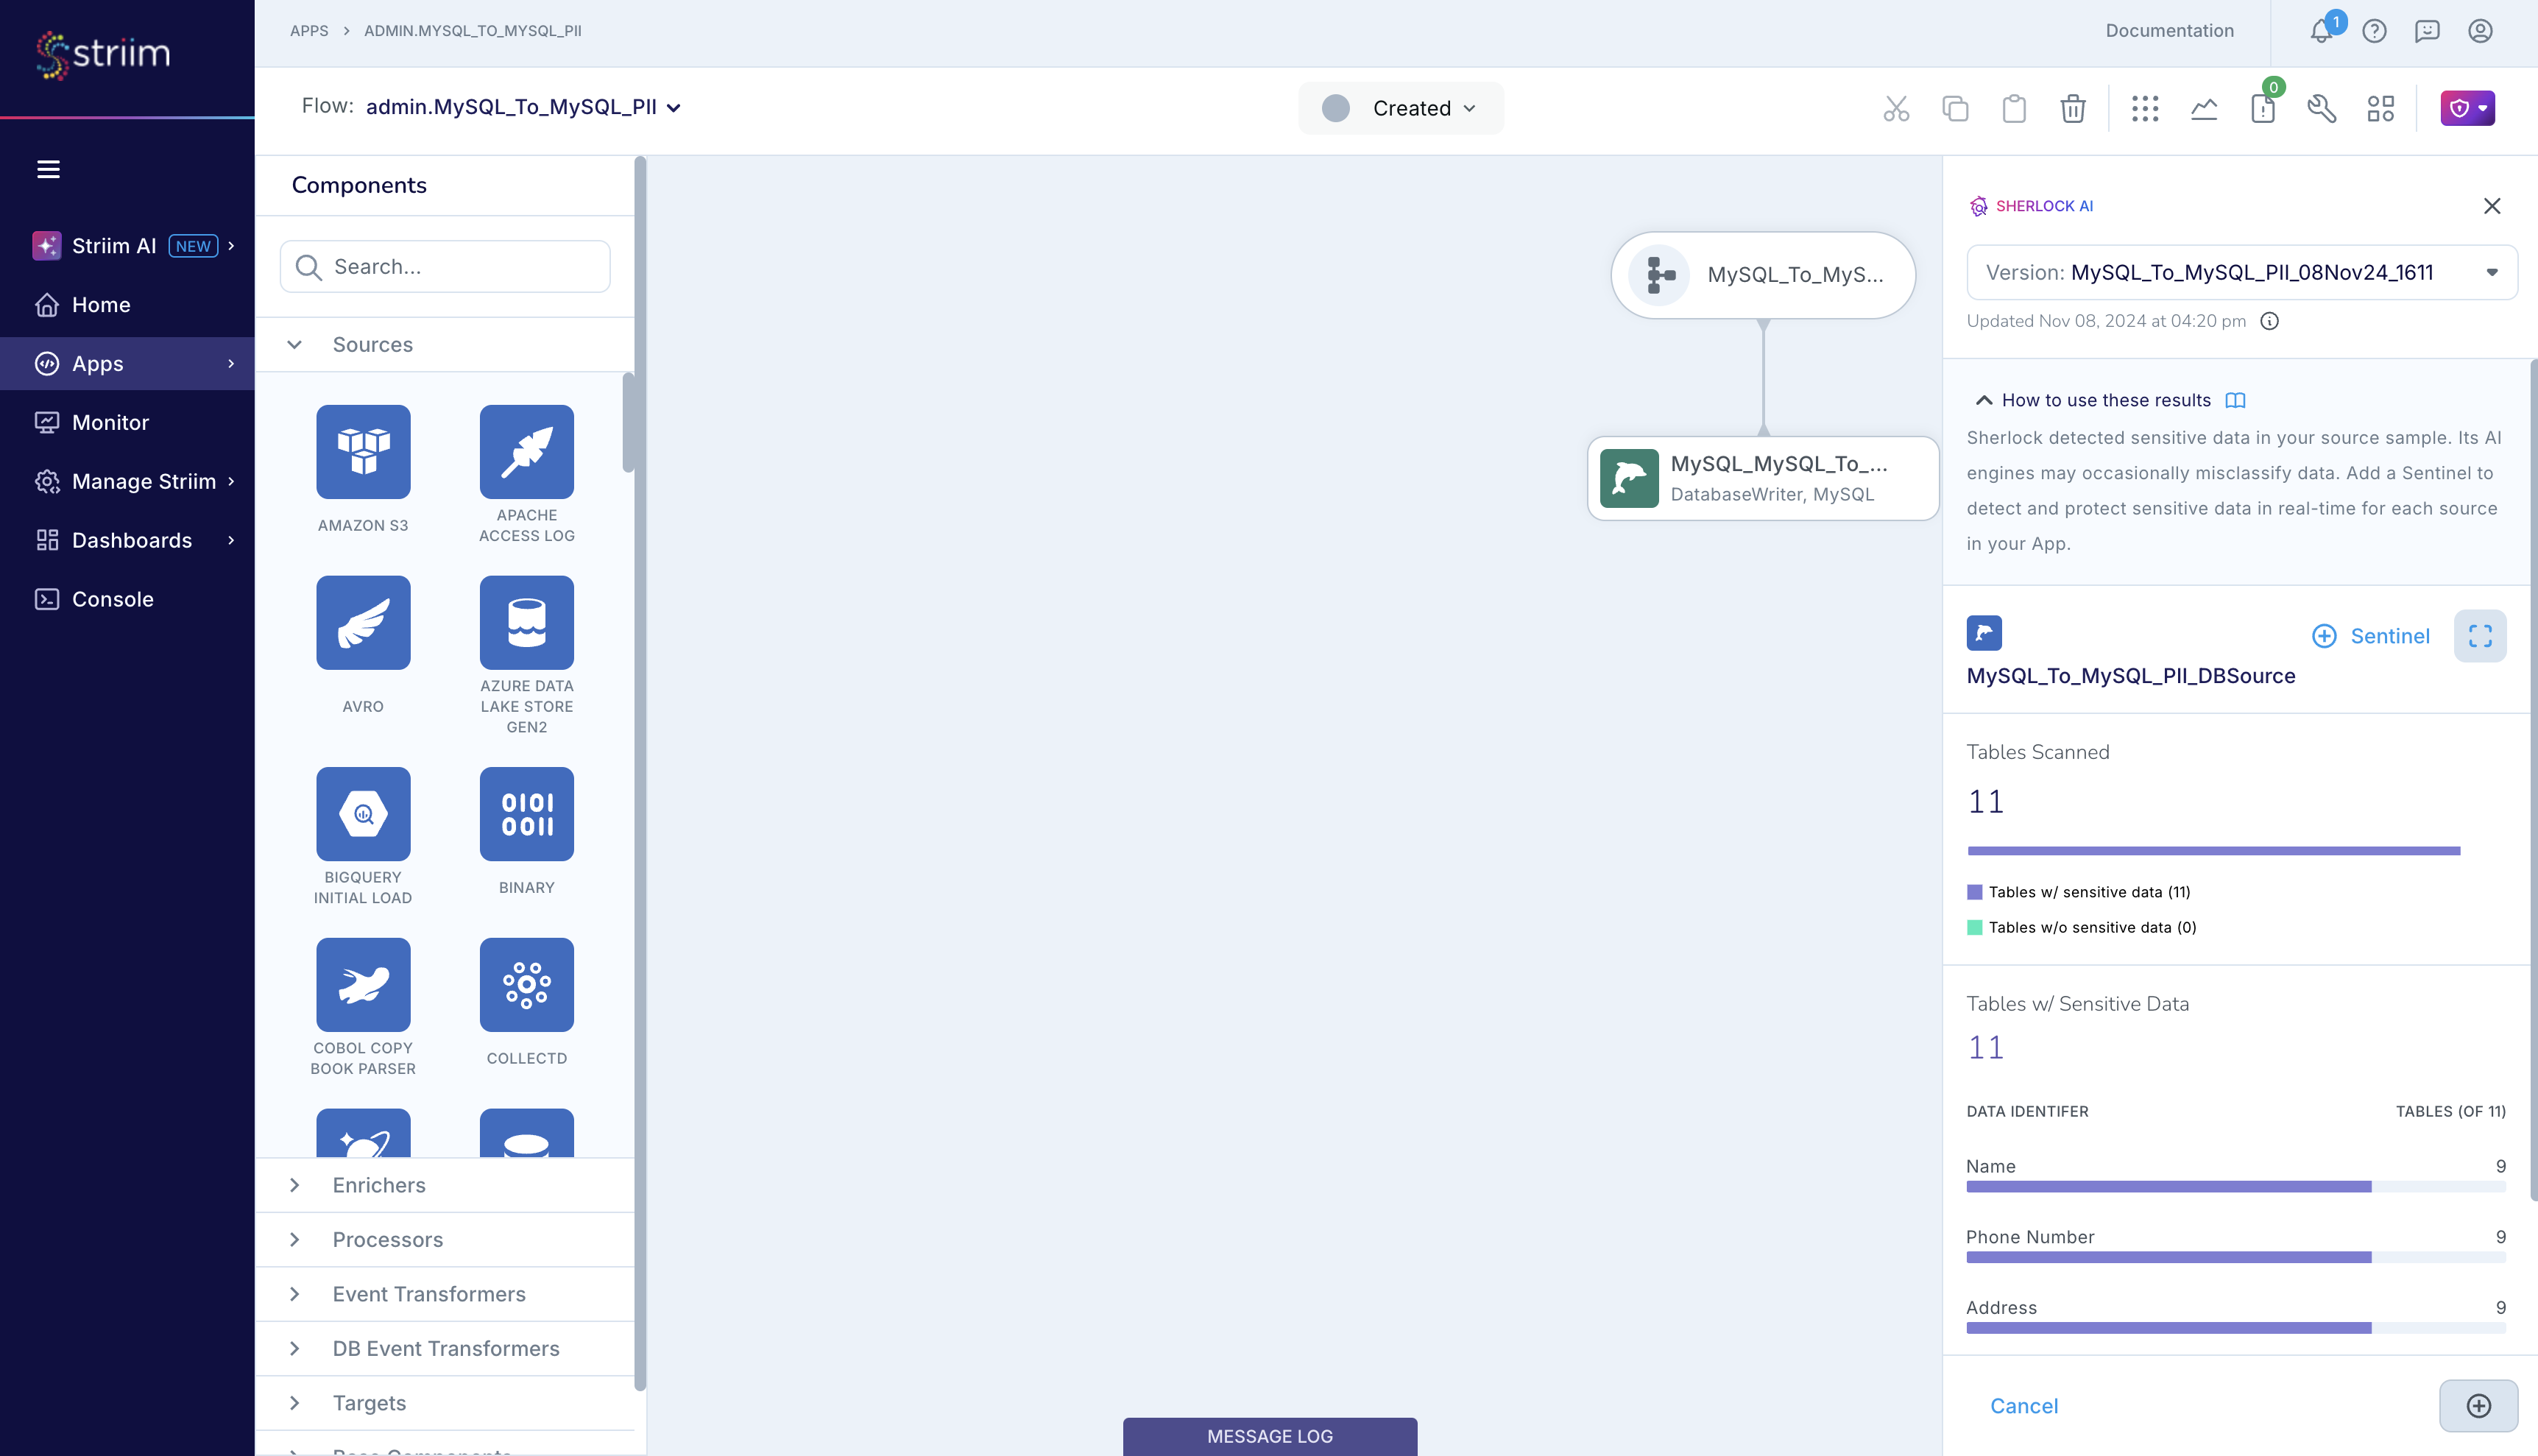
After Sherlock has completed its analysis, you can view its report.
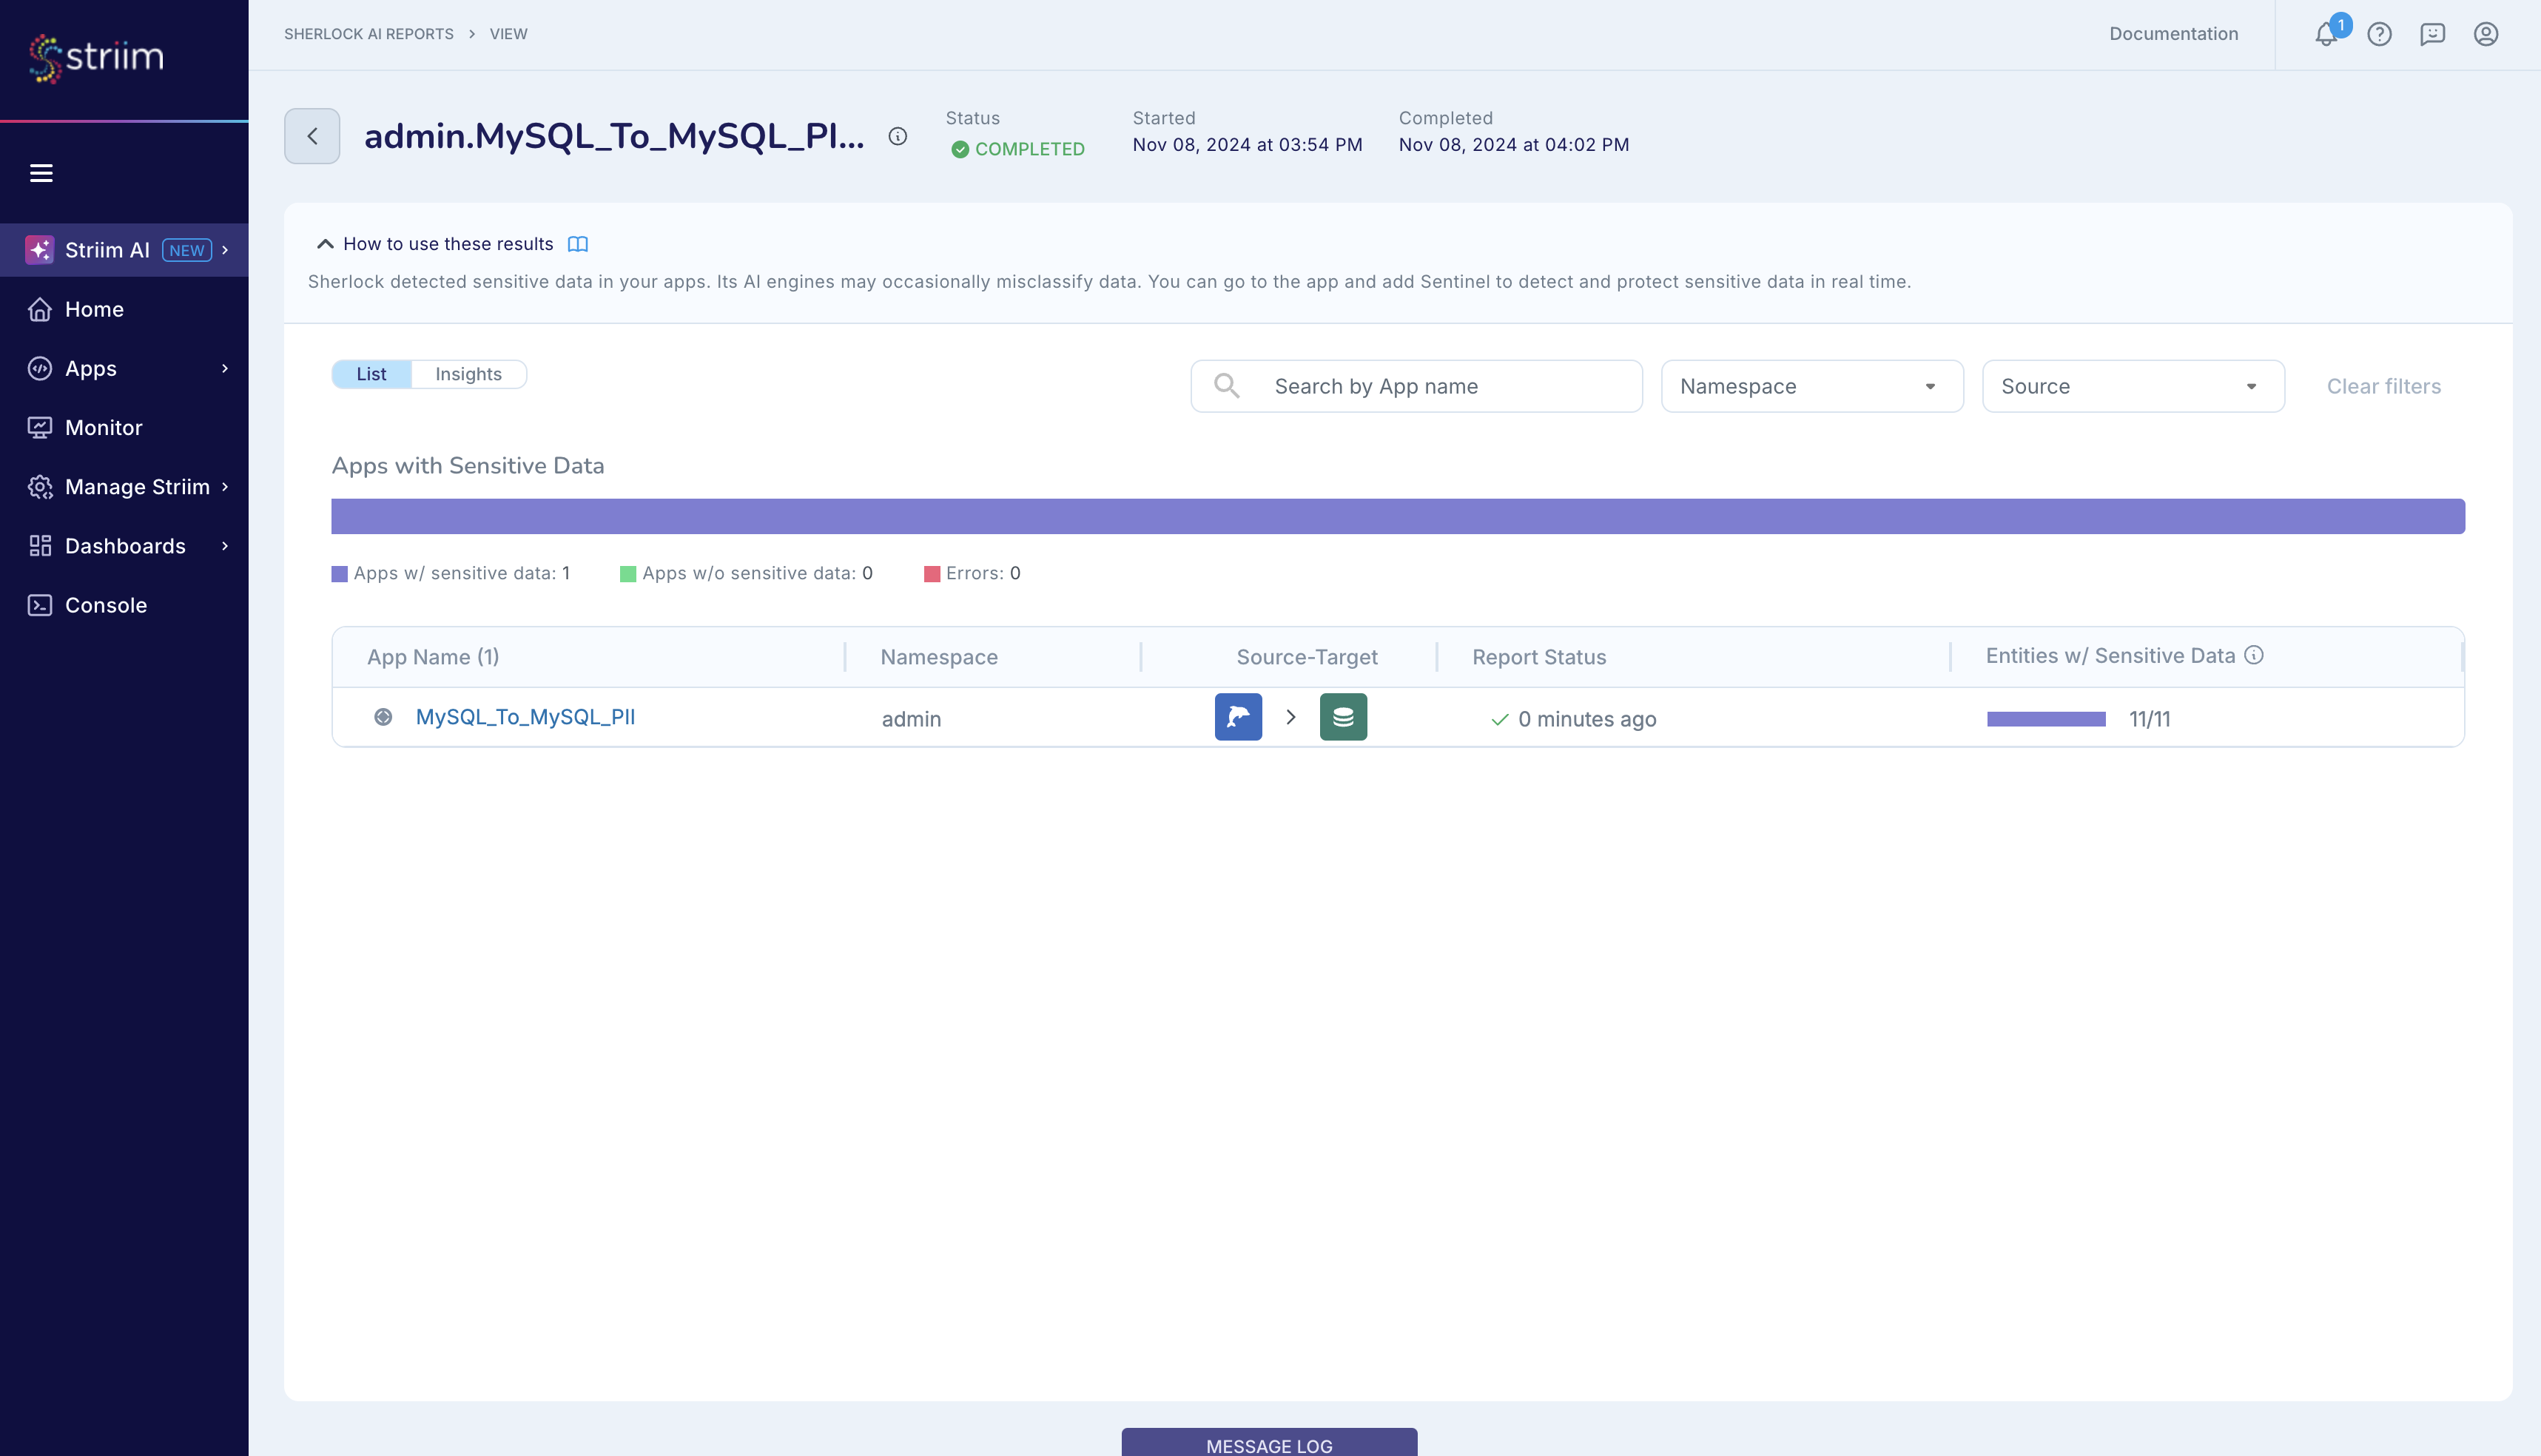
As shown in the figure below, Sherlock has detected sensitive data in several datasets configured in the MySQL_To_MySQL_PII_DBSource.
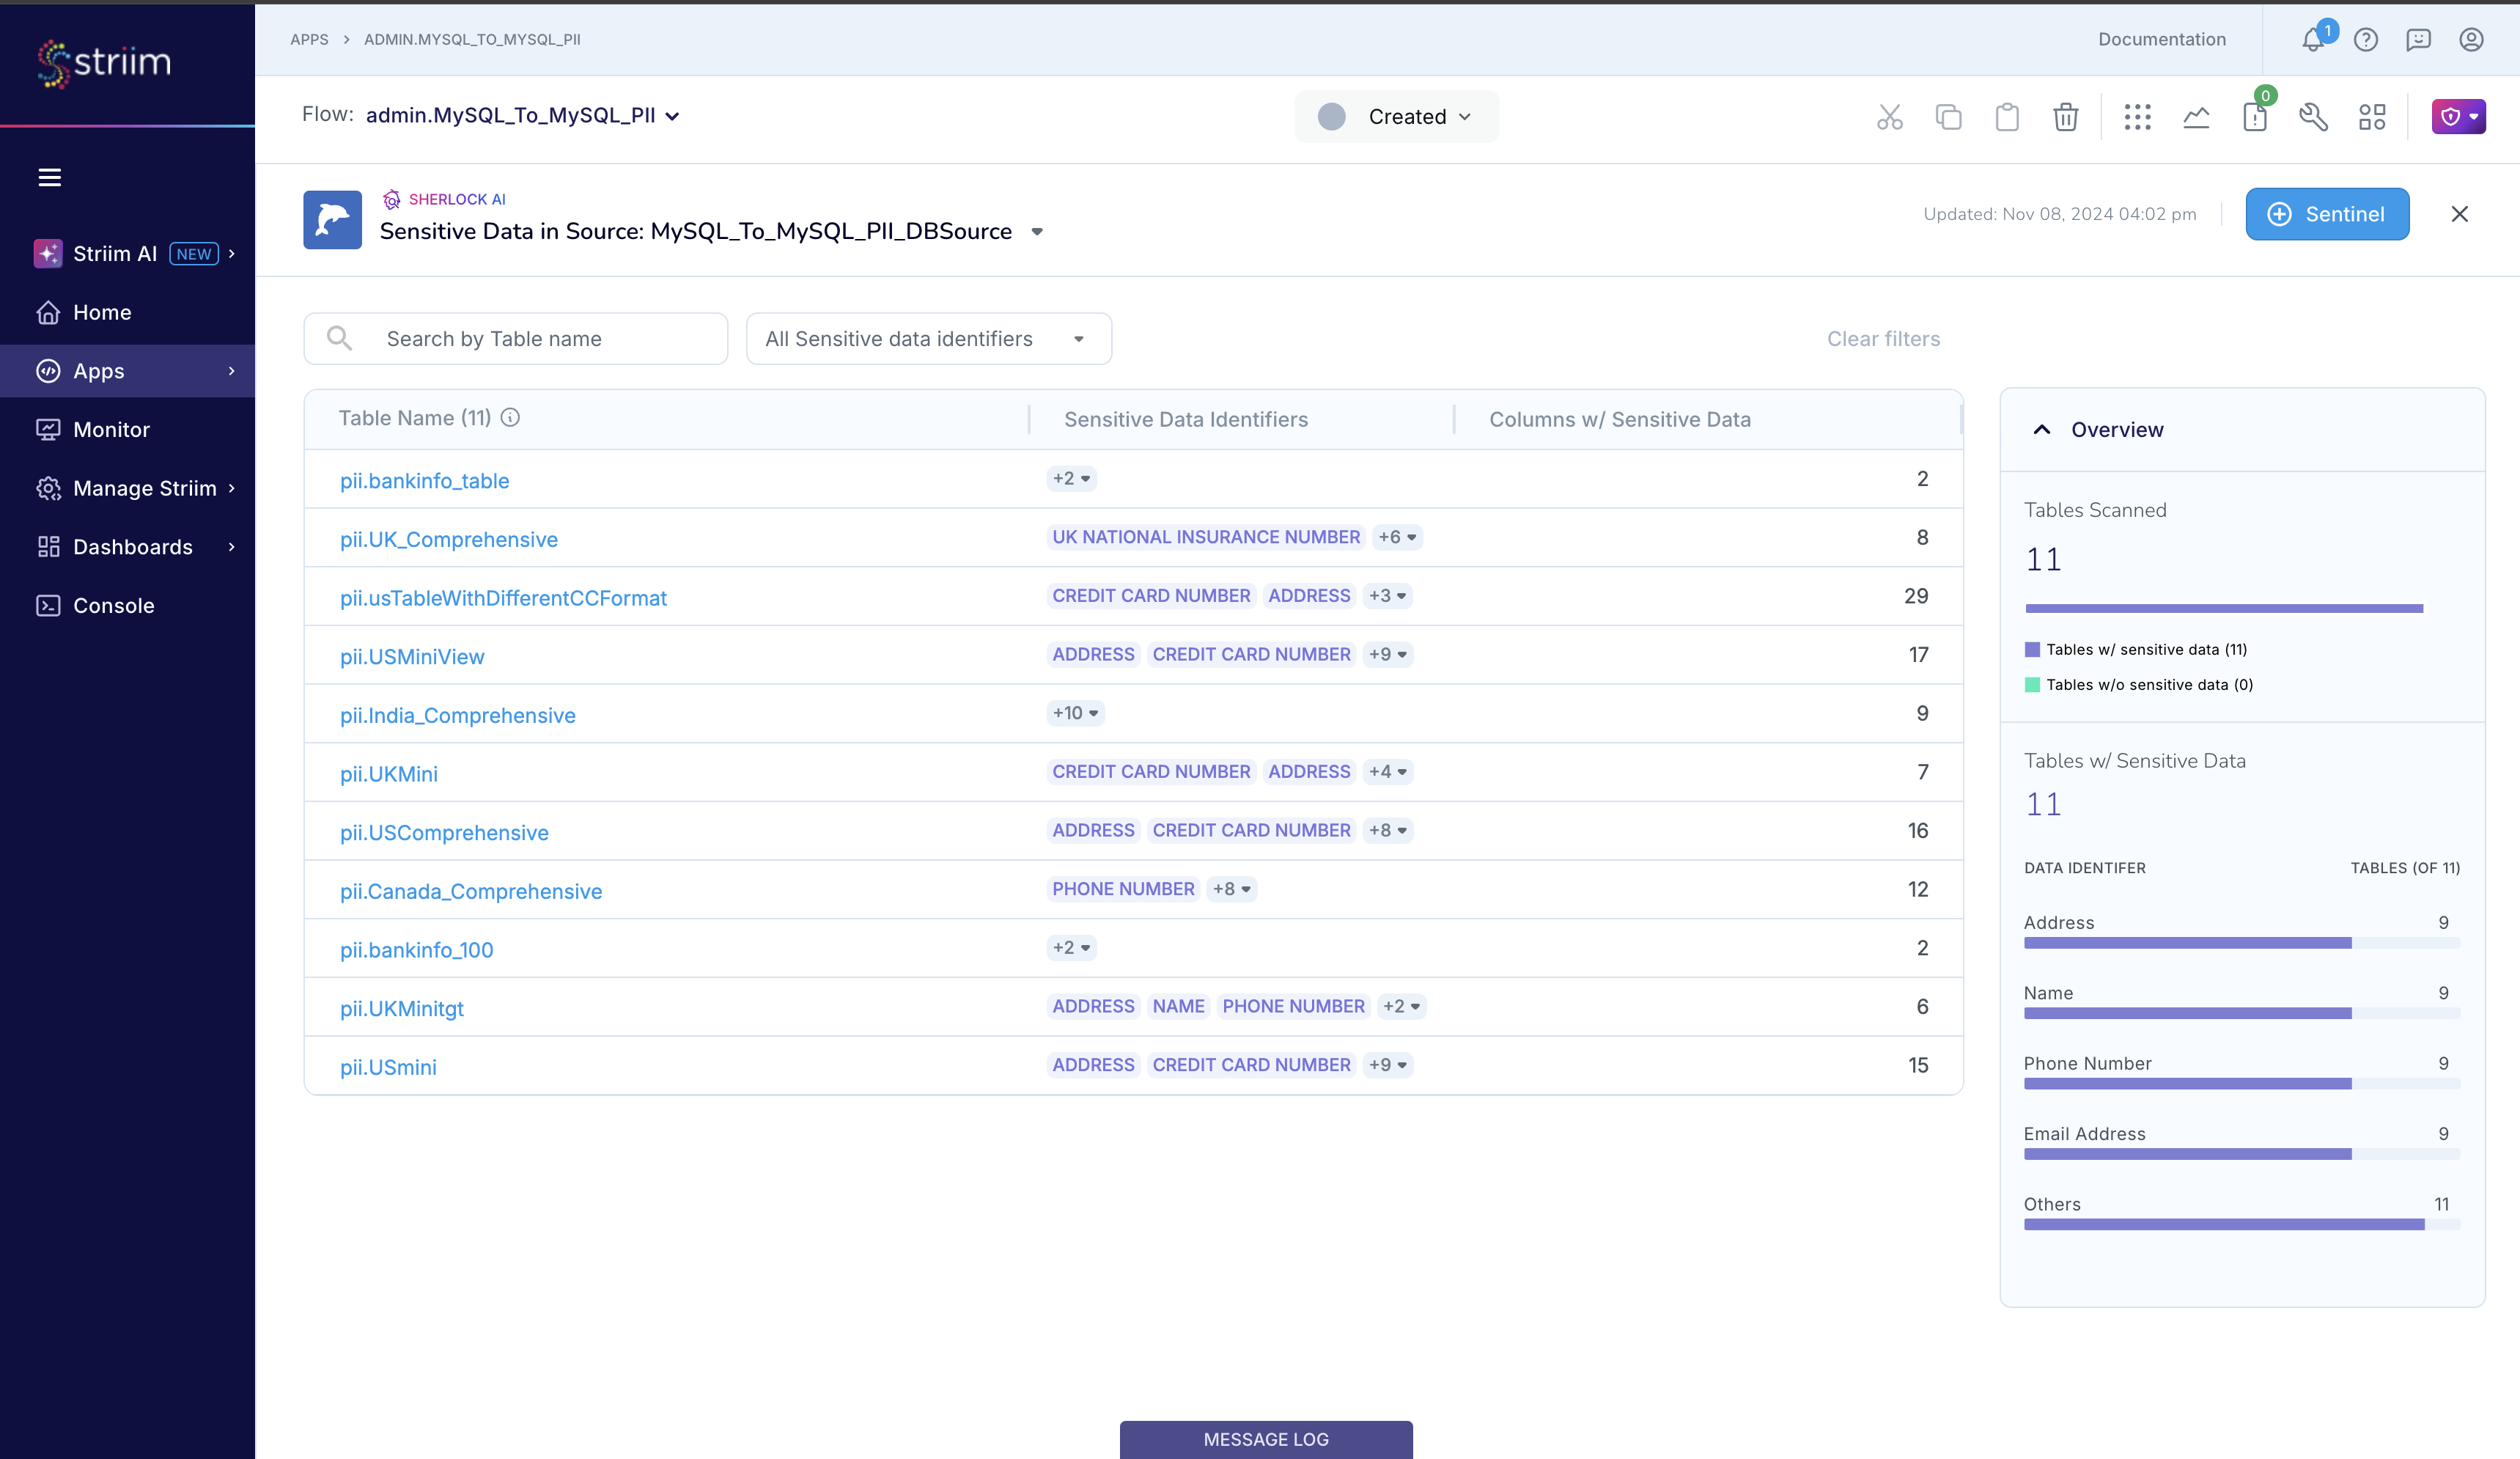
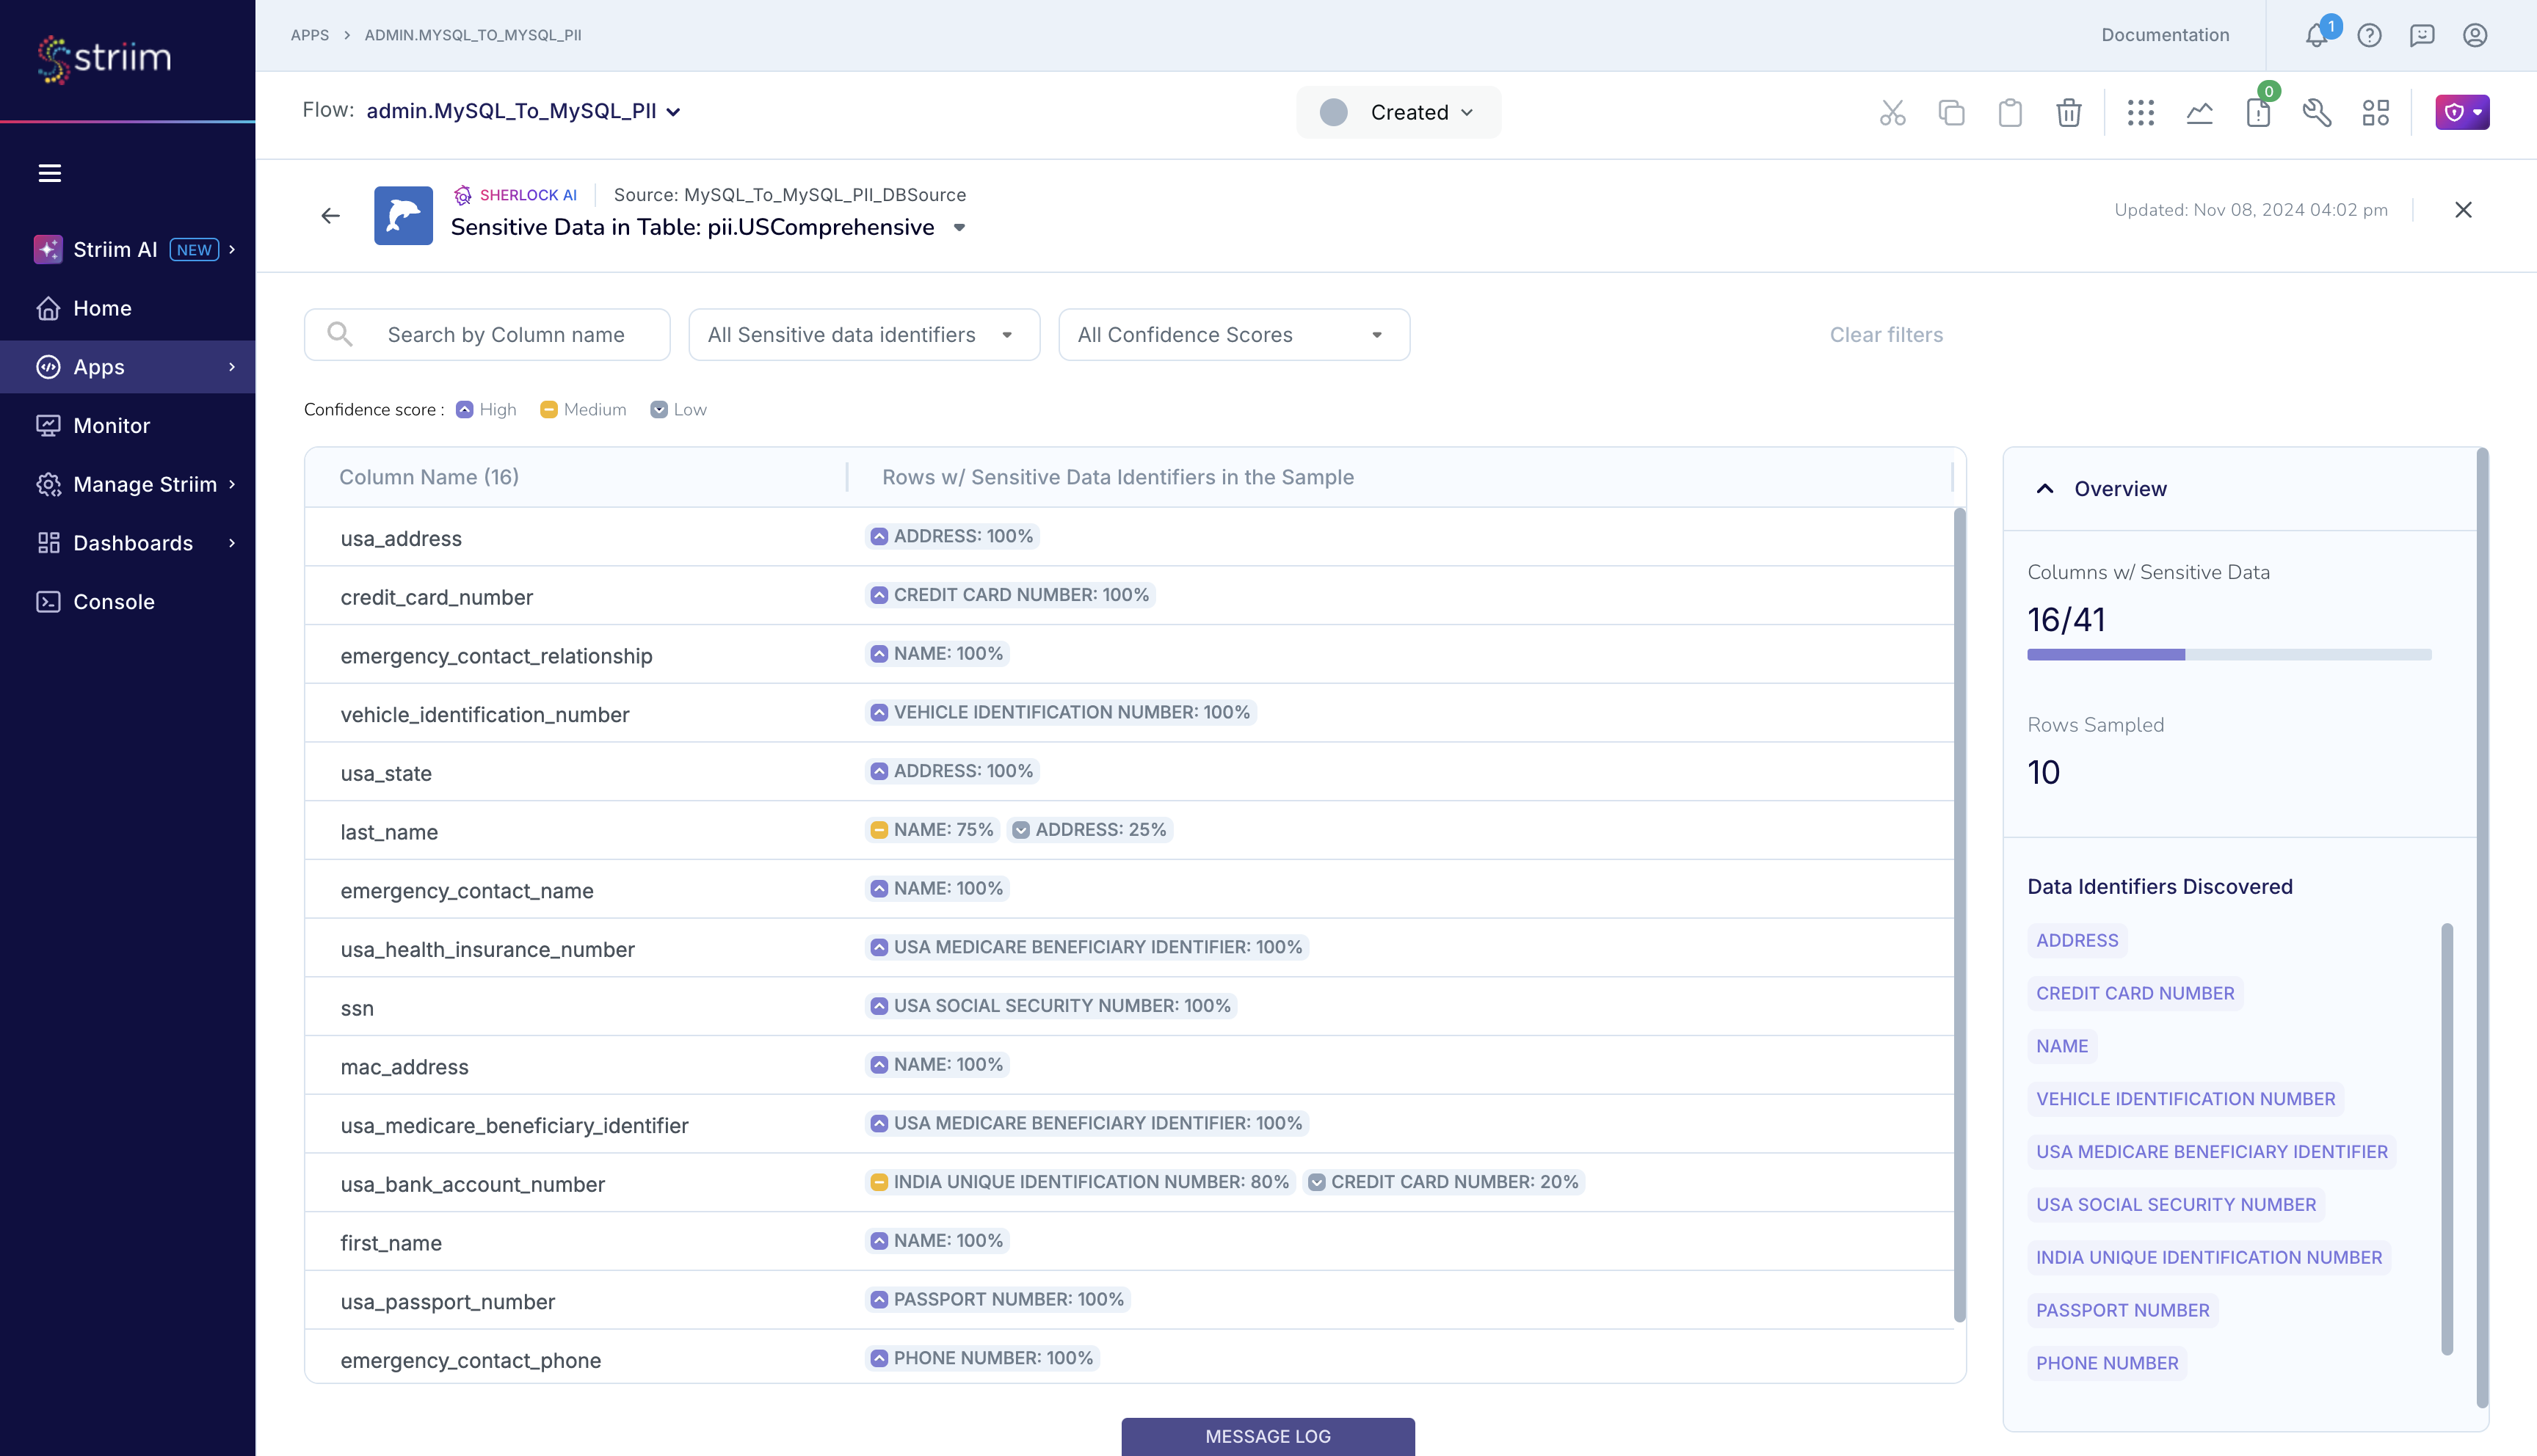
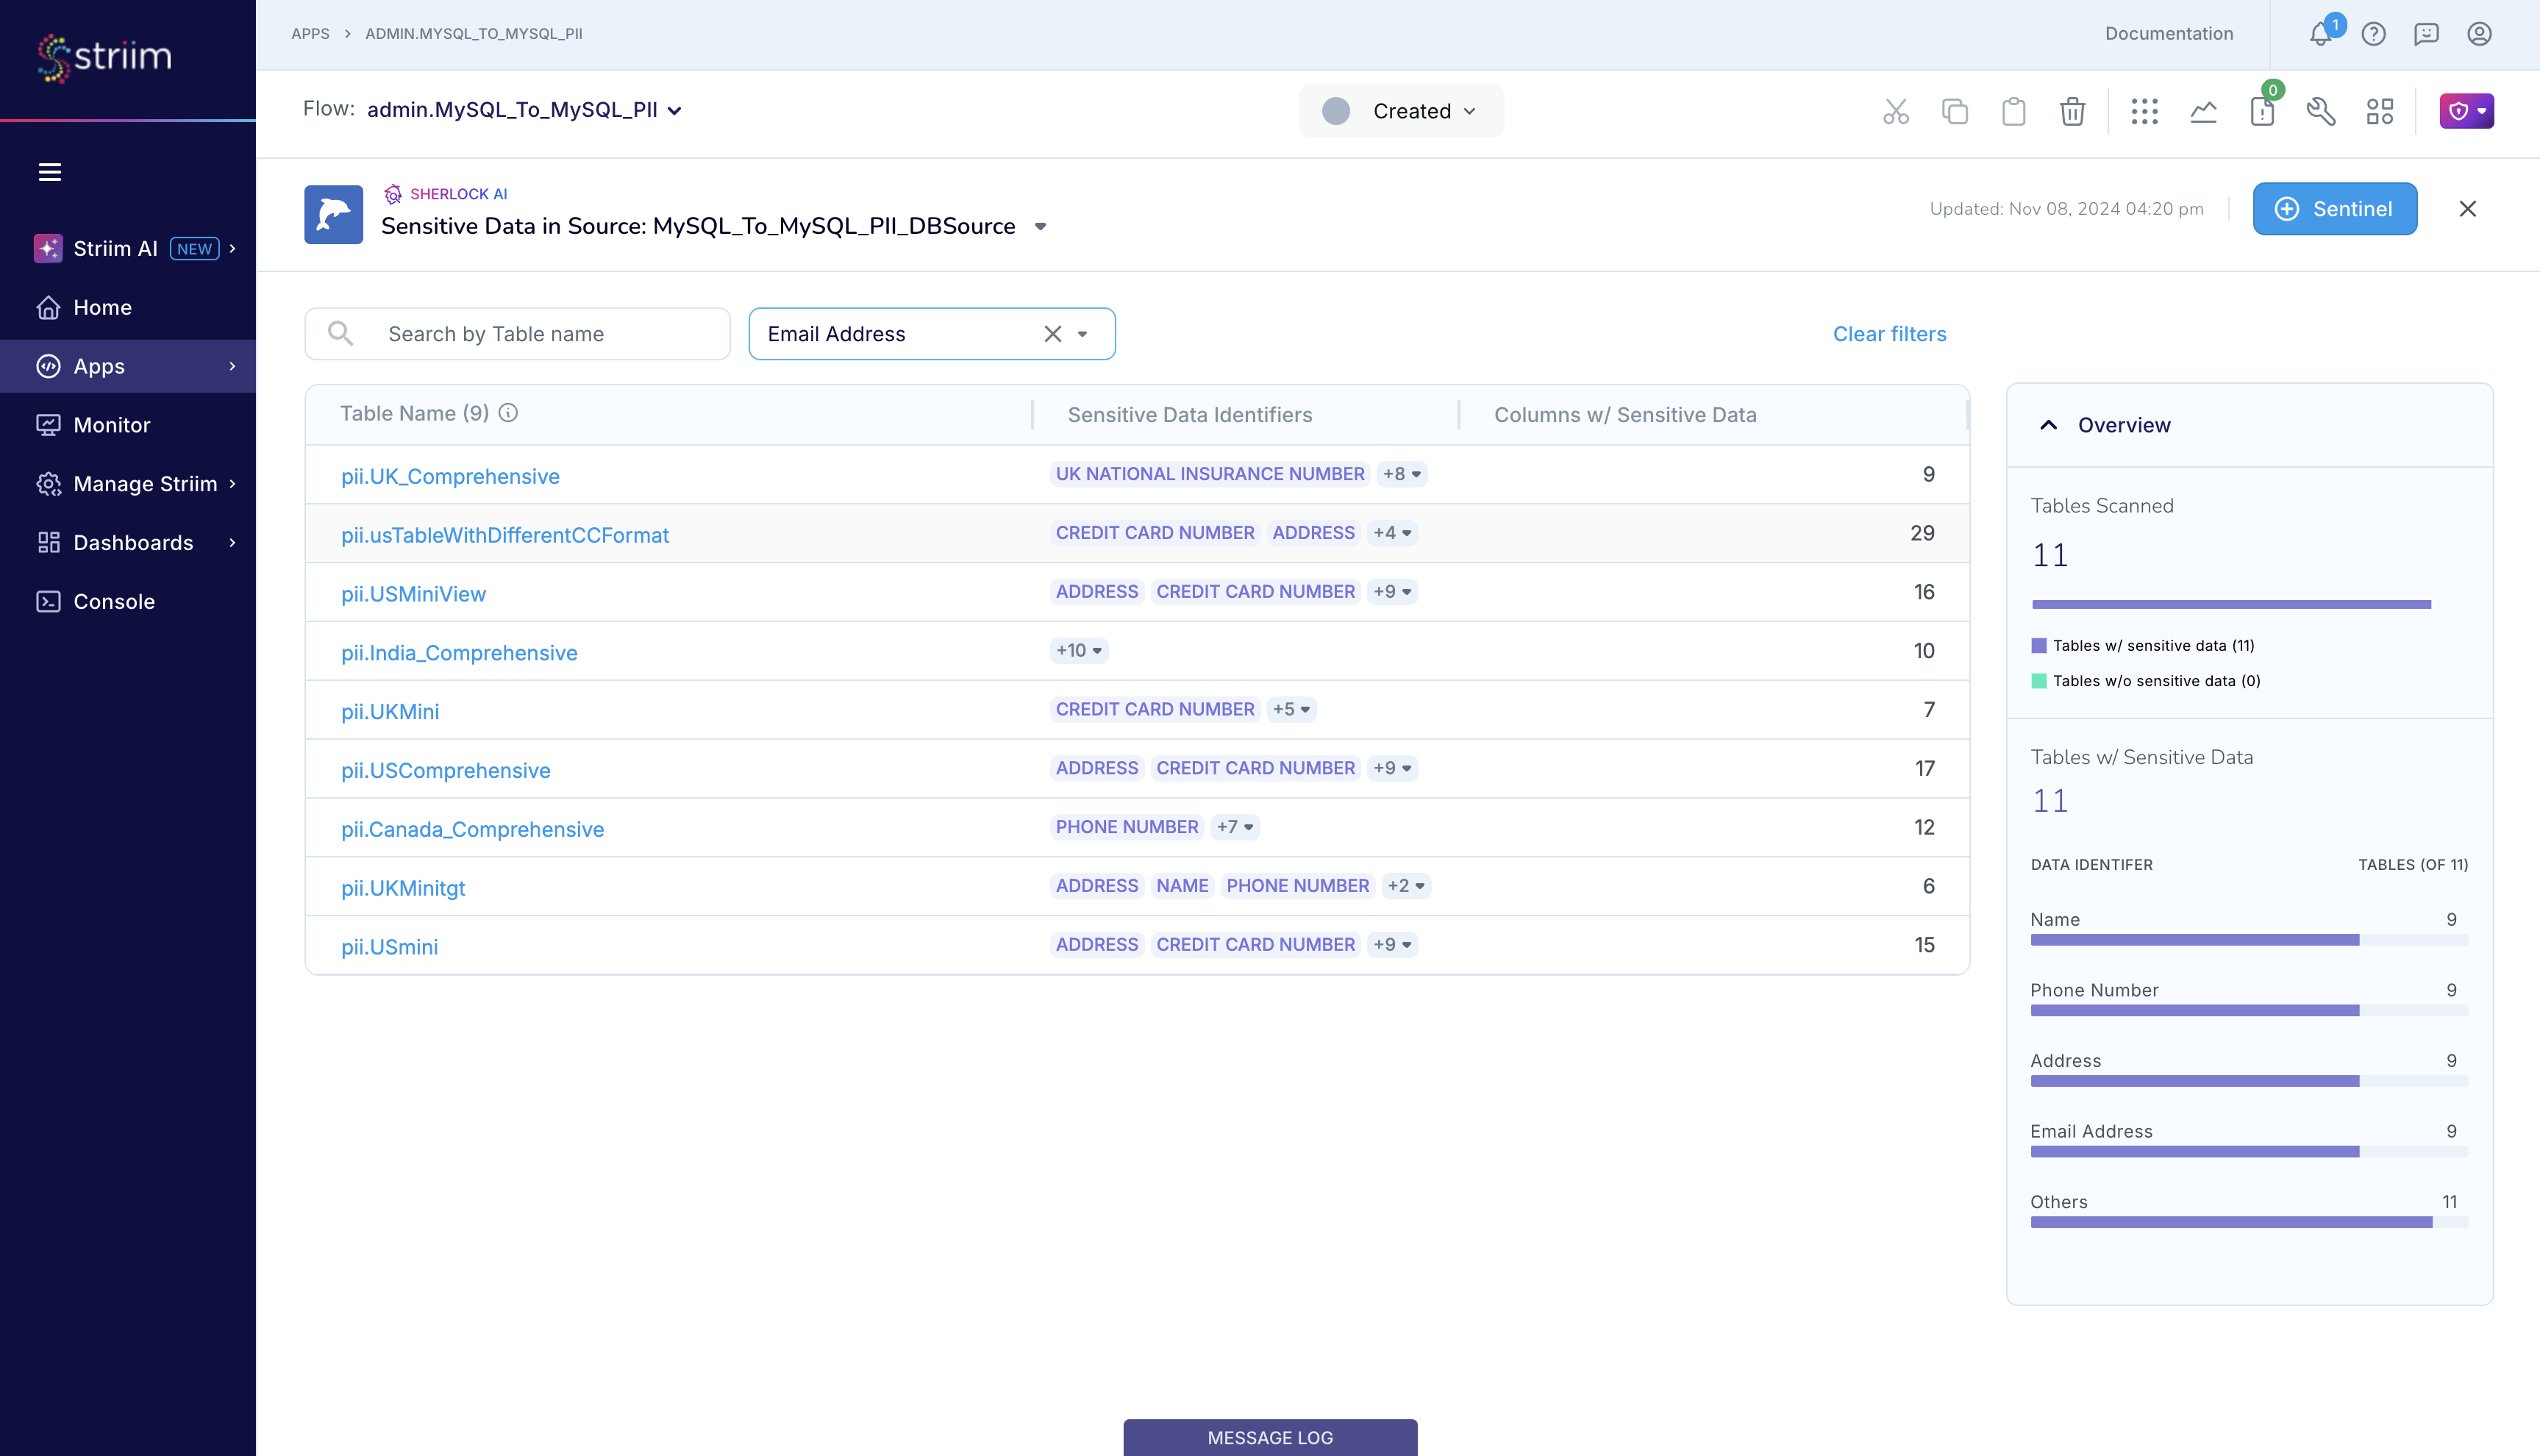
Click on a table name to find out more about the sensitive data that Sherlock detected in that dataset. Take the example of pii.USComprehensive table. Sherlock lists the columns and the sensitive data that it detected in that column from the sample that read. Sherlock reports that it detected data matching CREDIT_CARD_NUMBER in the column named credit_card_number, as you likely expected. Sherlock also reports that it detected multiple types of sensitive data, namely CREDIT_CARD_NUMBER and INDIA_UNIQUE_IDENTIFICATION_NUMBER, in the column named usa_bank_account_number, which you likely did not expect, allowing you to investigate and address this potential data quality issue. Note: You may find Sherlock’s analysis to be lacking if the sampled set that it used for its analysis is not representative of the entire source table.
You can similarly investigate Sherlock’s report for the other tables.
Running Sherlock from the flow designer
You can also open the MySQL_To_MySQL_PII app and run Sherlock from the flow designer by clicking on the Sensitive Data Governance icon on the right of the flow designer top bar.
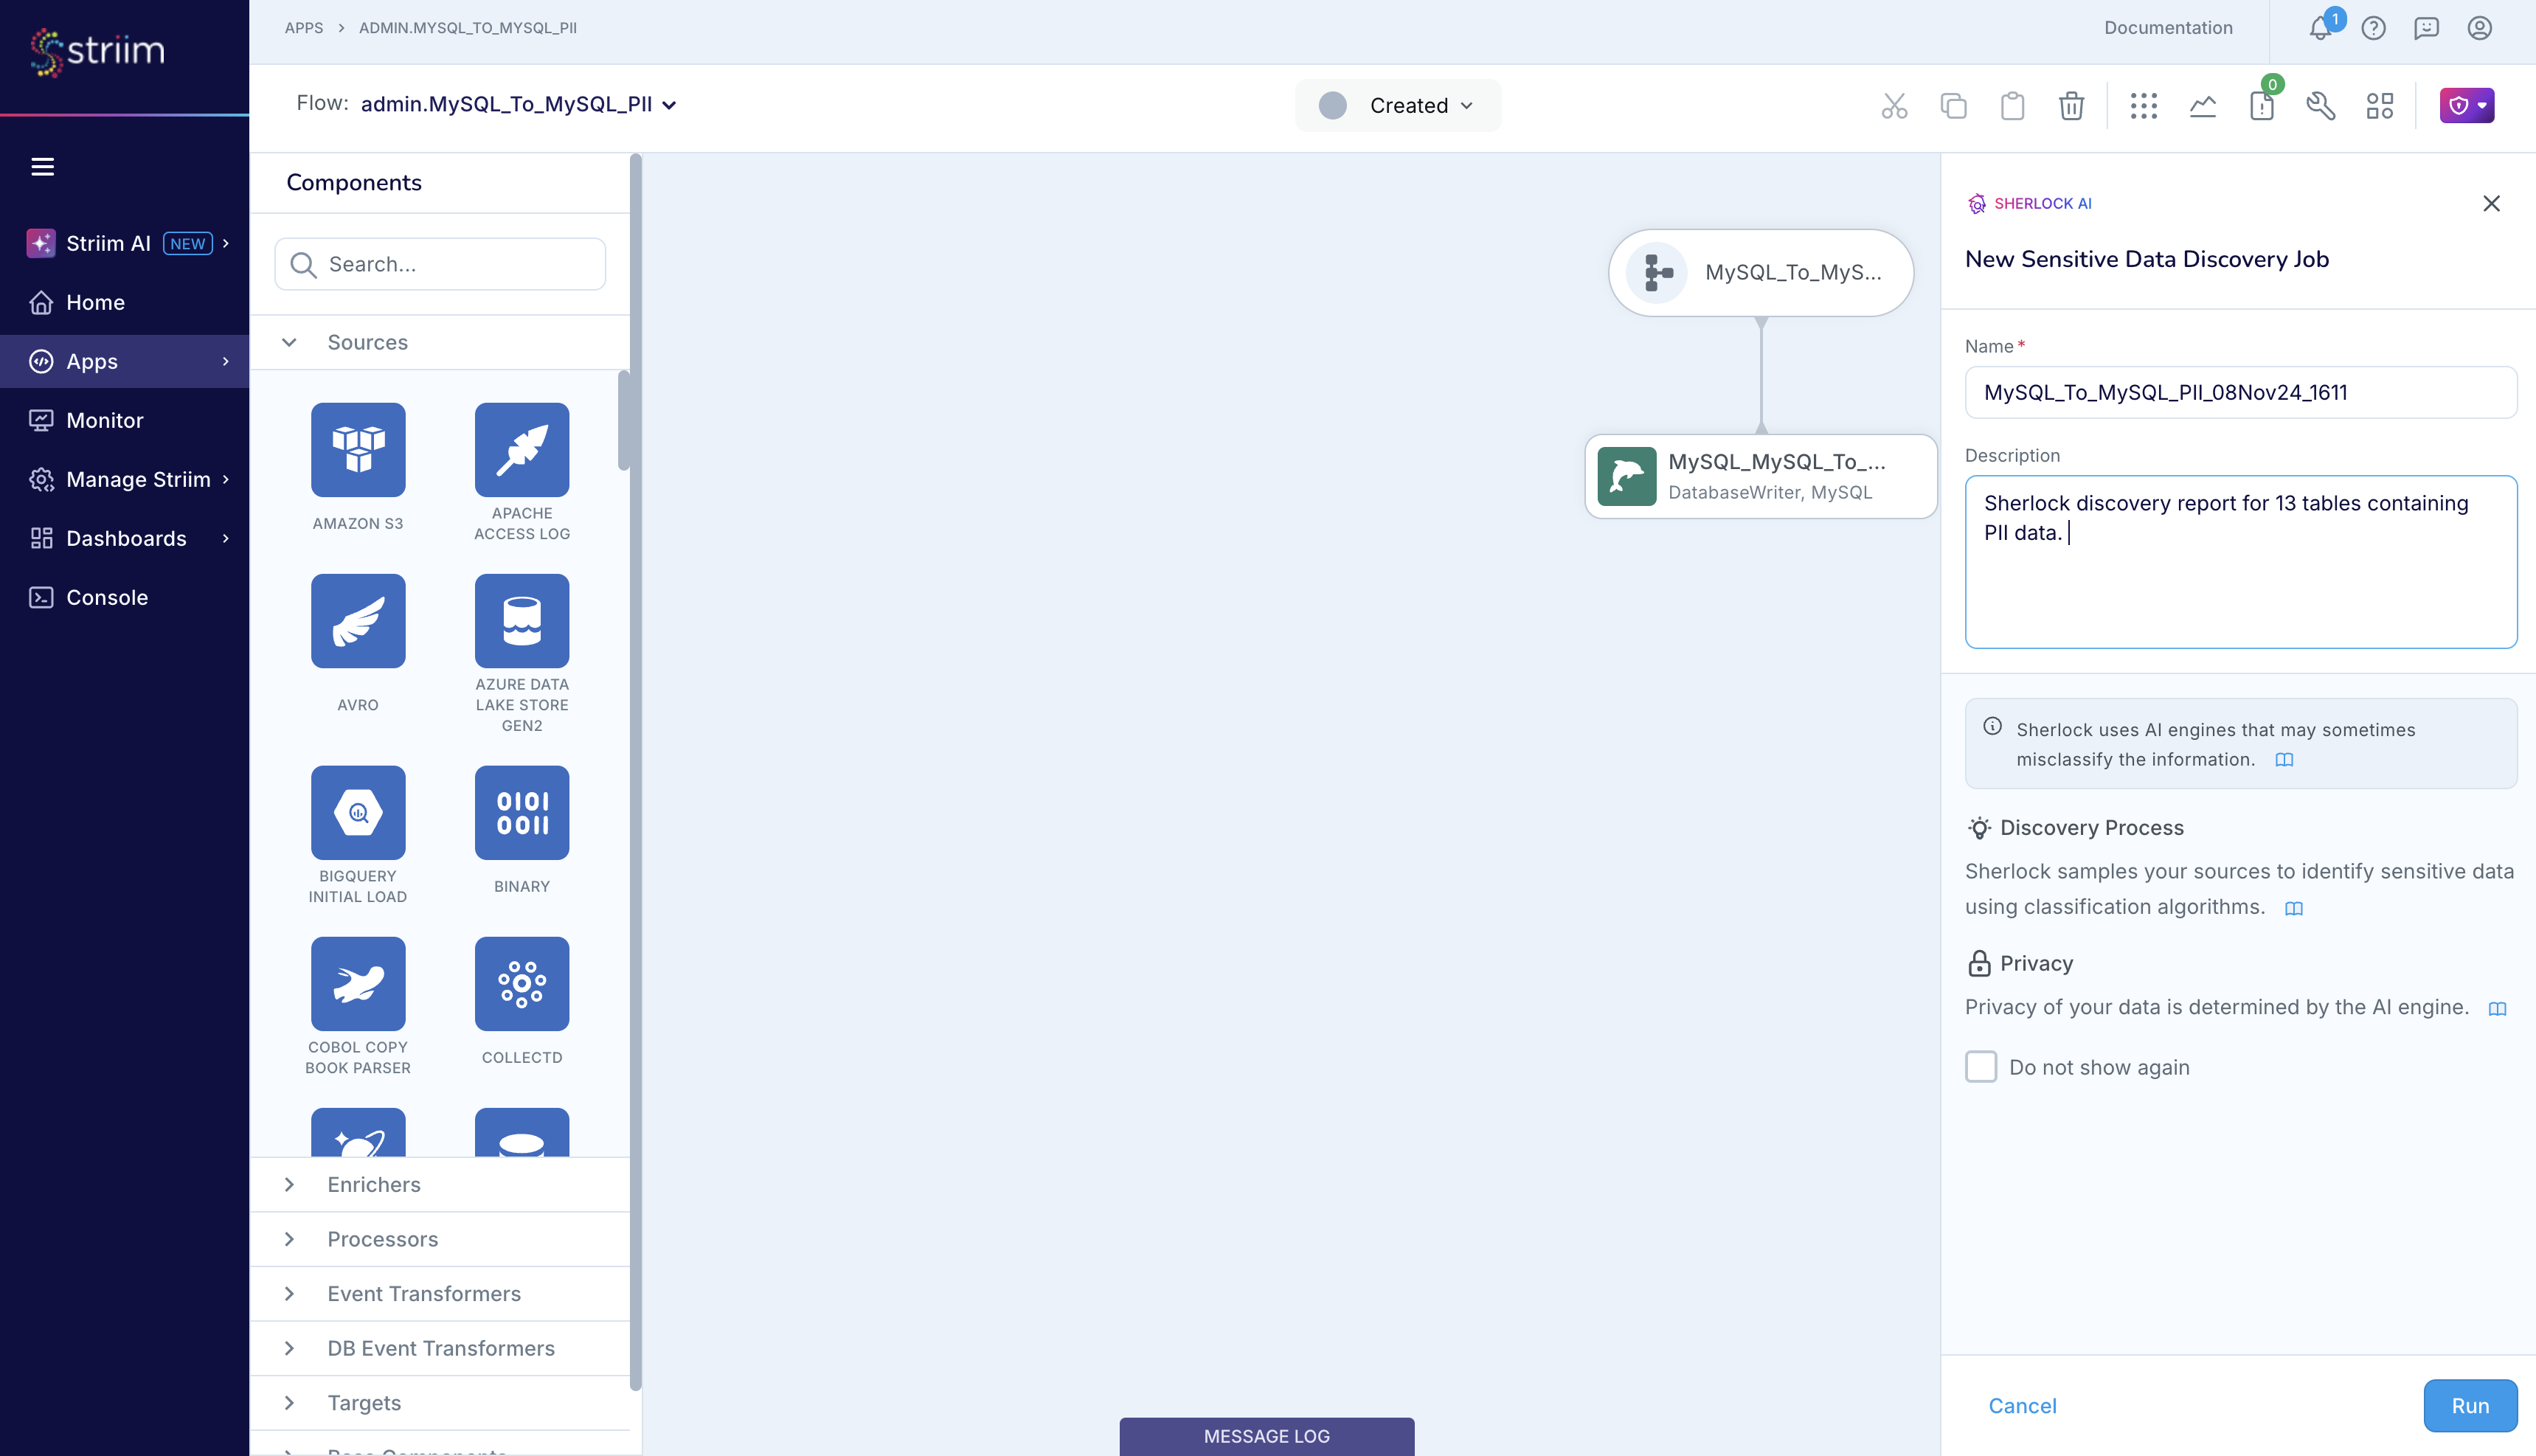
After you named the Sherlock report and launched it, you can see the status in the flow designer. In case you step away from the Sensitive Data Governance panel, you can always view the status from the Striim AI menu.
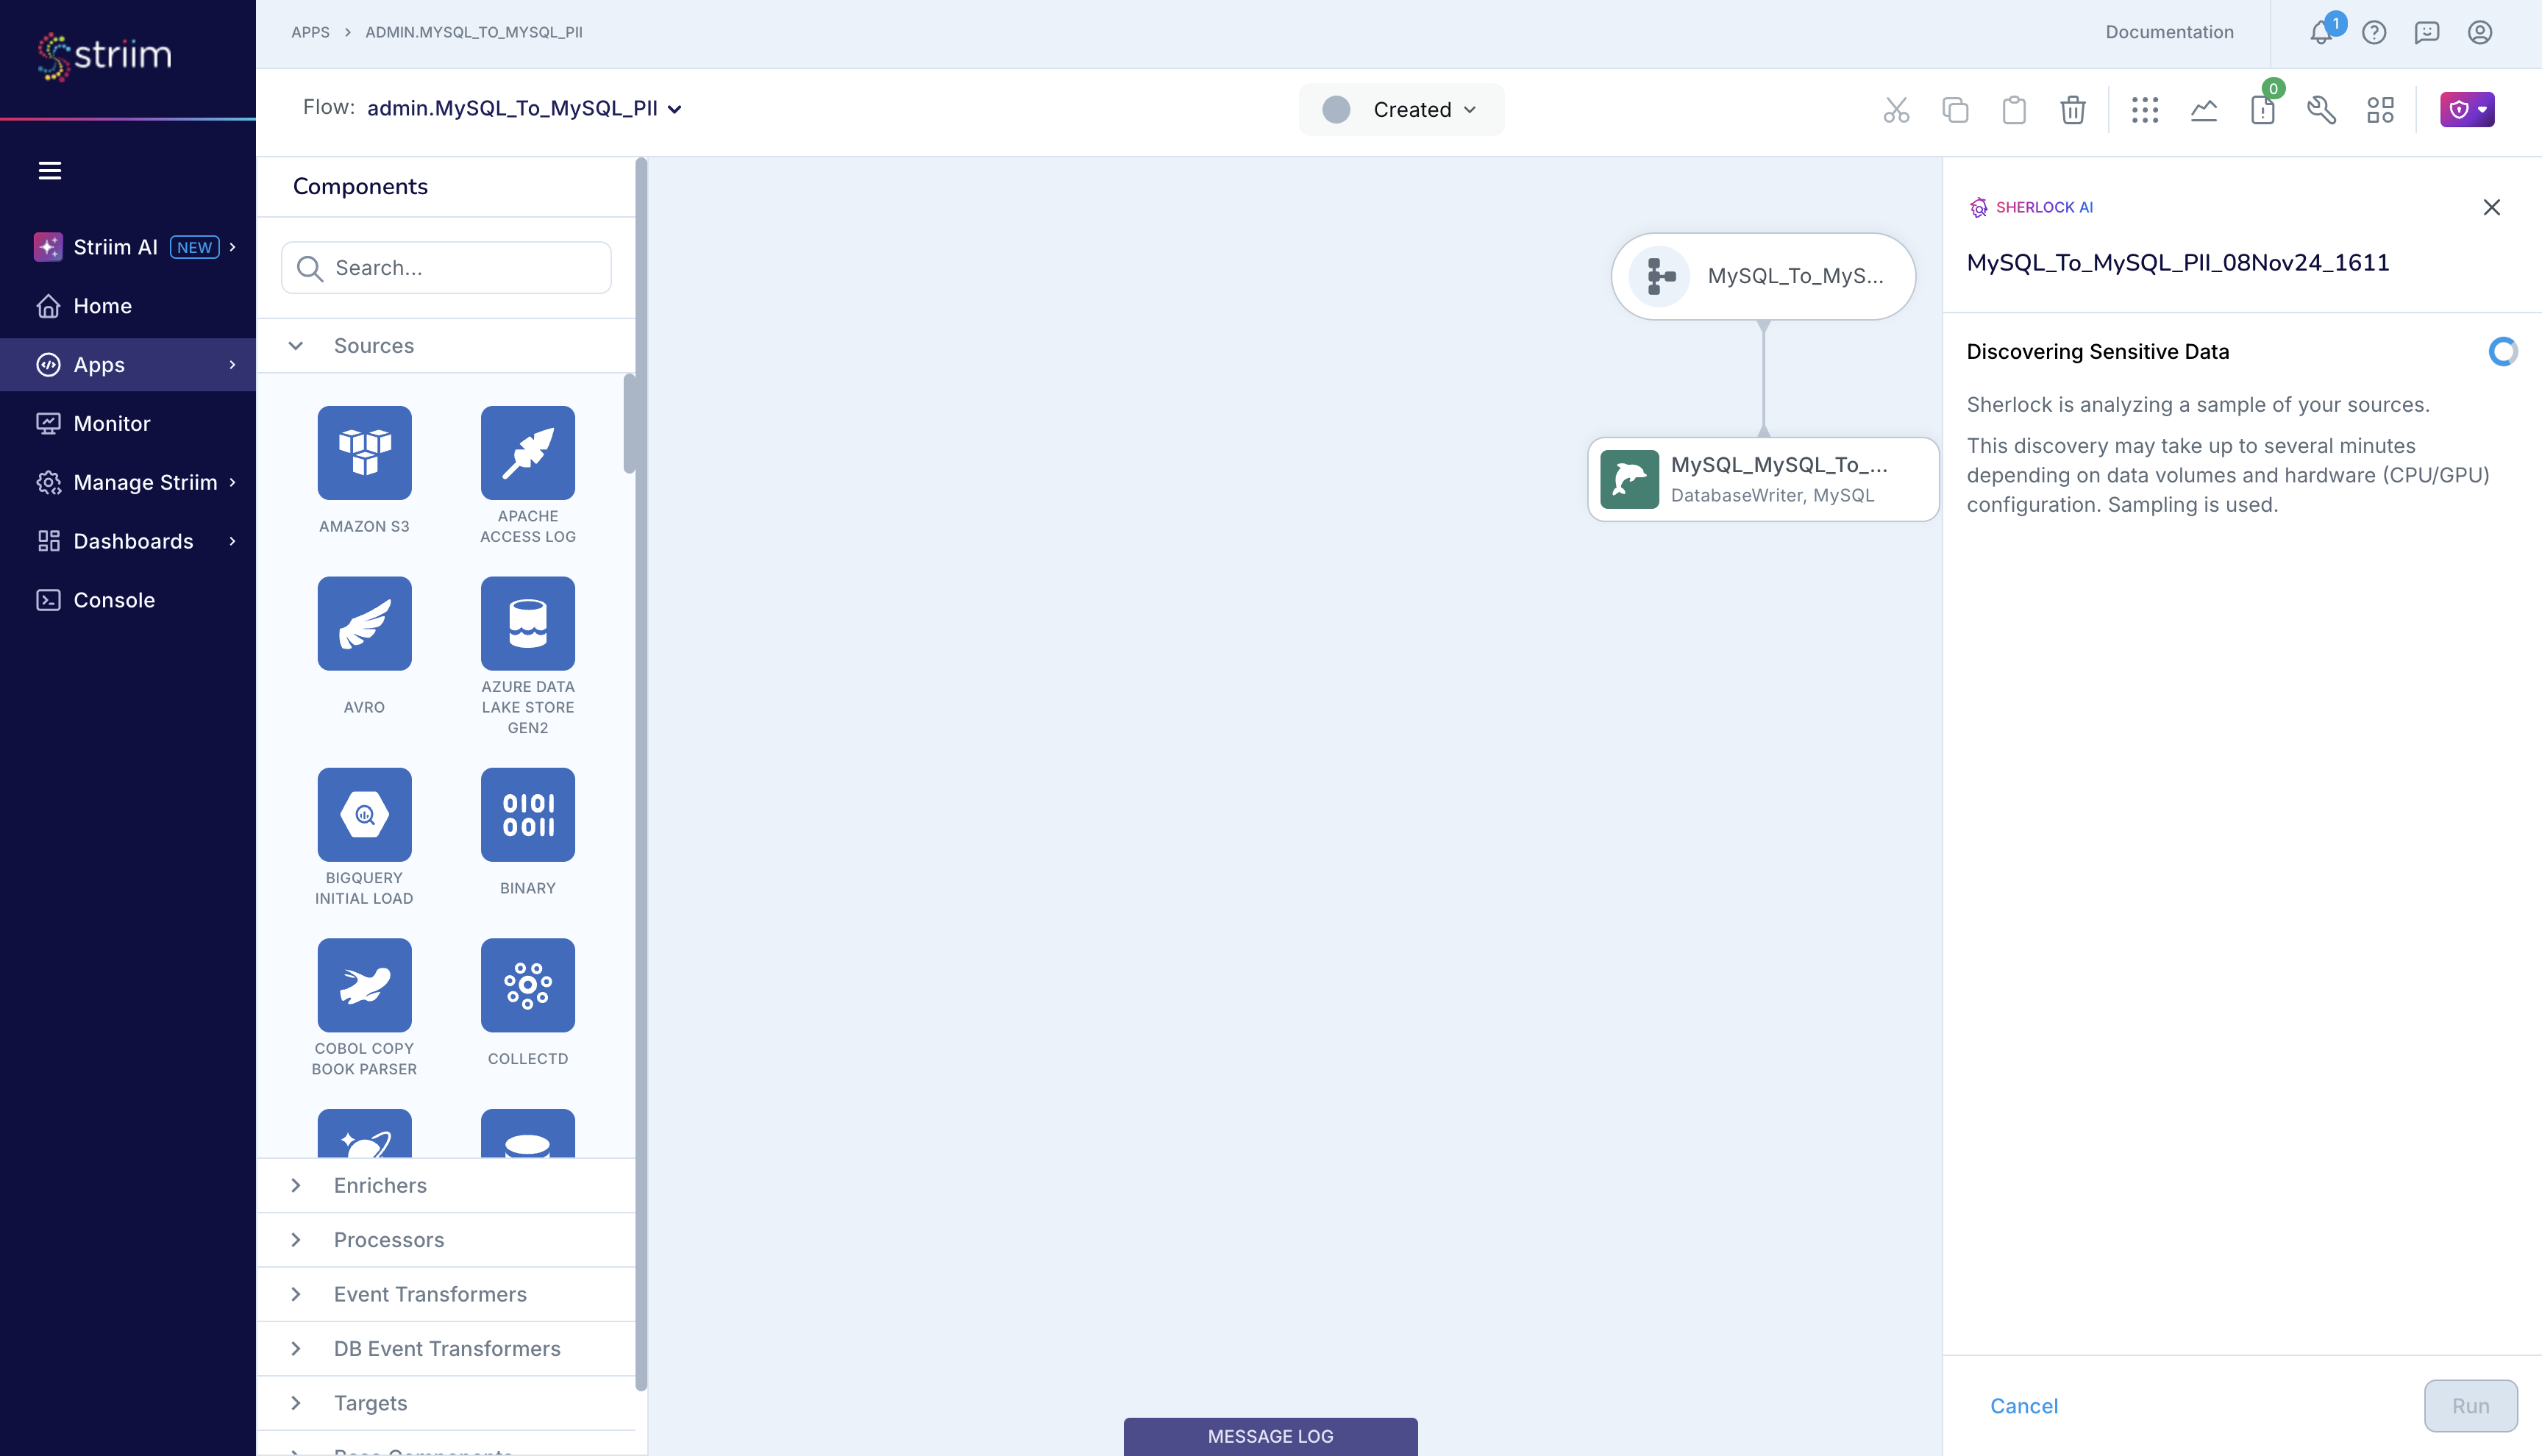
After Sherlock has completed its analysis, it will display a summary of the report on the Sensitive Data Governance panel.
You can expand the report and then dive deeper into the details, similar to accessing the report from the Striim AI menu.
Sentinel for real-time sensitive data detection and protection in applications
Setting up and using Sentinel
You can modify your application and add Sentinel to detect and protect sensitive data in your application. Let us start with the MySQL_To_MySQL_PII app that contains this dataset with synthetic sensitive data.
First, add Sentinel to your application. Here we add Sentinel directly to the MySQL source so that it can read the data from the source that Sherlock analyzed previously.
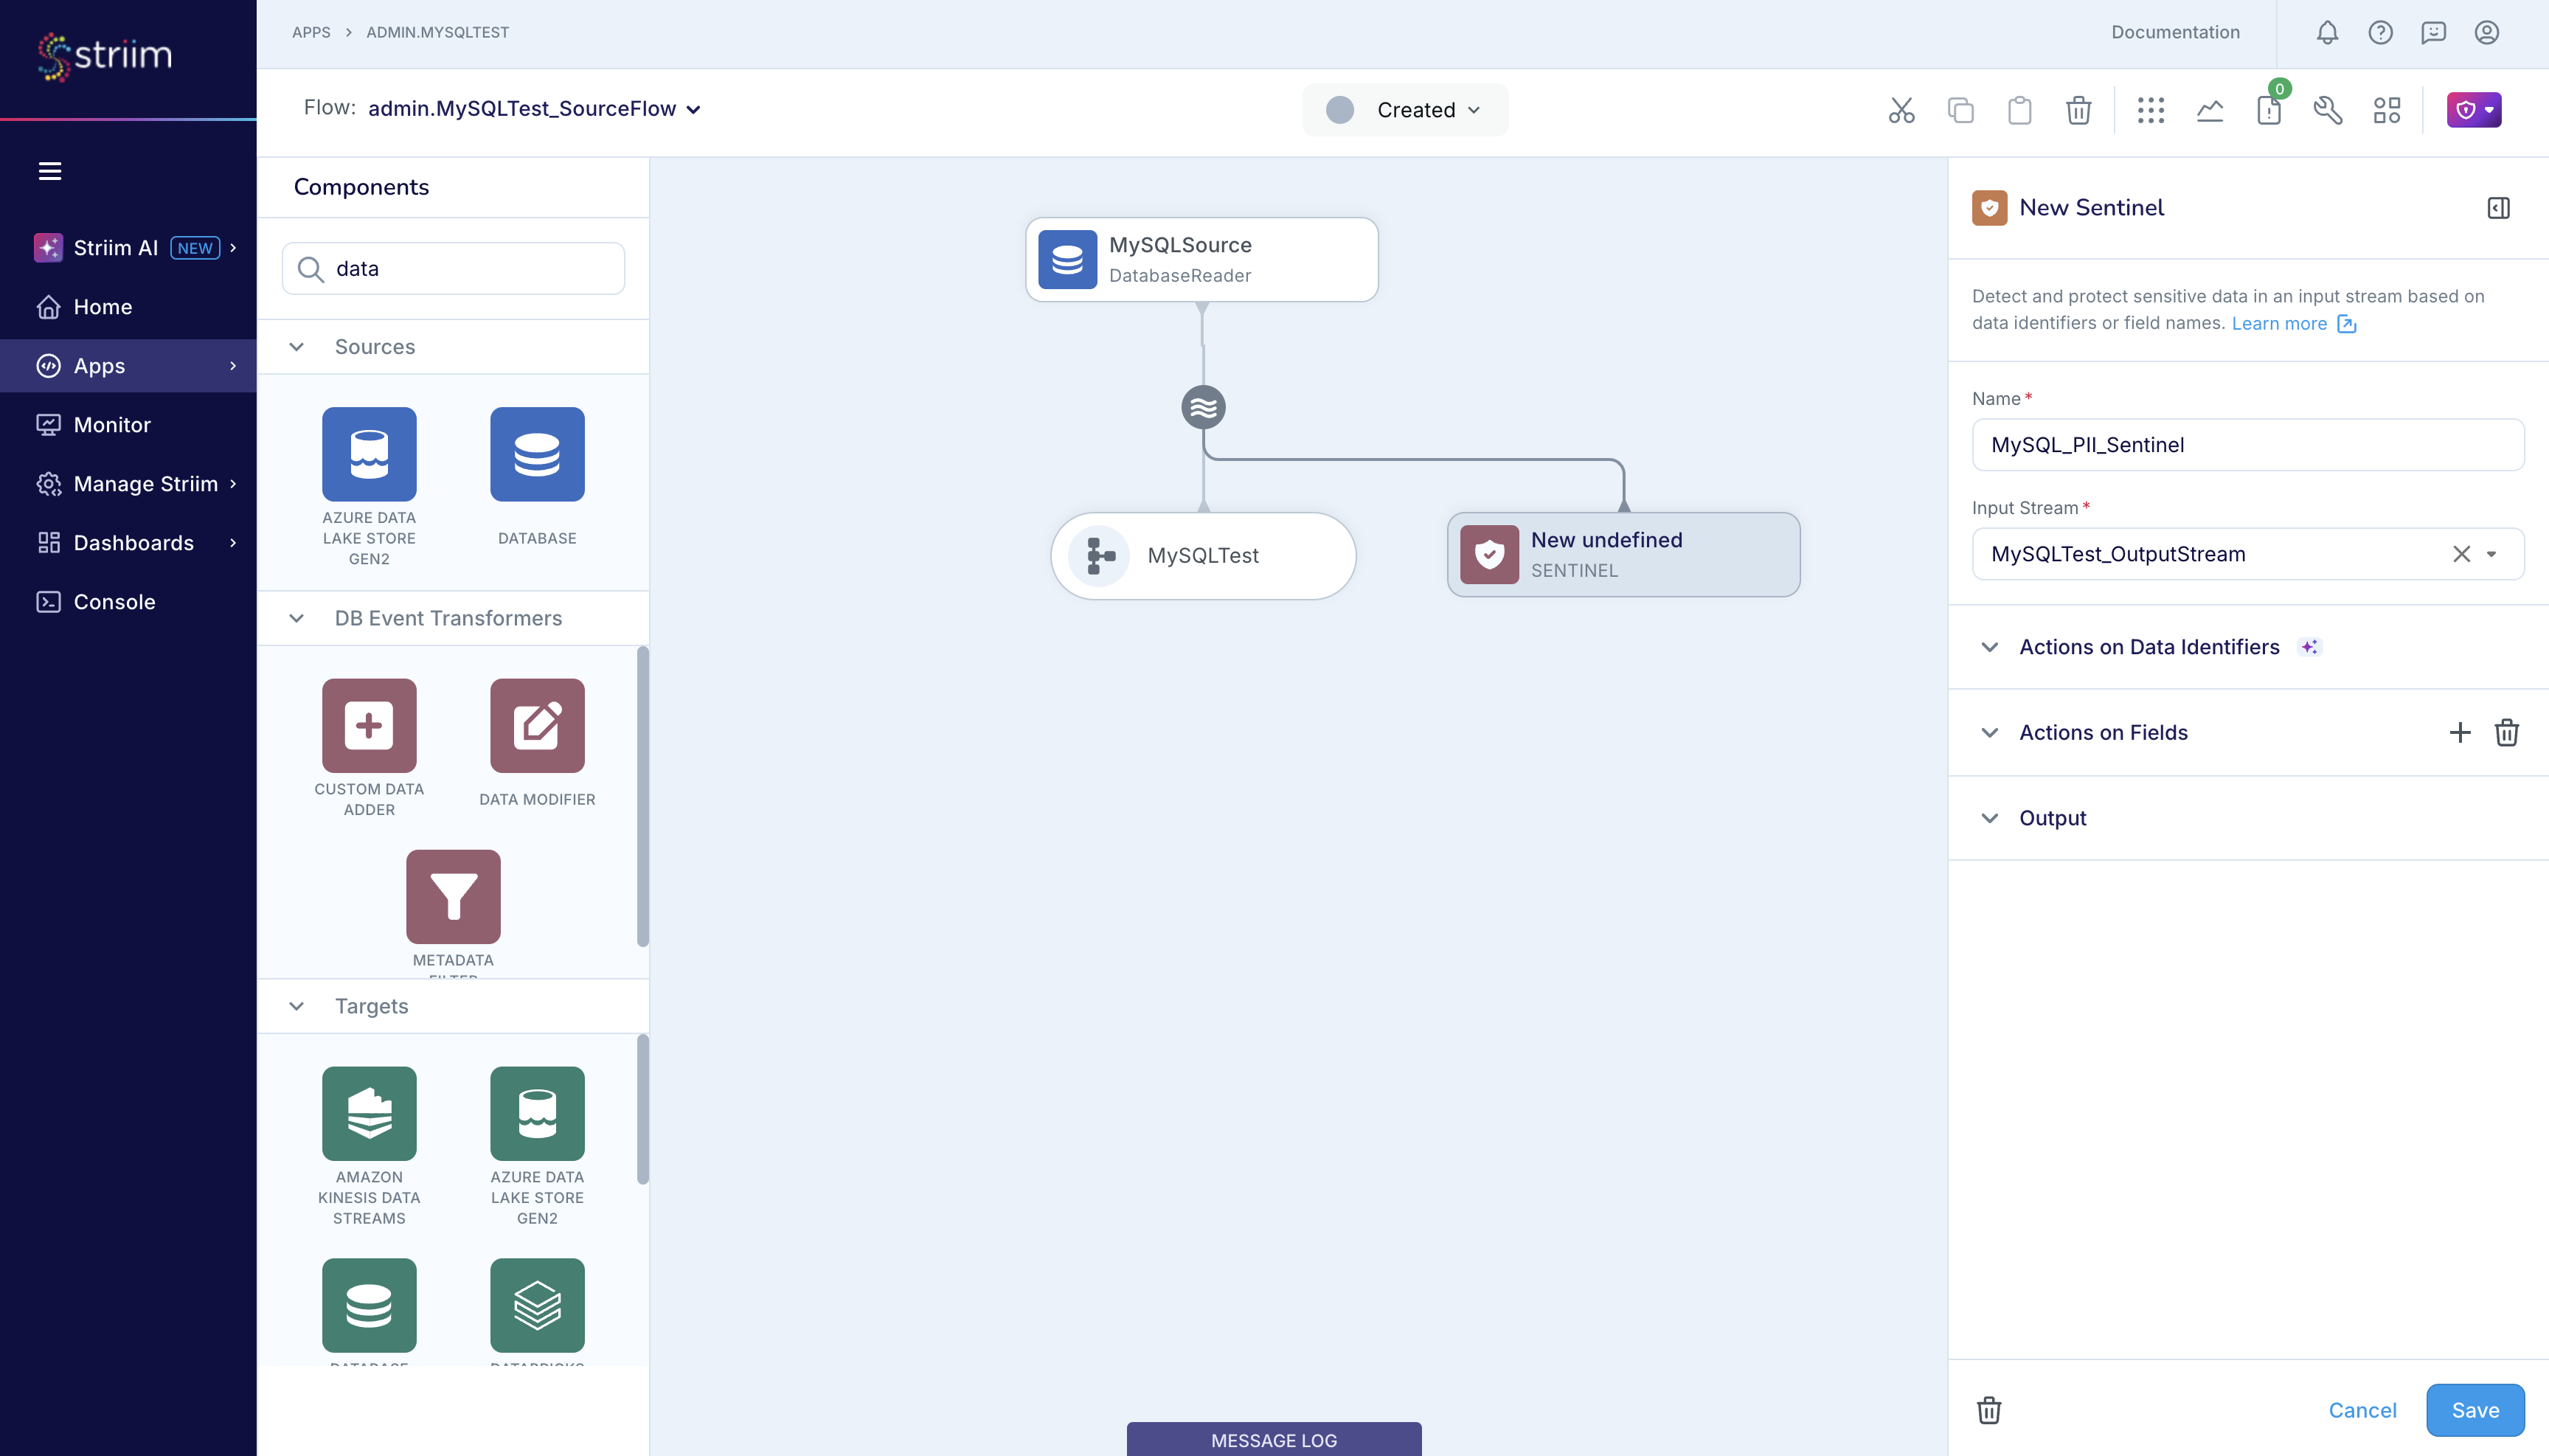
Before getting started, you can review the documentation on Sentinel to understand how it works and how to use the Actions on Data Identifiers and Actions on Fields.
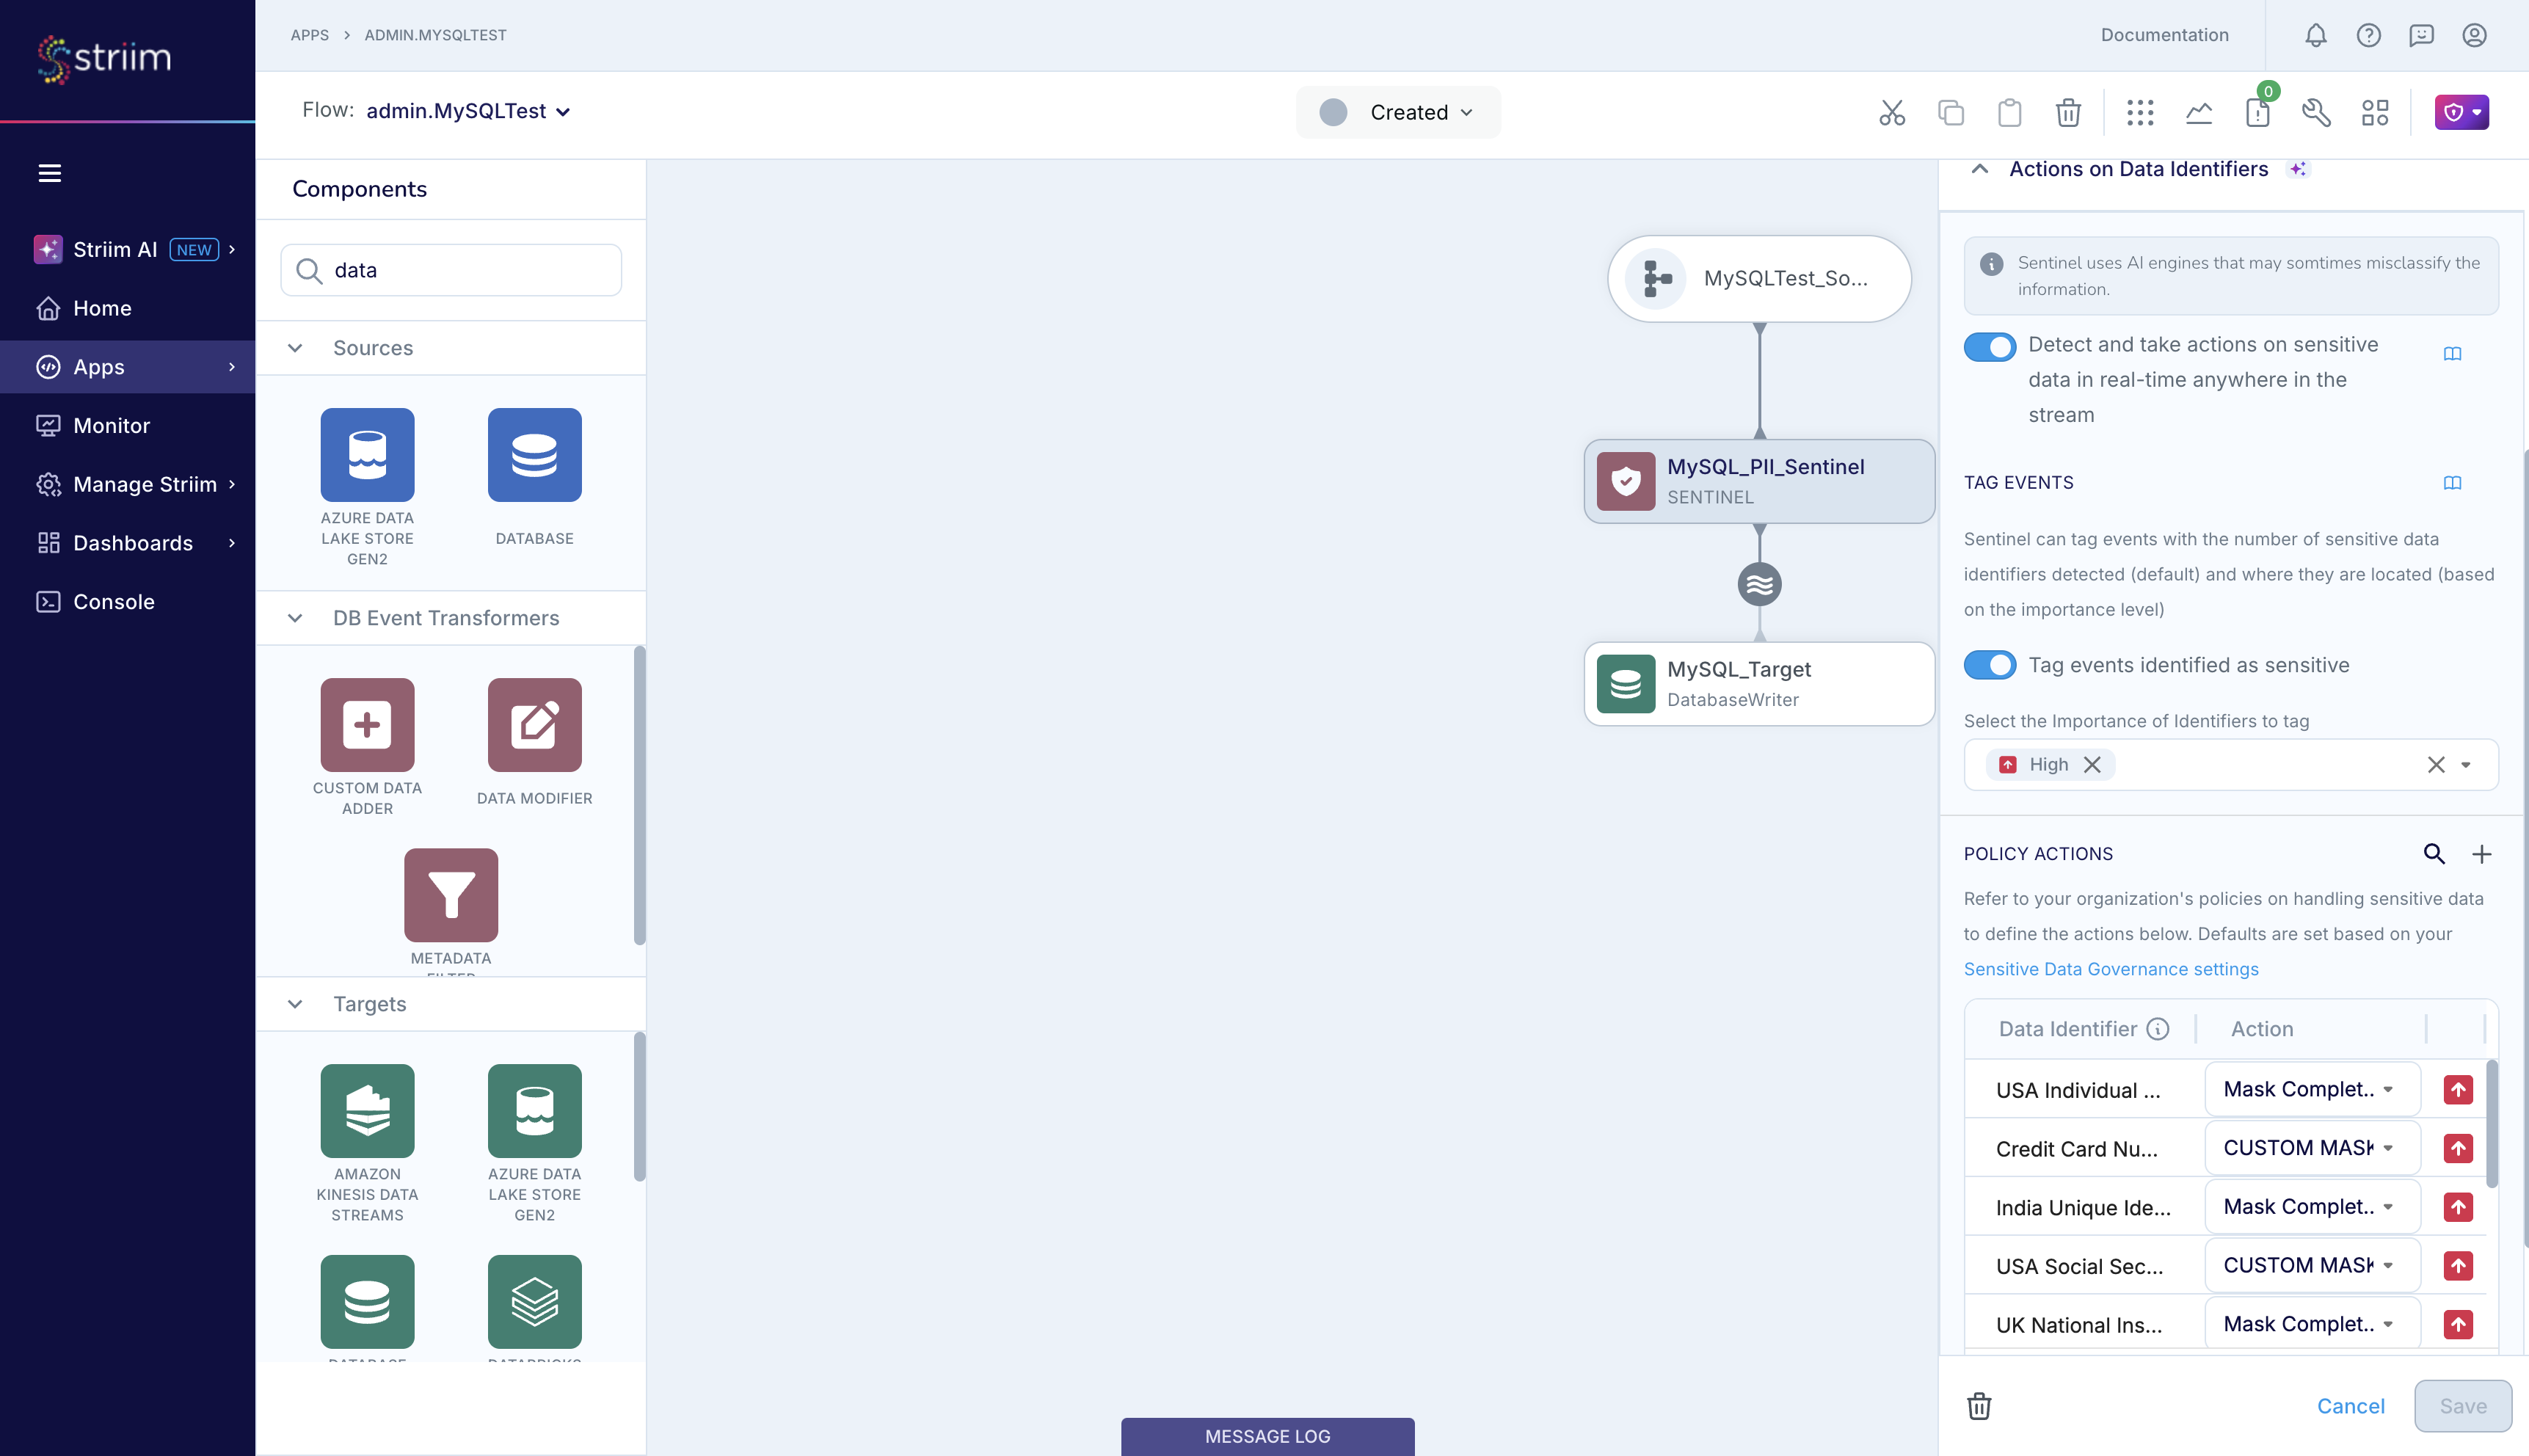
First, enable Detect and take actions on sensitive data in real-time. With this, Sentinel will use Striim AI to detect sensitive data in the data stream that flows through it and protect it as per your specifications. Enable event tagging so that Sentinel can report the sensitive data detected in every event that it scans. In the figure below, Sentinel will report about the number of sensitive data types that it detects in an event and report the location of the sensitive data that the Striim Admin has classified as High Importance such as USA Individual Tax Identification Number, Credit Card Number, USA Social Security Number and Passport Number.
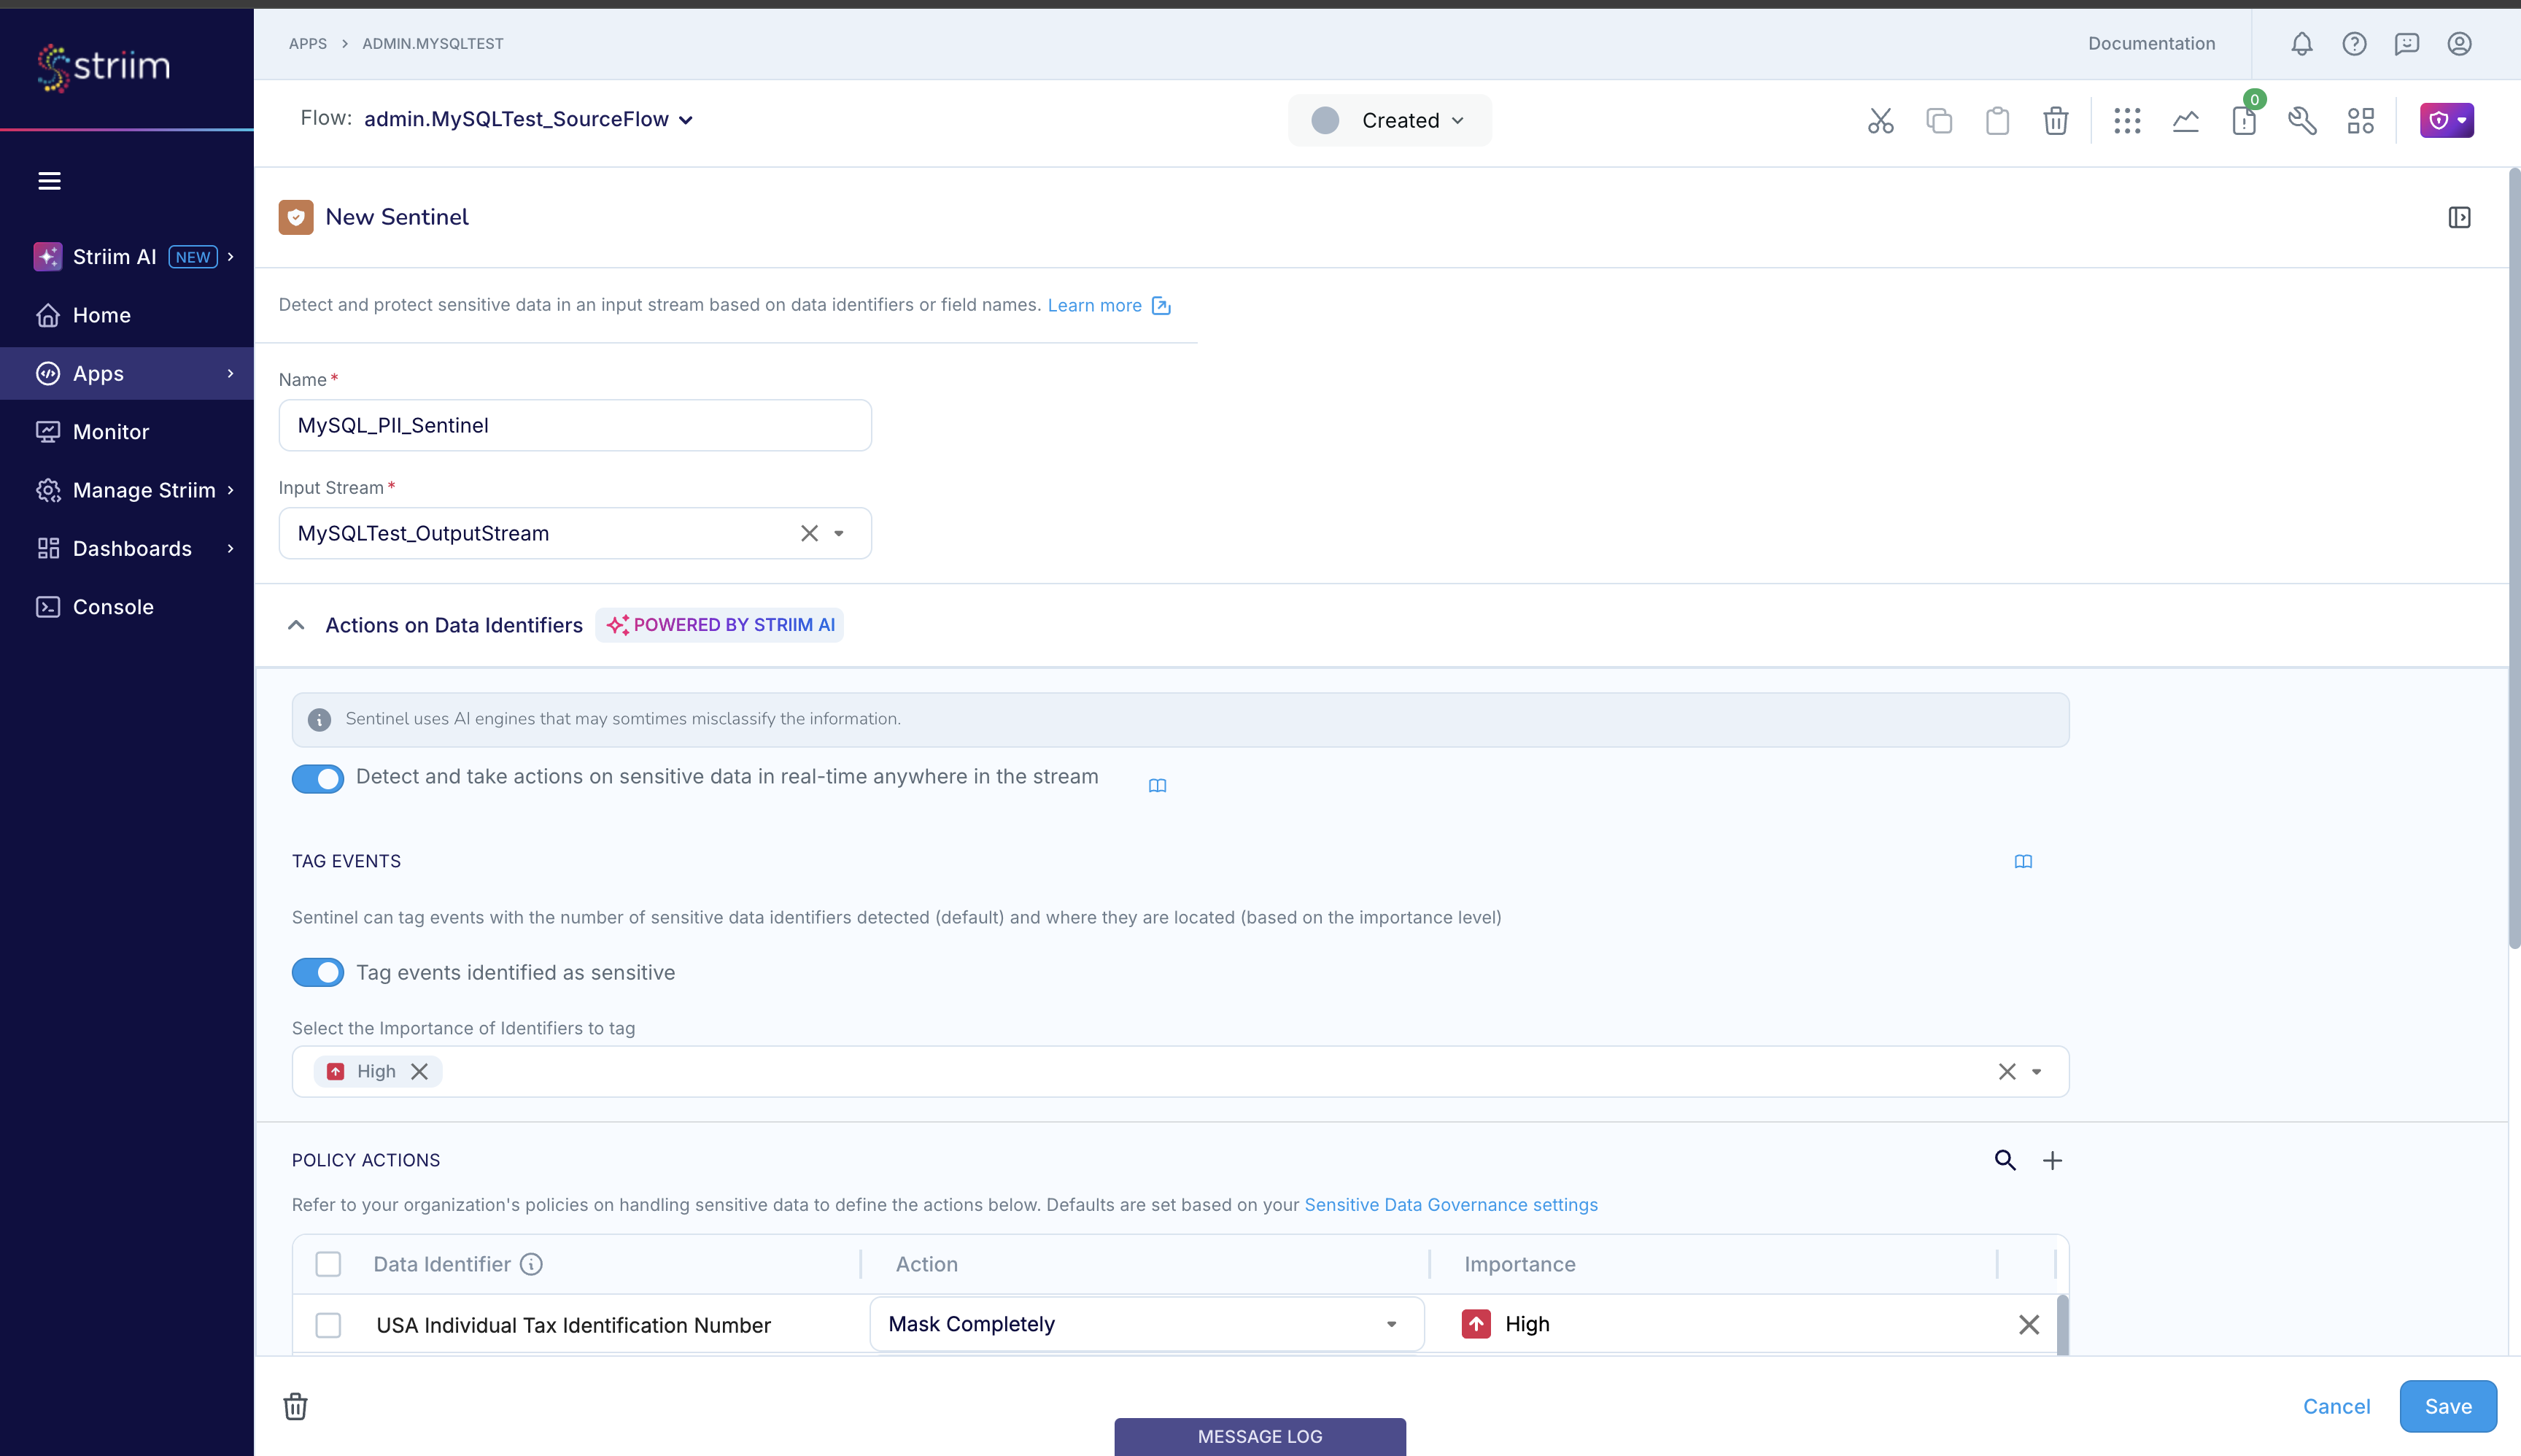
Sentinel’s Actions on Data Identifiers scan for sensitive data in the input event, irrespective of the field or column where that sensitive data is placed in the event. For each sensitive data identifier, you can configure the Policy Action that you want Sentinel to take. Sentinel supports 5 Policy Actions on Data Identifiers: (i) No action, (ii) Encrypt, (iii) Mask completely, (iv) Custom masking - redaction, and (v) Custom masking - using regex.
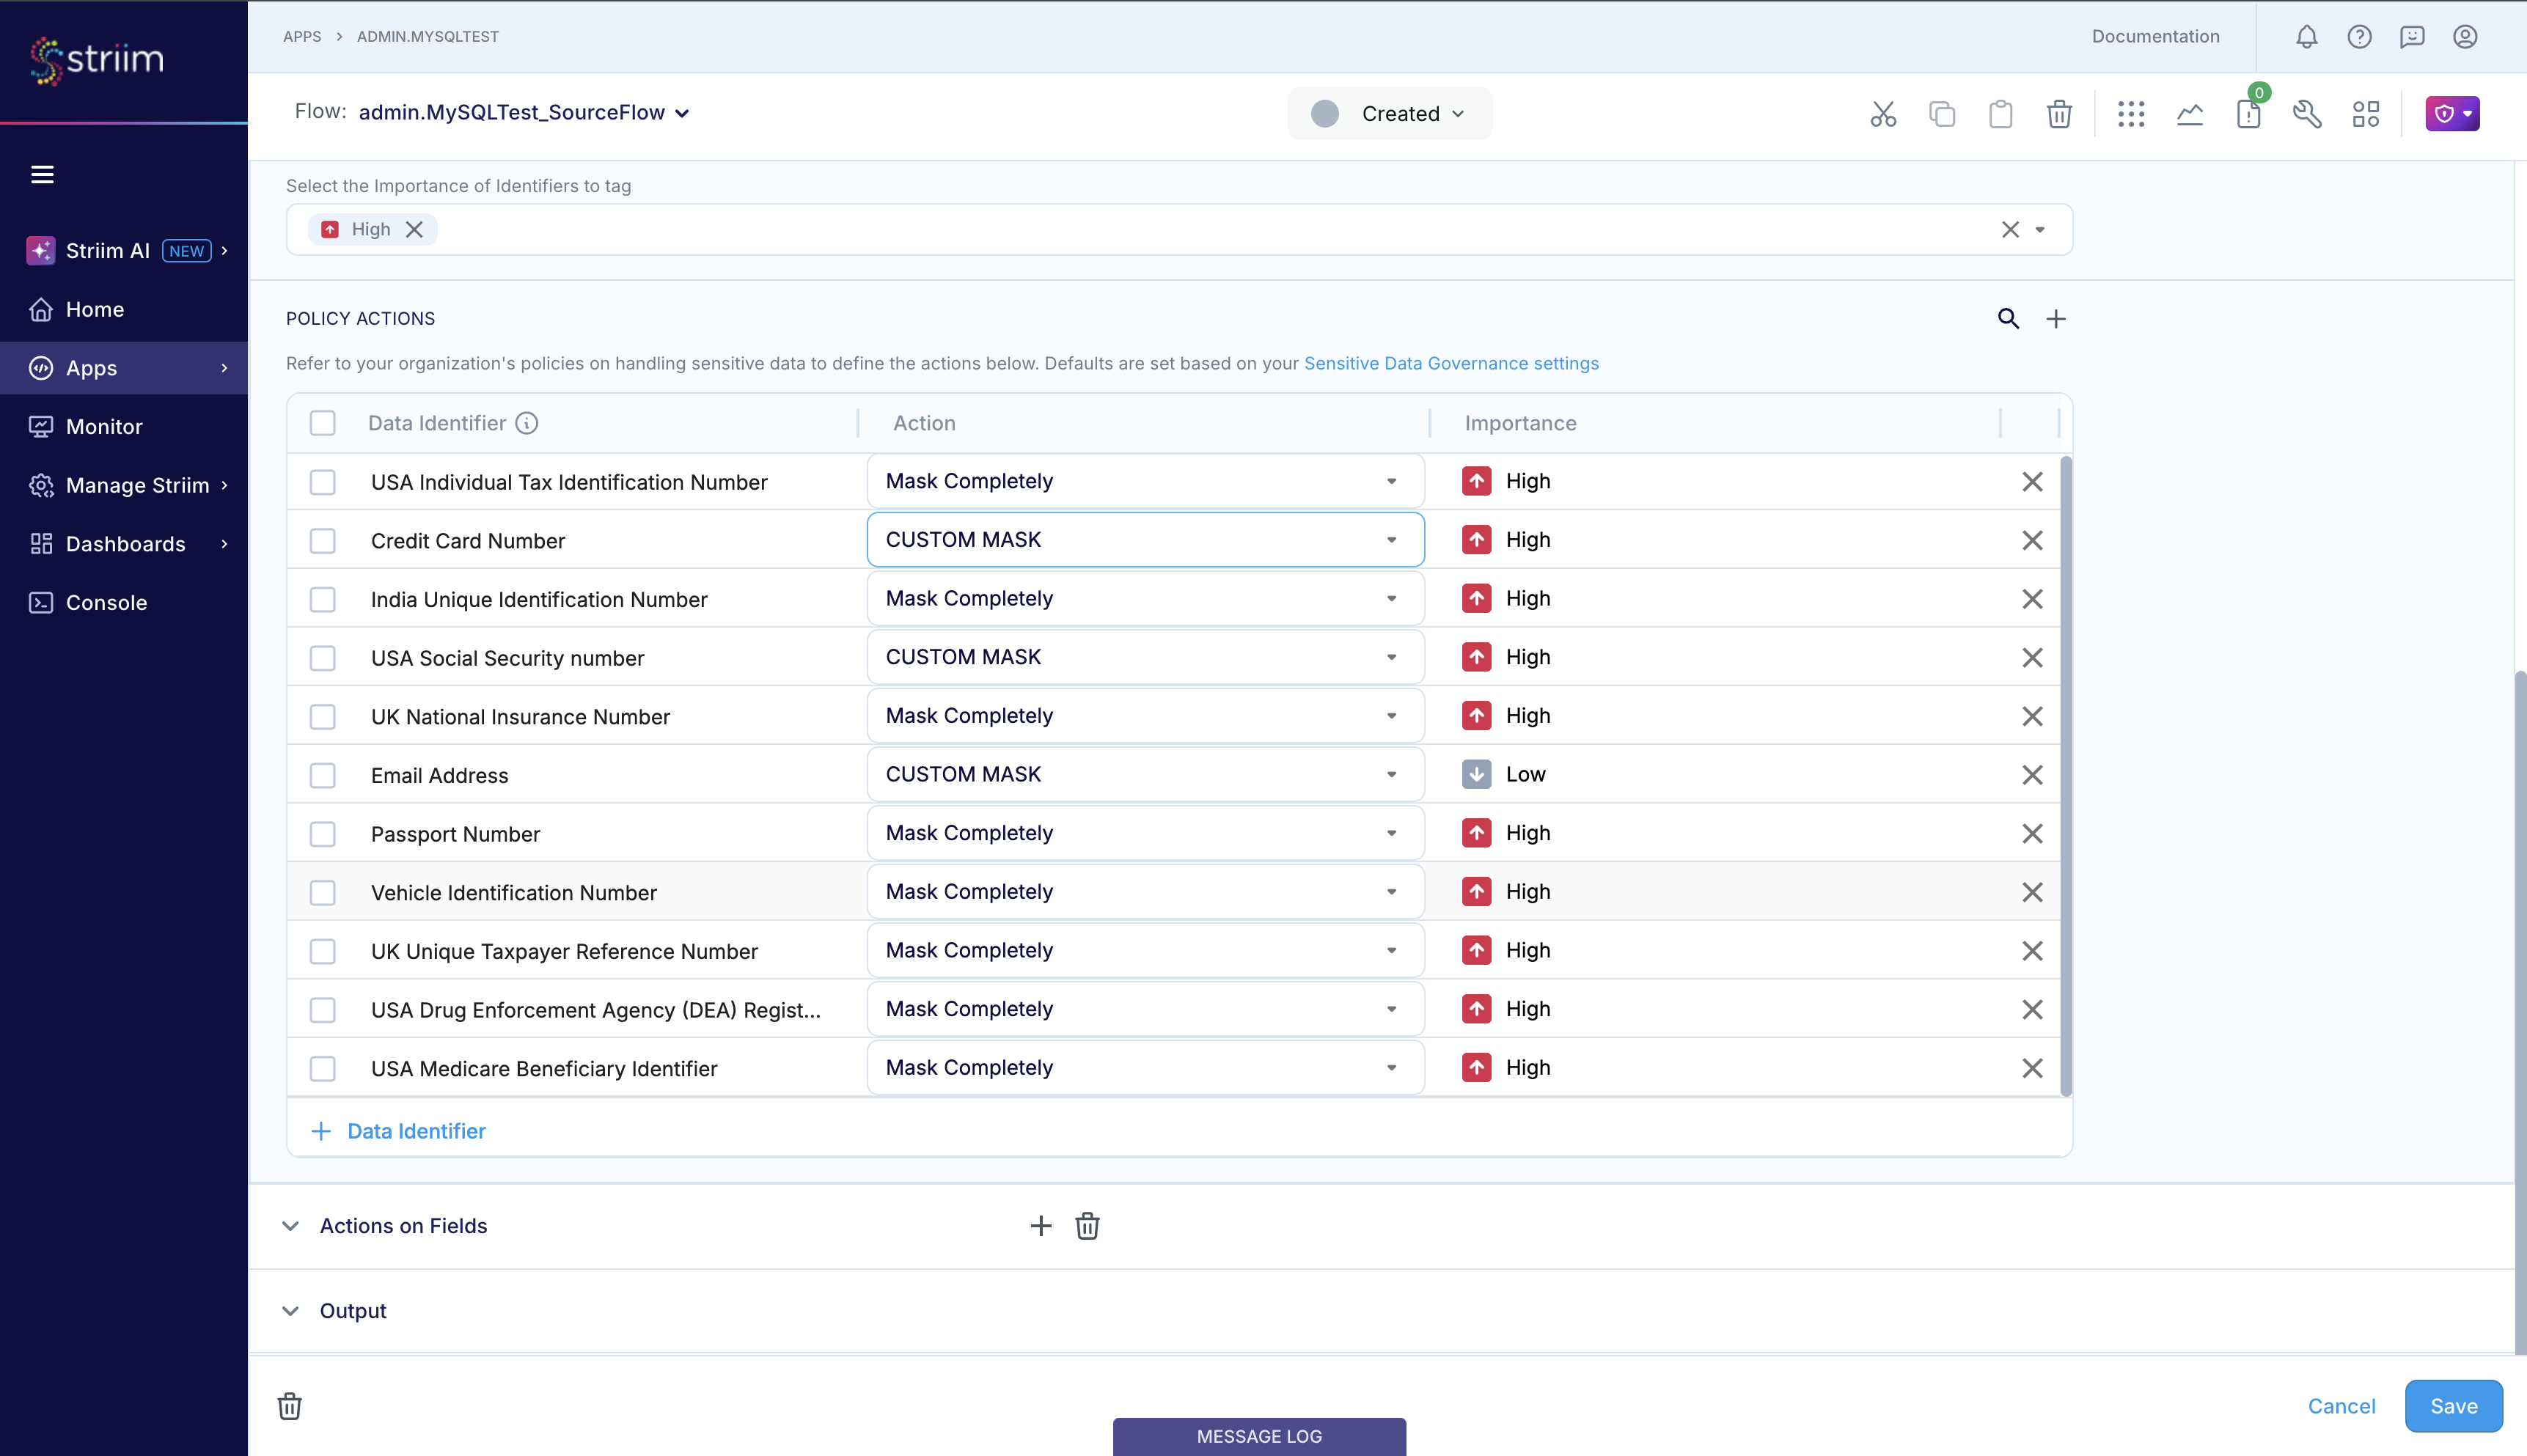
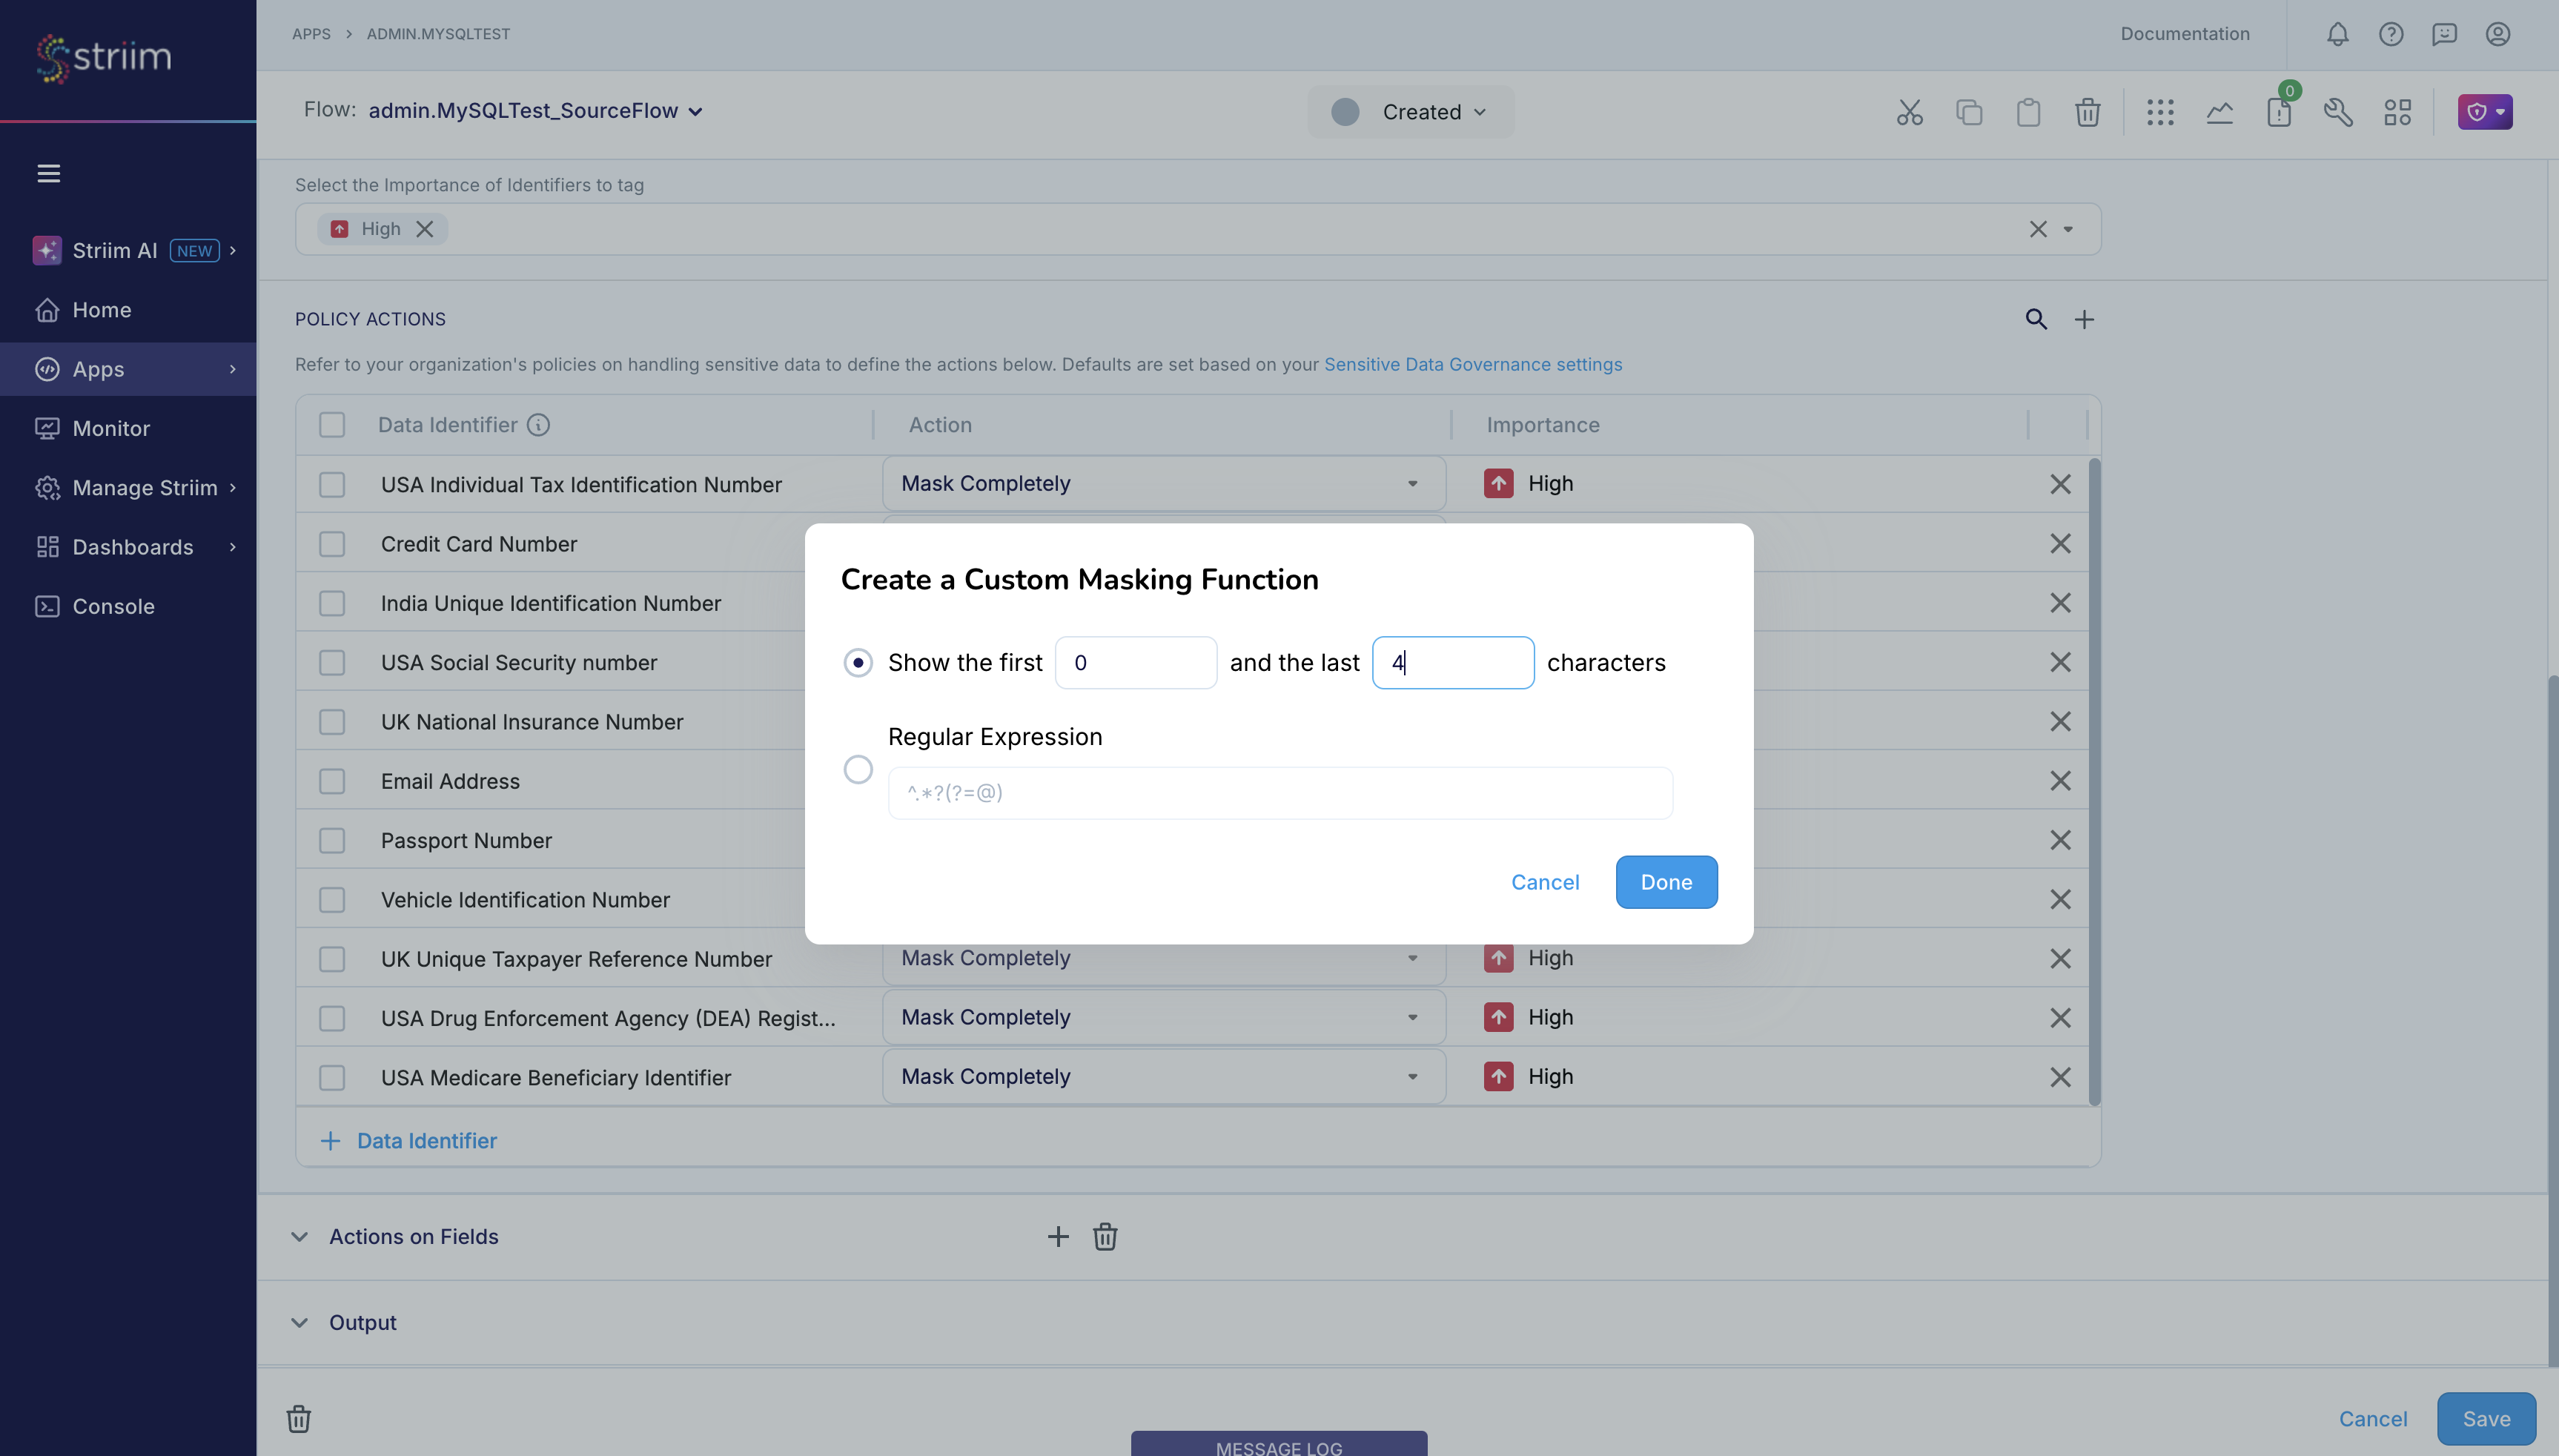
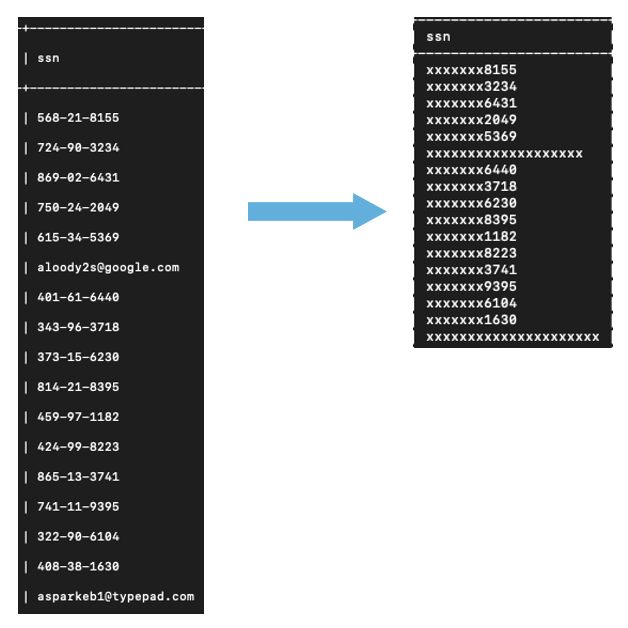
In the custom masking – redaction setup shown below, Sentinel will only show the last 4 characters of the input sensitive data, and replace all other characters of the input sensitive data with “x”. For example, if Sentinel detects a US Social Security Number 123456789 in the input event, it will mask it as xxxxx6789.
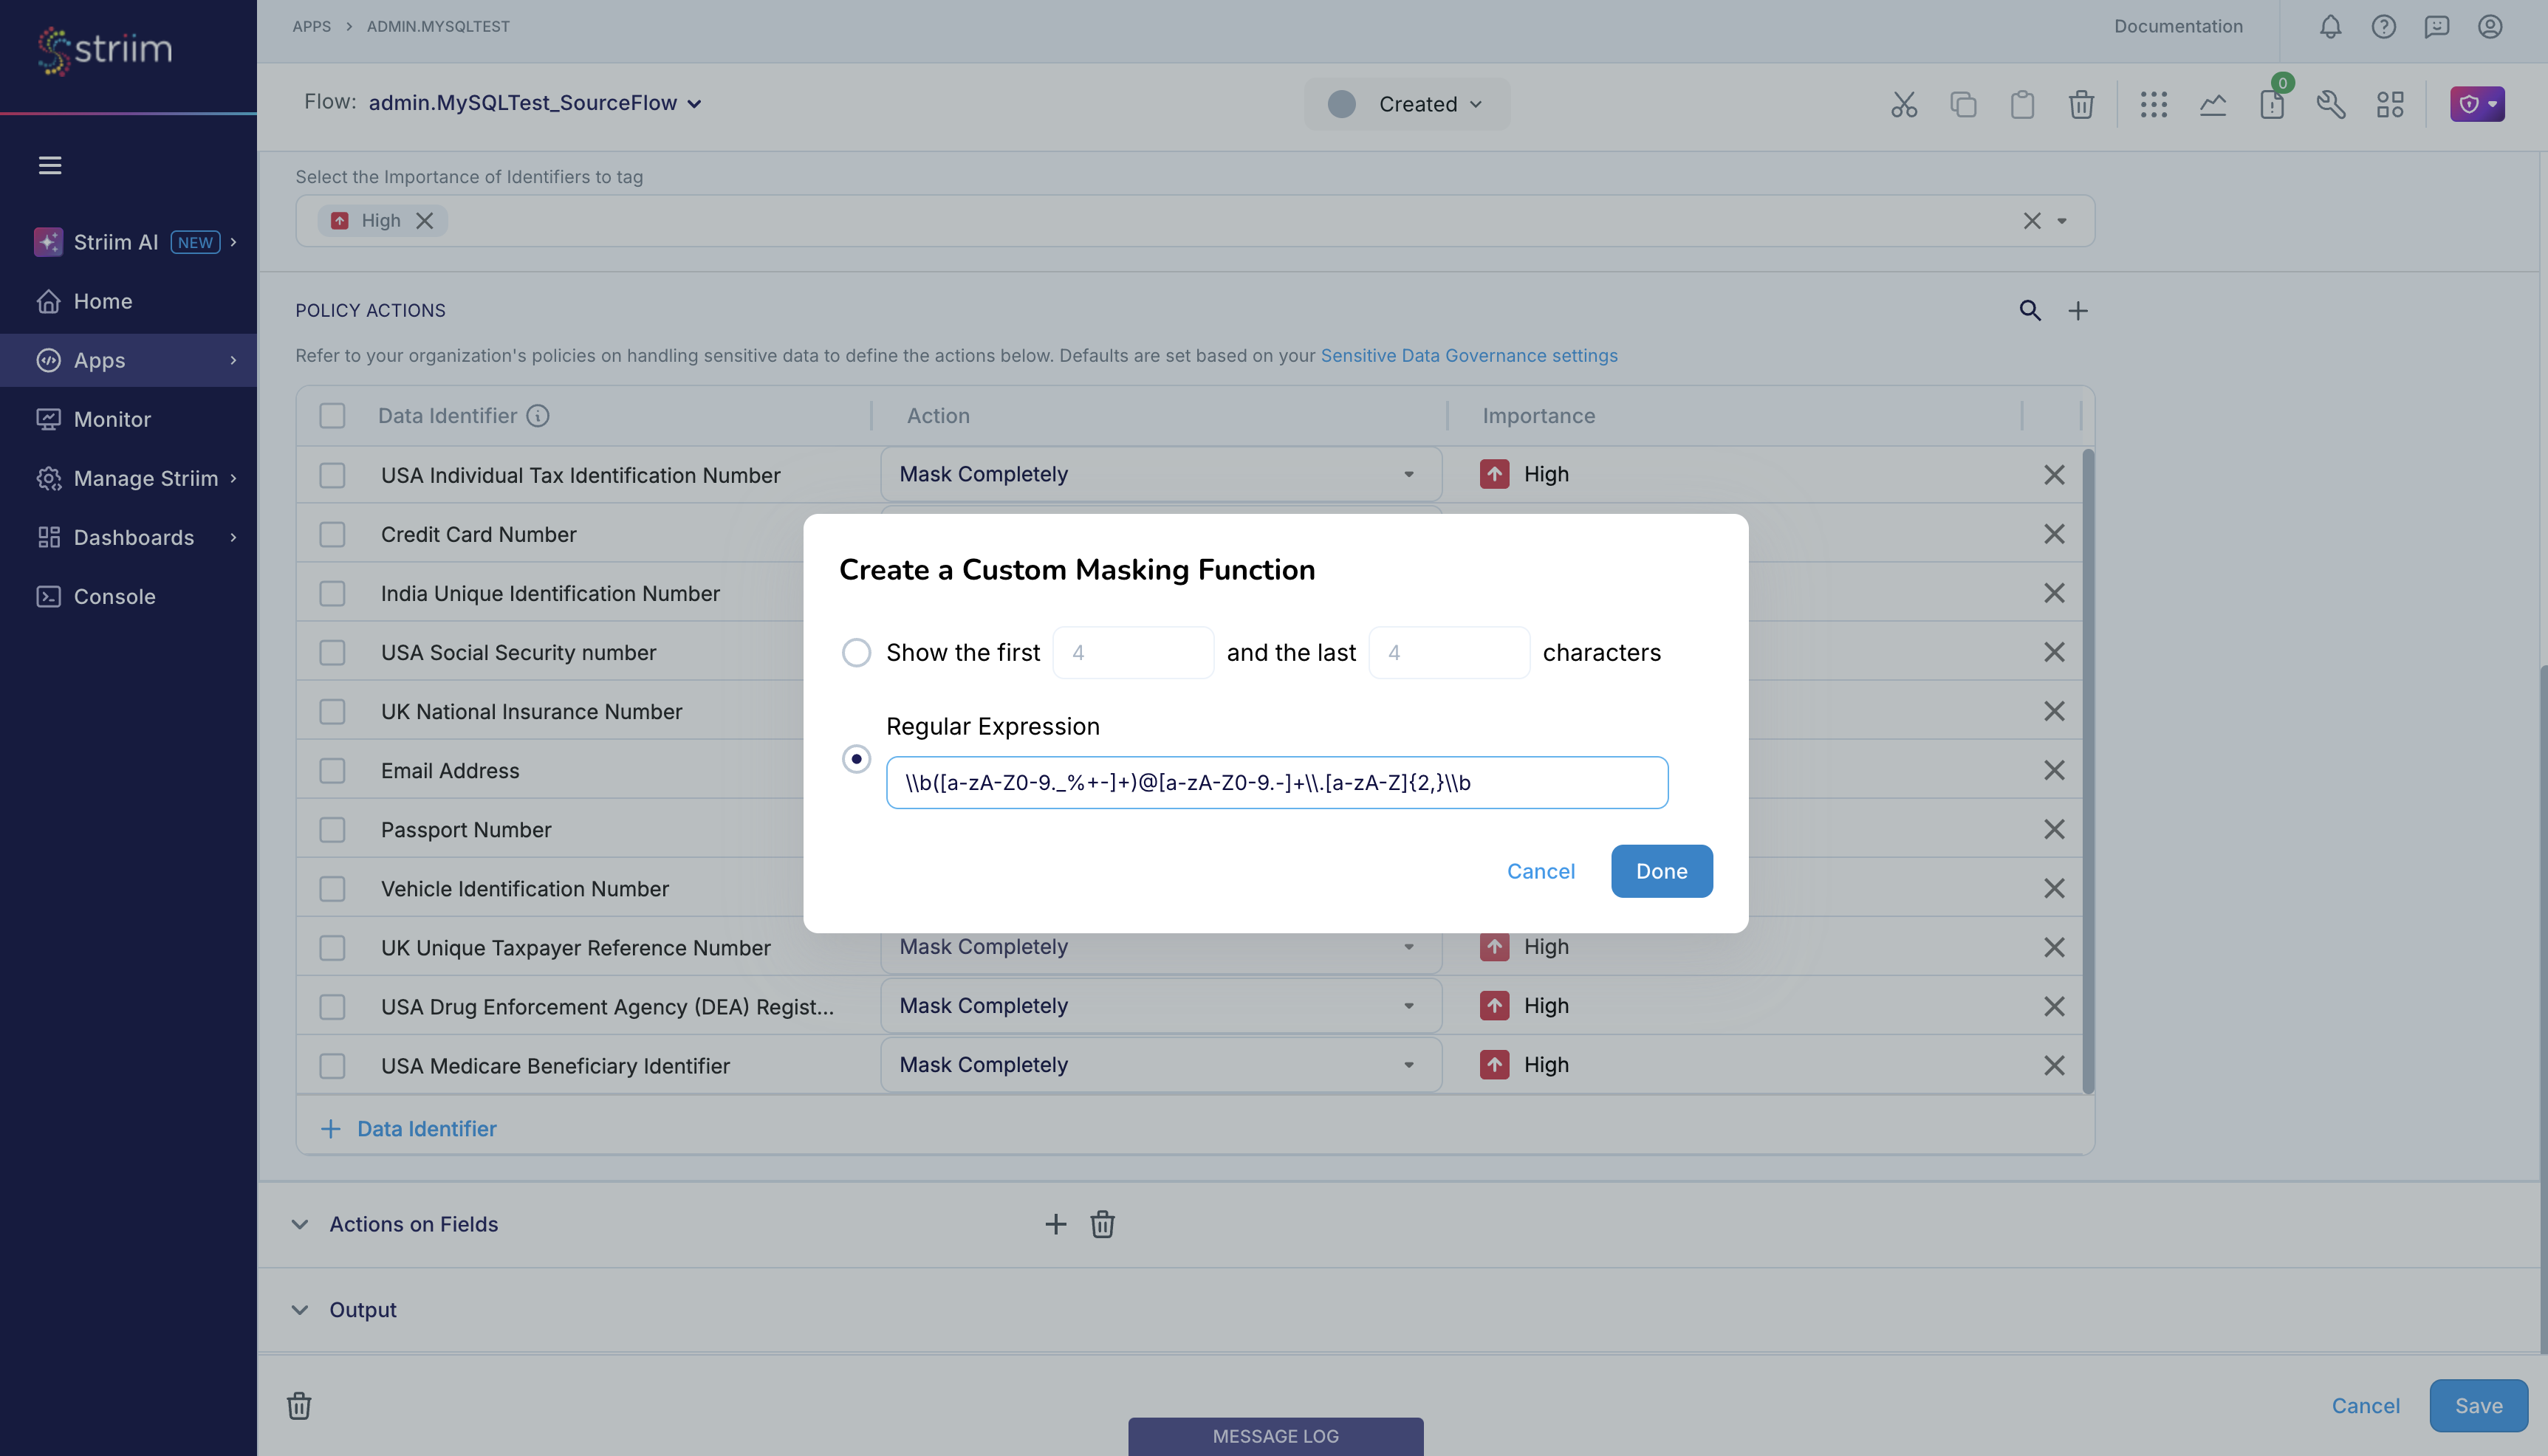
Sentinel also supports custom masking where you can specify the pattern of the sensitive data as regex, and when Sentinel detects sensitive data that matches your specified pattern, it will take the specified action. Assume that you want Sentinel to mask the john.doe@example.com email address and output it as jxxxxxxx@example.com. You can achieve this by specifying the custom masking action for email address as \\b([a-zA-Z0-9._%+-]+)@[a-zA-Z0-9.-]+\\.[a-zA-Z]{2,}\\b.
If you choose to encrypt the input sensitive data using Shield, you must set up the Google KMS keys by setting up and linking a Google KMS Connection Profile, as shown below.

The modified app, with Sentinel placed in the stream between source and target, is now ready to run.
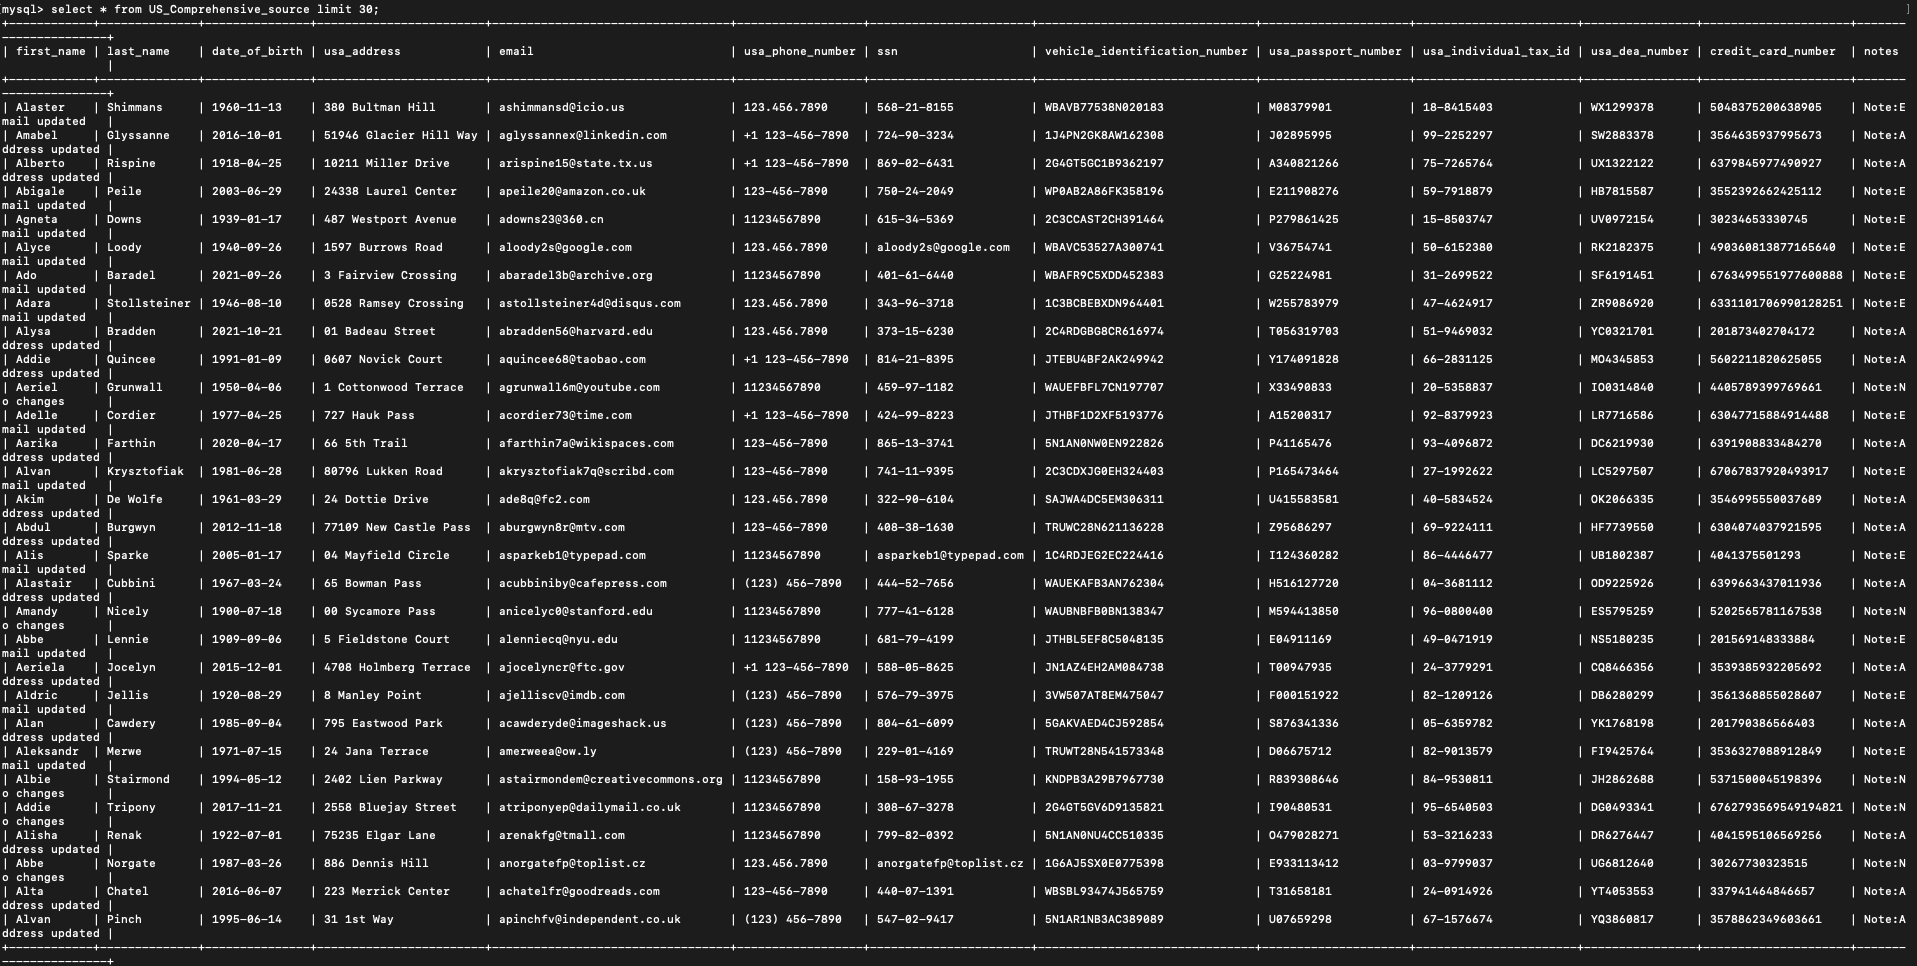
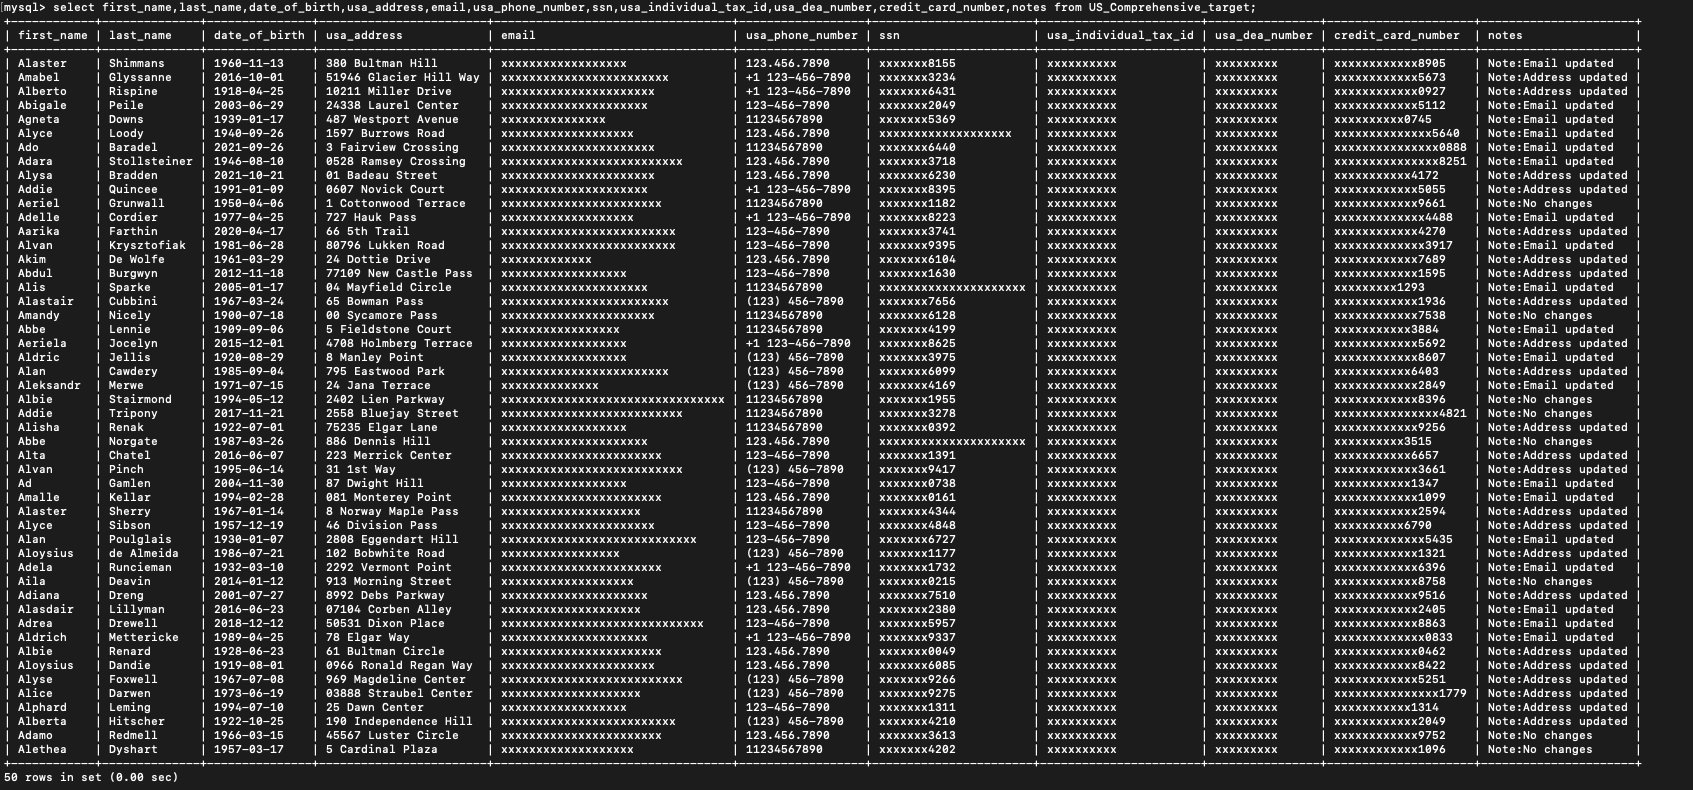
We can view the data at the target to verify if Sentinel has protected the data as per your specification. The screenshot below shows the output, and you can see that Sentinel has masked the sensitive information as per your specifications.
As mentioned previously, Sentinel’s Actions on Data Identifiers detect and act on sensitive data irrespective of their location in the input event. As the screenshot below shows, Sentinel detected US Social Security numbers and email addresses in the same column but took different actions based on the type of sensitive data that it detected.
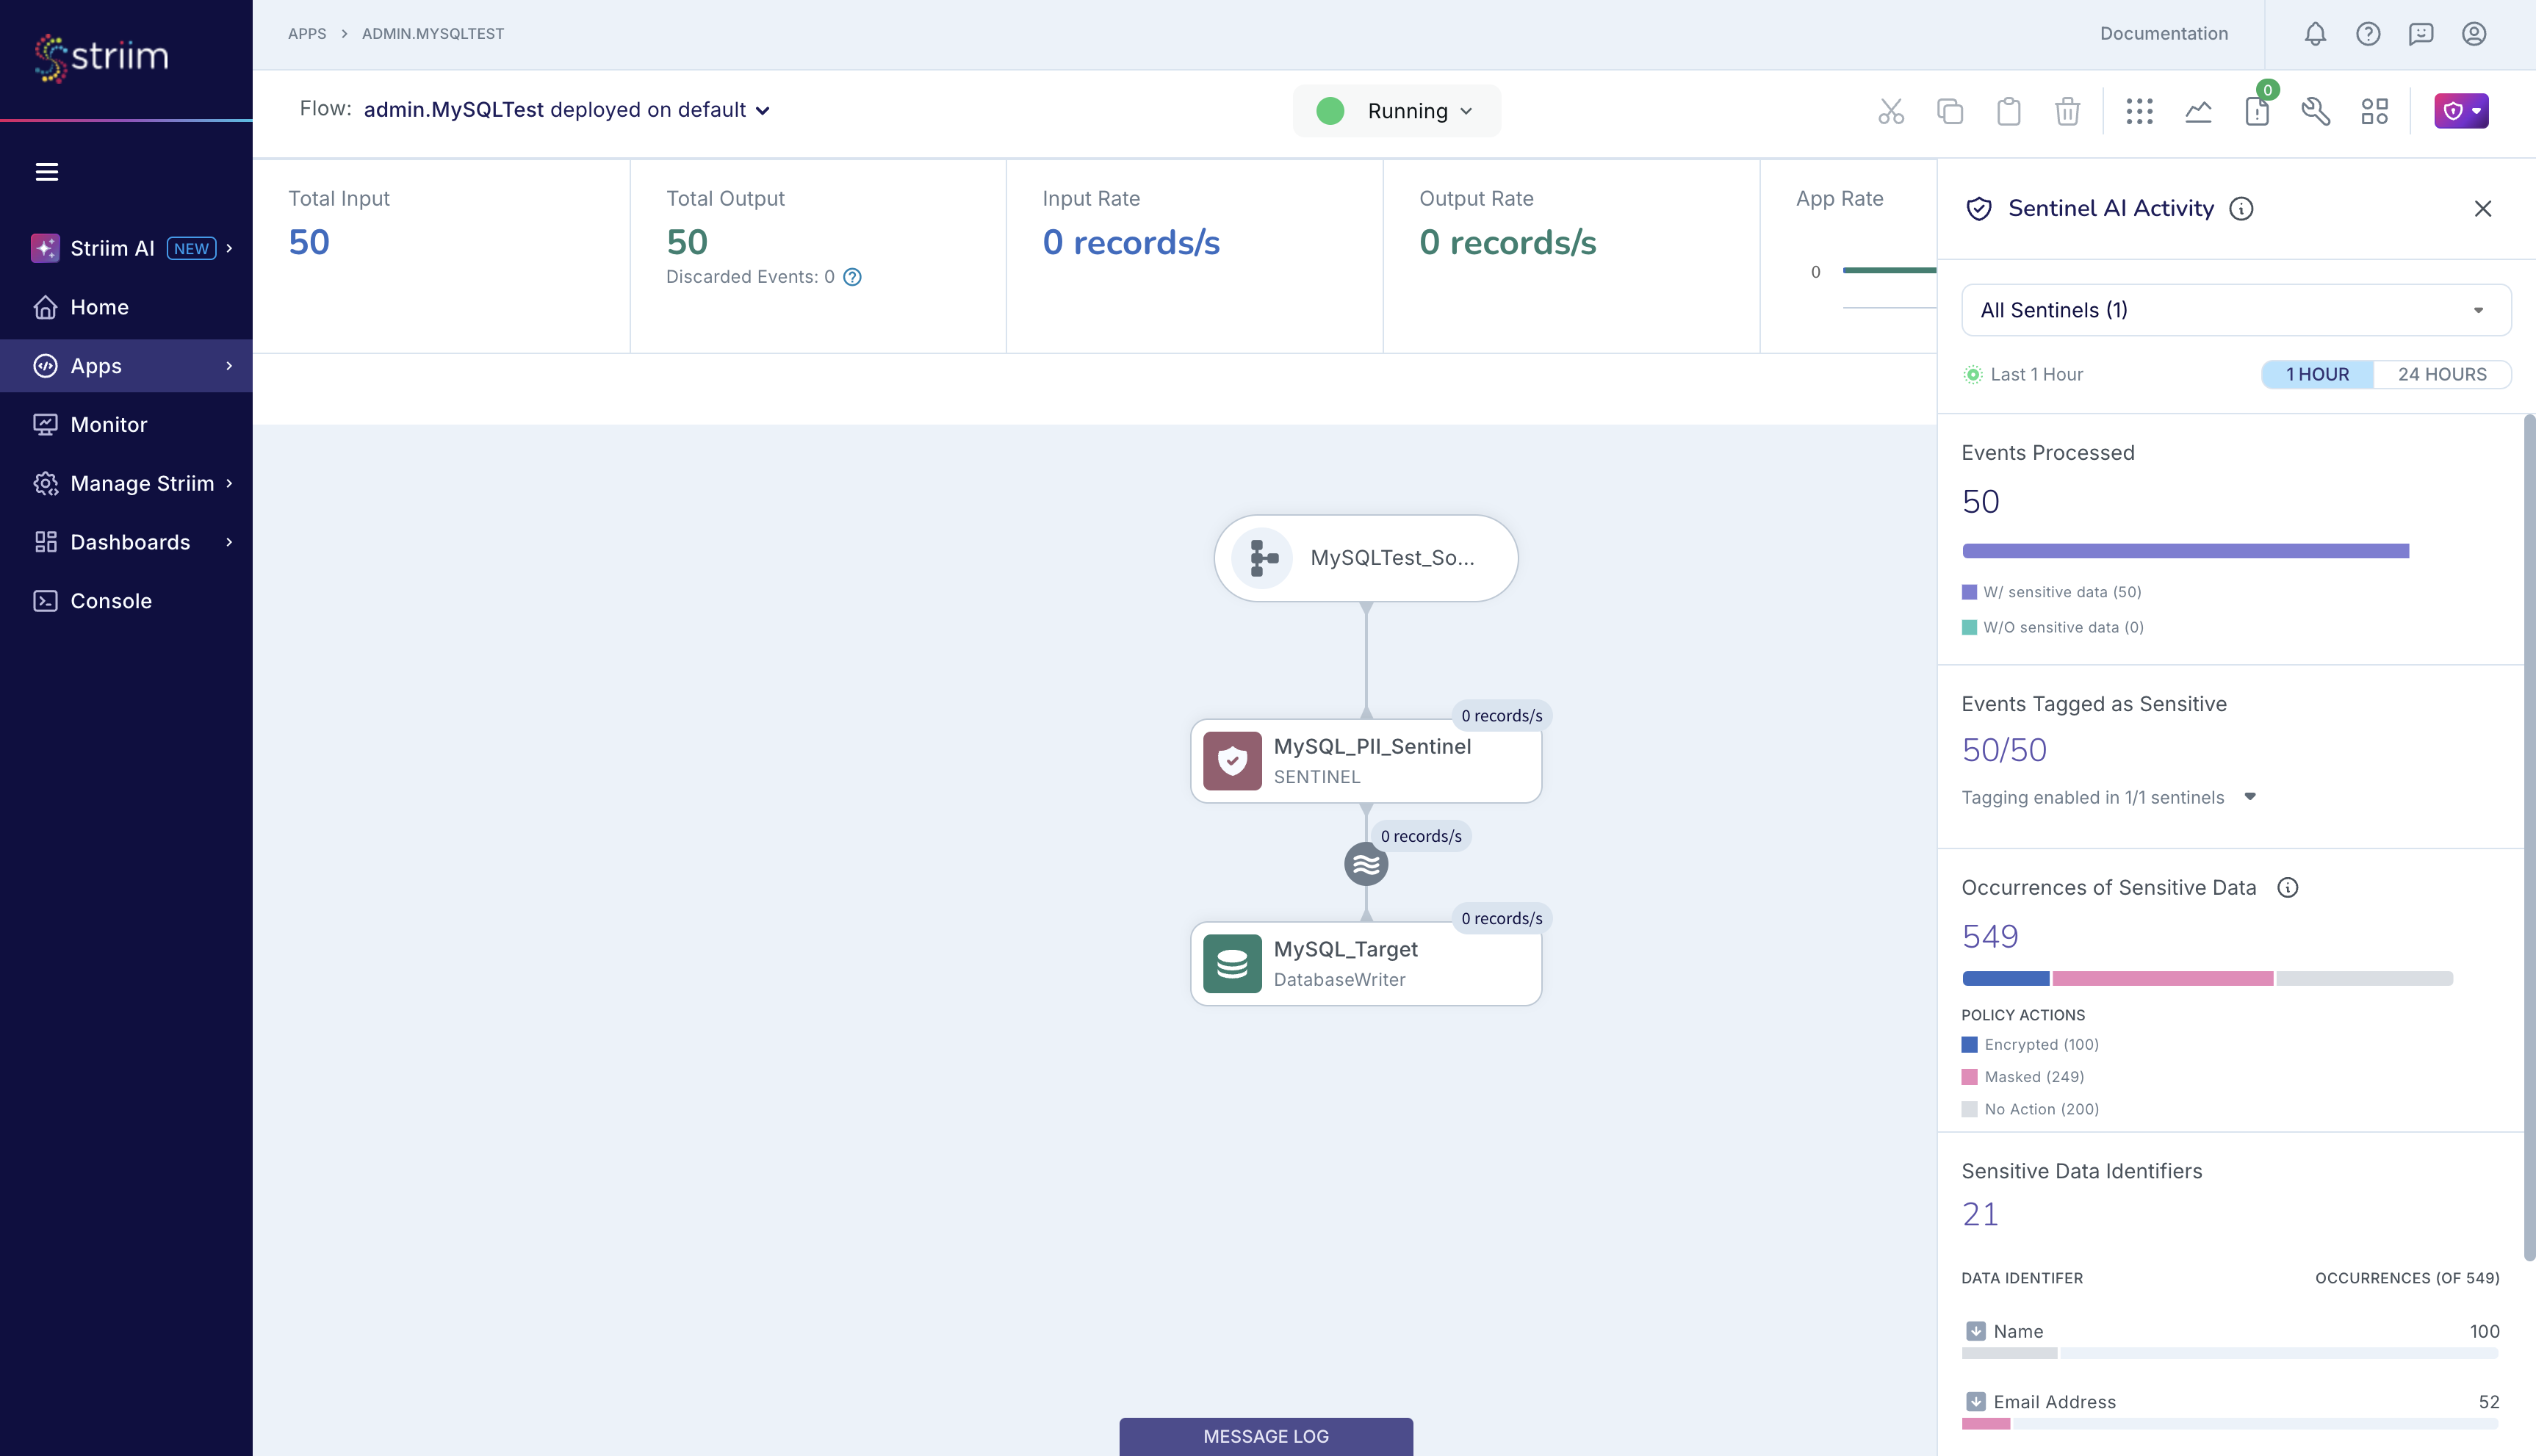
Sentinel’s report is accessible from the Sensitive Data Governance icon. This report is updated in real-time when the app is running. Today, Sentinel provides a report of its detections and actions from the last 24 hours, as shown below. Sentinel is reporting that, in the last 1 hour:
It processed 50 events and detected sensitive data in all 50 events.
Since Sentinel’s event tagging was enabled, it also tagged all 50 events with information about the sensitive data detected in each event.
In these 50 events, Sentinel is reporting that it detected a total of 549 occurrences, or count, of 21 sensitive data types. Based on your Policy Action specifications, Sentinel encrypted 100 sensitive data items, masked 249 sensitive data items, and took no action on the remaining 200 sensitive data items.
Sentinel will also provide granular information about each sensitive data type that it detected in its input stream. In the figure below, Sentinel is reporting that it detected 100 occurrences of names, and 52 occurrences of email addresses.
Event tagging for granular reporting per event
Previously, we had introduced the concept of event tagging, a feature of Sentinel's Actions on Data Identifiers. With event tagging, you can record Sentinel’s report for a report along with the event at the target. You can also add a CQ that can read the AIData information from every report and report it for in-app use. We show both examples in this section.
Let’s start with the target database in the MySQL_To_MySQL_PII app. As shown in the figure below, we create an extra column at the target table called AIData_info, and we write the contents of AIData to that column.
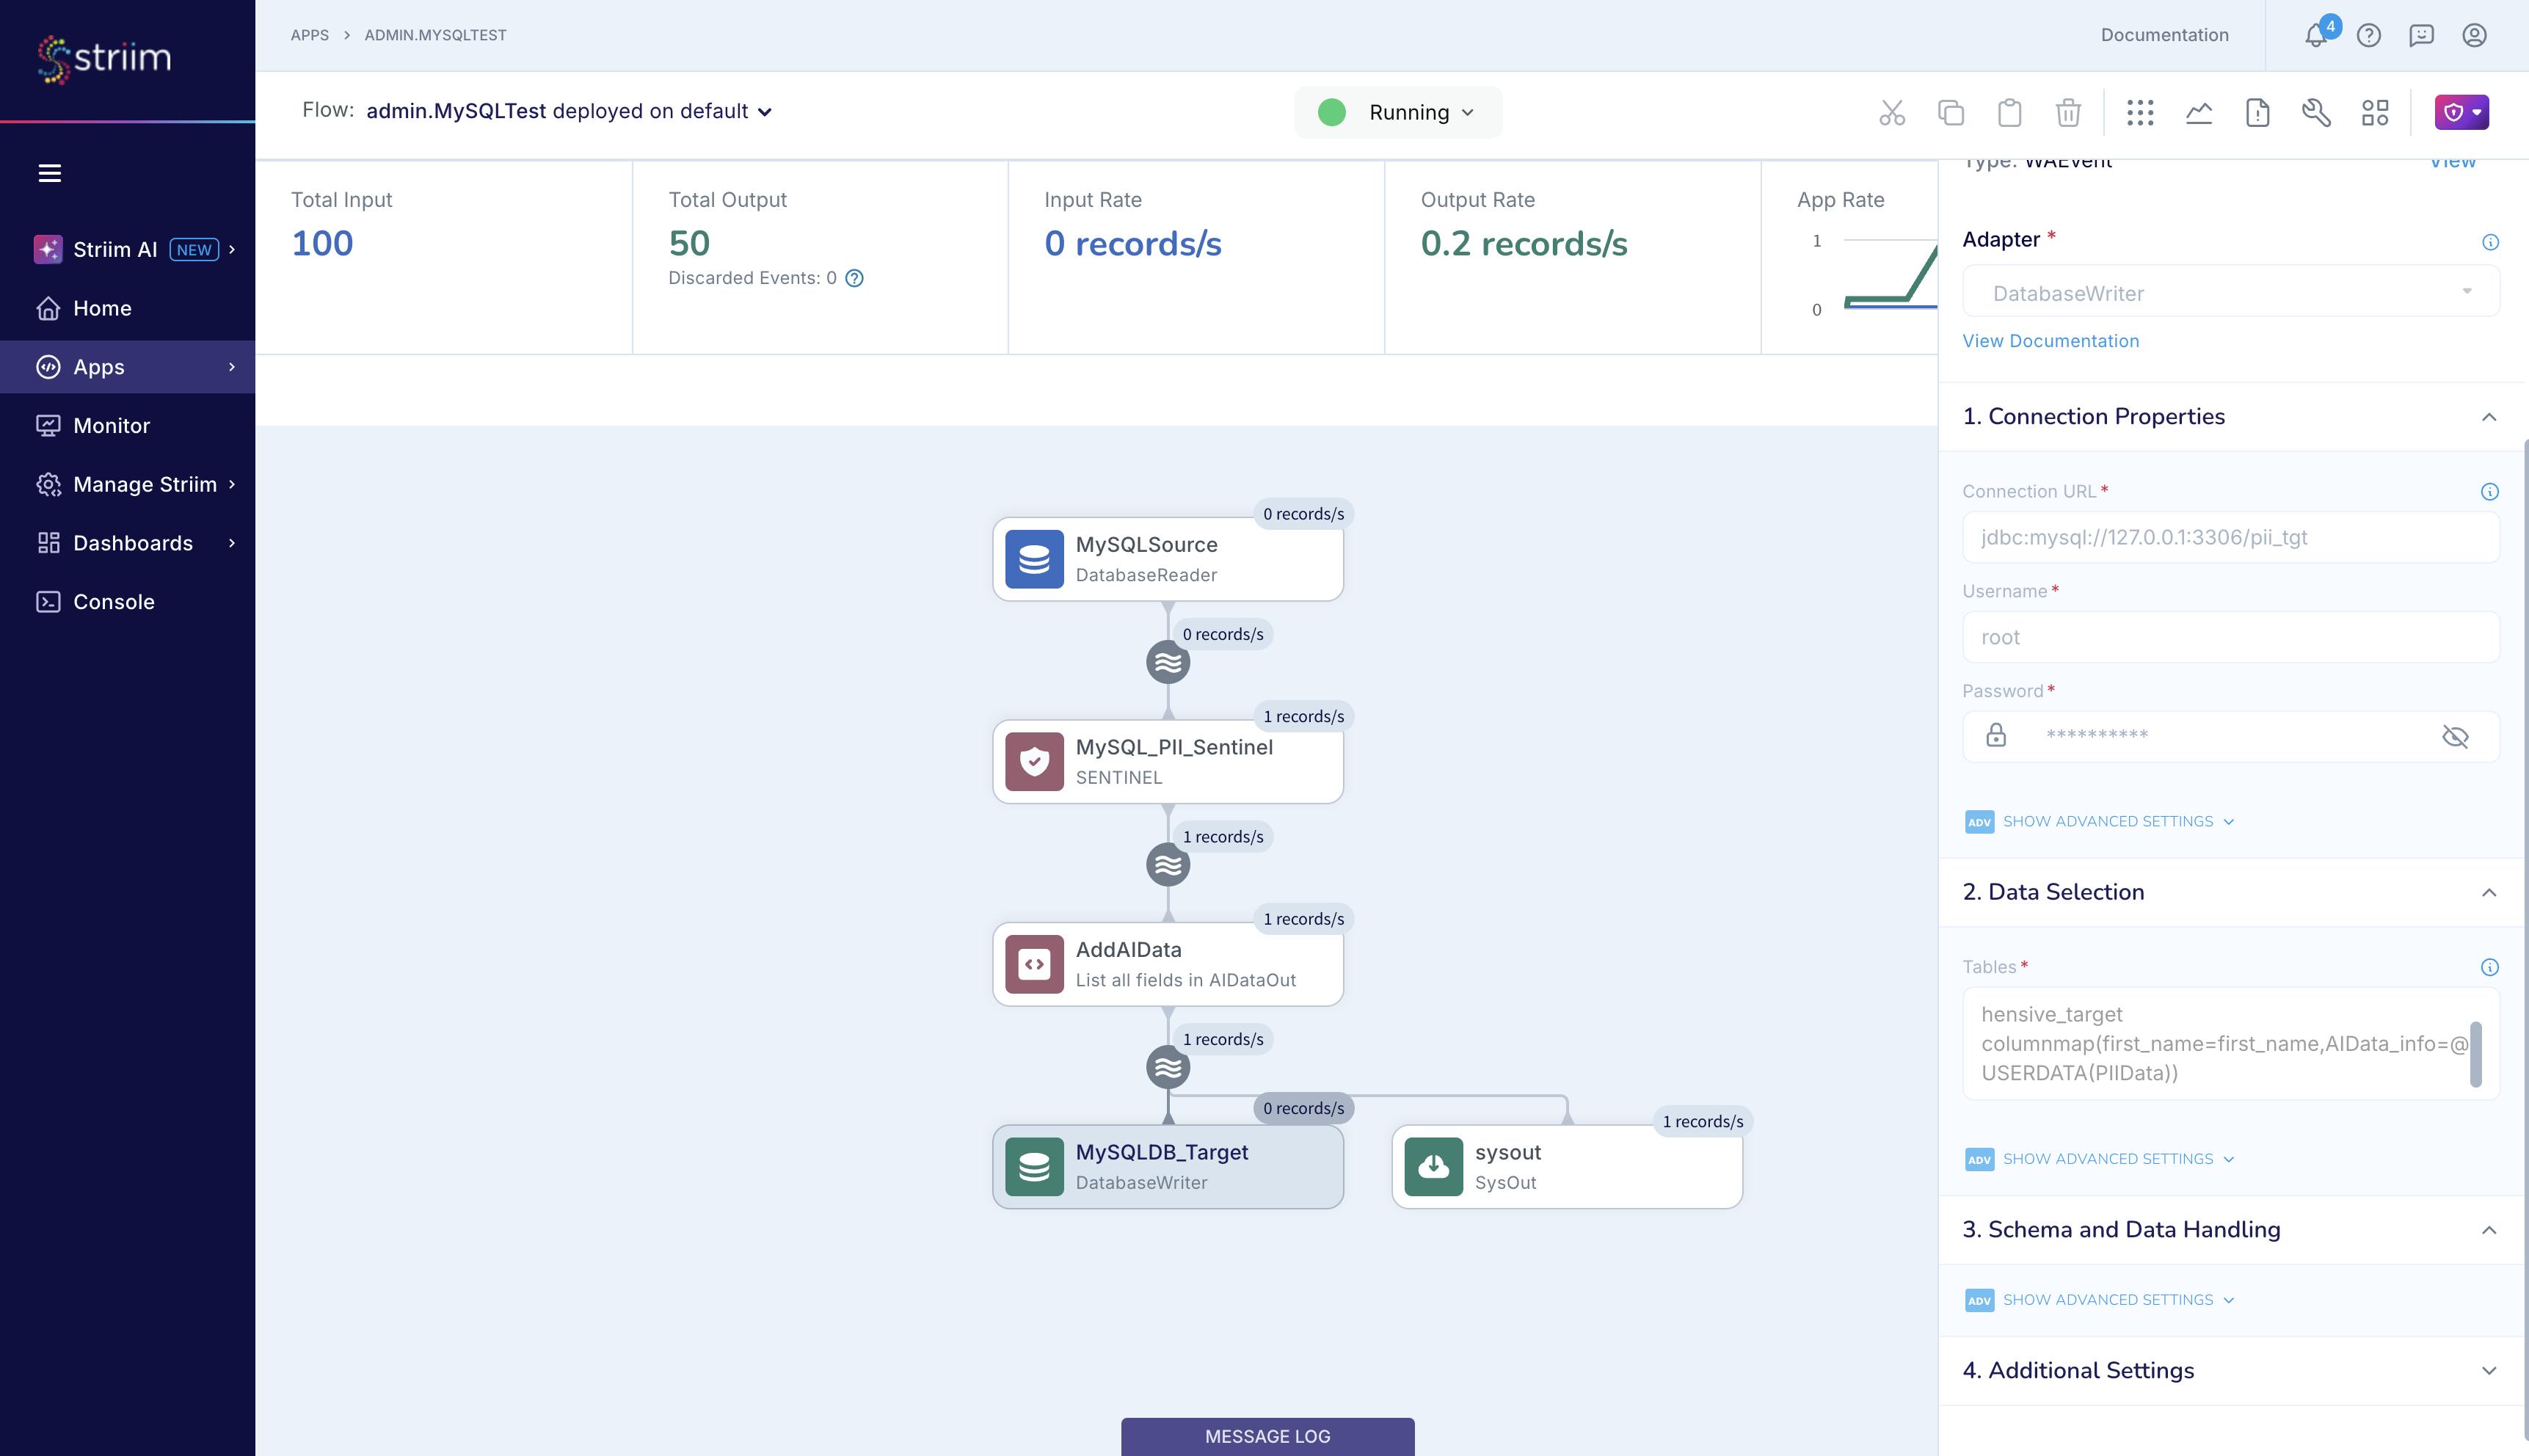
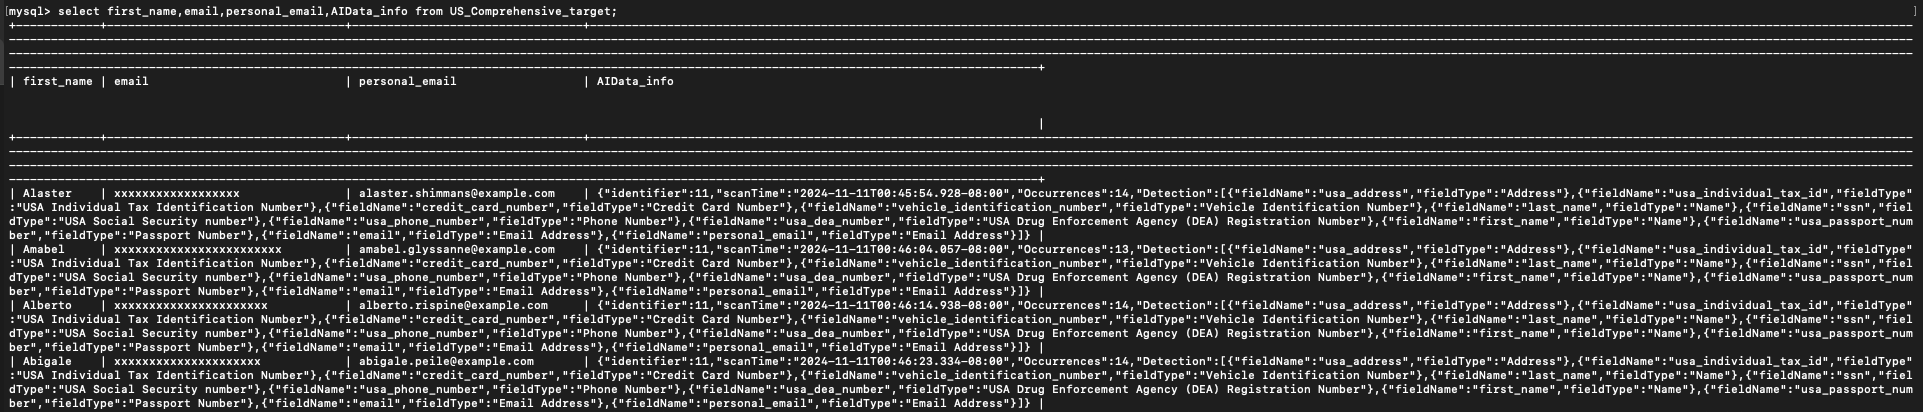
You can view the target table, and see that this additional column now contains information about the sensitive data that Sentinel detected in each row such as the number of sensitive data types in the row and the column name where each High Importance sensitive data type is located in that row. Since this information is stored at the target table, you can use it later for analysis such as checking if sensitive data in recently updated records is located in the expected columns. If you do not store the AIData information at the target, then it is lost forever.
You can also place a CQ to read and report on the event tag data, as seen in the figure below.
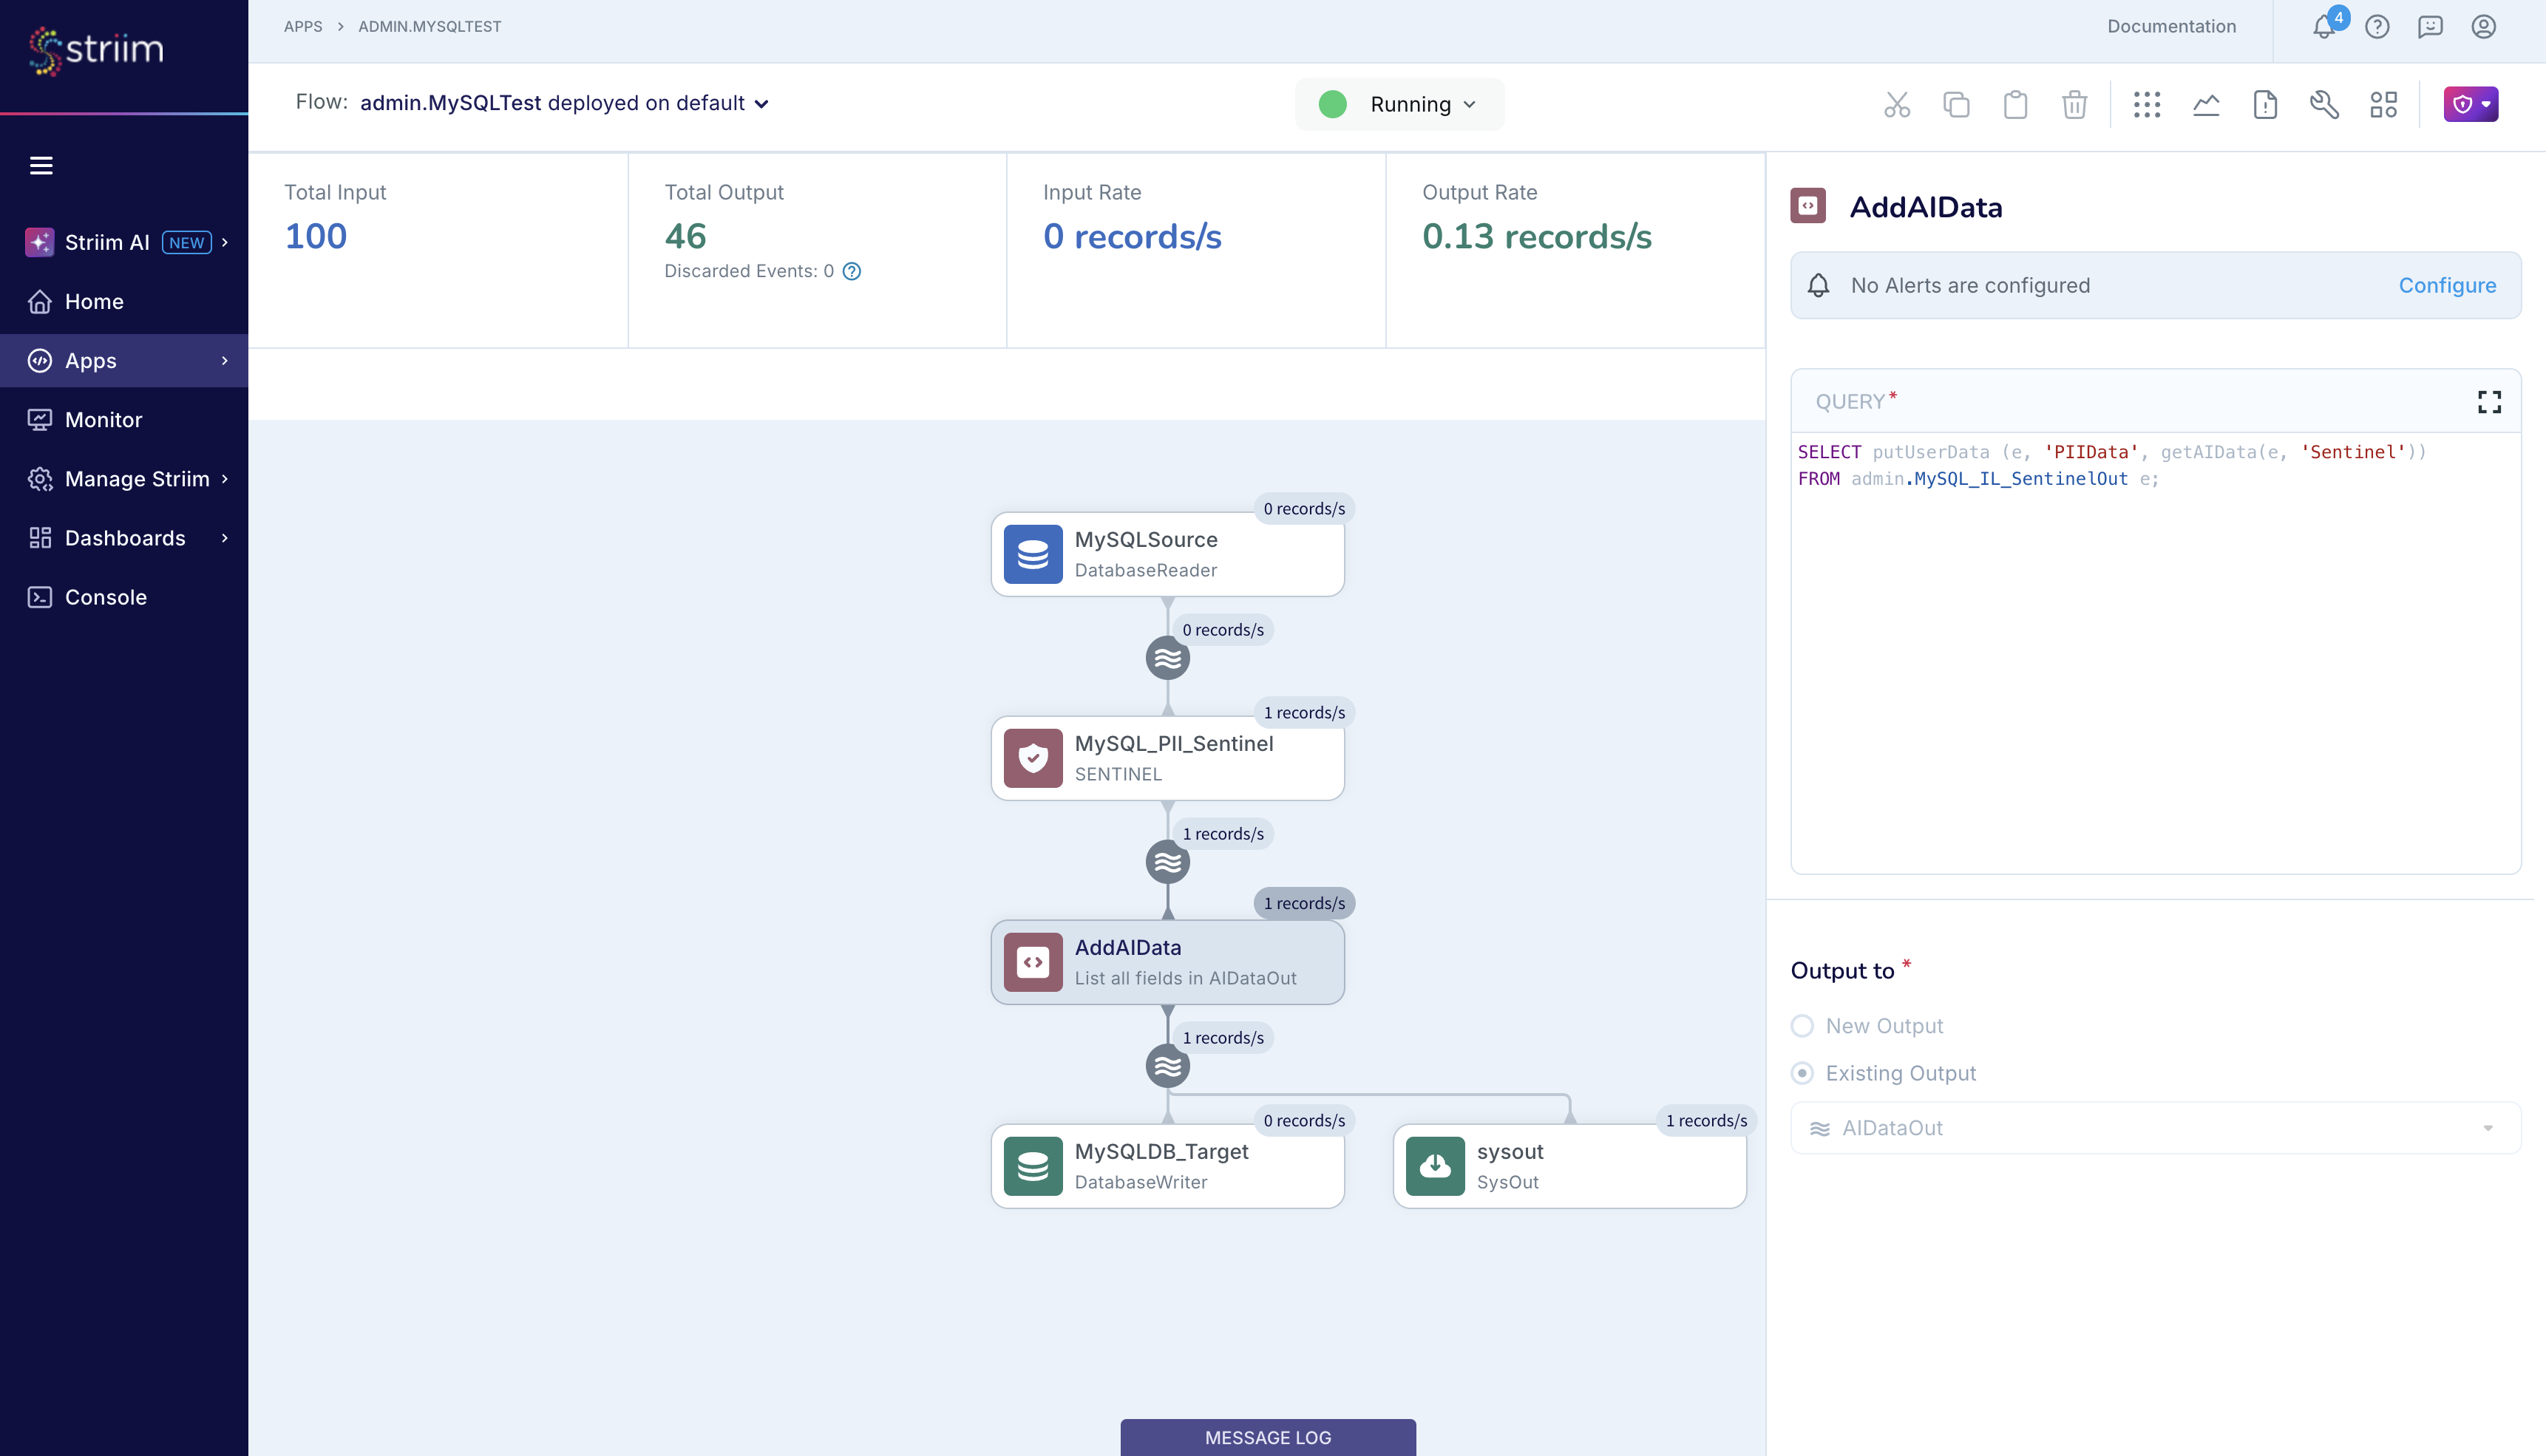
The CQ reports the same AIData information that you stored at the target database and you can use this information for real-time in-flight analysis. The CQ output is ephemeral and you cannot retrieve once the event has flown through; therefore, it is best if you store the information at the target database.
