Salesforce initial load
The Salesforce Reader uses REST APIs to read Salesforce CRM (sObject) data at configured refresh intervals. See also Salesforce Marketing Cloud Engagement, Salesforce Platform Event Reader, and Salesforce Push Topic Reader.
See API Request Limits and Allocations for information on Salesforce-side limits that may require you to limit how much and how quickly Salesforce Reader ingests data.
Summary information and supported objects
APIs used/data supported | Standard and custom Salesforce objects |
Security and authentication |
|
Operations/modes supported |
|
Schema management | Initial schema creation |
Resilience / recovery | Configurable automatic retries |
Performance | Striim Platform supported parallel execution |
Programmability |
|
Metrics and auditing | Key metrics available through Striim monitoring |
Salesforce Reader initial setup
The Salesforce Reader supports authentication with OAuth. Configure OAuth when prompted by the Striim wizard.
Configuring OAuth for Salesforce Reader
For simpler configuration, create a connection profile (see Connection profiles).
Configuring OAuth for automatic authentication token renewal
The following procedure requires an active Salesforce account and a Striim app connected to Salesforce (see Create a connected app).
From the connected app, get the values of the Consumer Key and Consumer Secret.
In the Salesforce Reader, set the values of the Consumer Key and Consumer Secret.
Generate a security token following the instructions in Reset your security token.
In the Salesforce Reader, set the value of the Security token.
Configuring OAuth for manual authentication token renewal
Generate an authentication token using the following command:
curl https://login.salesforce.com/services/oauth2/token -d "grant_type=password"\
 -d "client_id=<your consumer key>"\
 -d "client_secret=<your consumer secret>"\
 -d "username=<your username>"\
 -d "password=<your password>"
In the Salesforce Reader, set the value of the authentication token.
Generate a security token following the instructions in Reset your security token.
In the Salesforce Reader, set the value of the Security token.
Verifying Salesforce Reader configuration
Use the following cURL commands (see Using cURL in the REST Examples and curl.haxx.se) to verify your configuration and get information about available resources and sObjects.
Get an access token using the Salesforce login URL.
curl https://login.salesforce.com/services/oauth2/token -d "grant_type=password" \
-d "client_id=<your consumer key>" -d "client_secret=<your consumer secret>" \
-d "username=<your username>" -d "password=<your password>"
Using the access token returned by that command, test the REST API URL for your organization. The instance is typically the first part of the URL you see in your browser when logged into Salesforce, such as "mycompany" in mycompany.salesforce.com. Alternatively, ask your Salesforce technical administrator for access to a connected app. (For more information, see Understanding the Username-Password OAuth Authentication Flow.)
If you do not have a proxy server:
curl https://<your Salesforce instance>.salesforce.com/services/data/ \
-H 'Authorization: Bearer <token>'
If you have a proxy server (change the proxy server URL to match yours):
curl -x http://mycompany.proxy.server.com:8080/ \
https://<your Salesforce instance >.salesforce.com/services/data/ \
-H 'Authorization: Bearer <token>'
List available REST resources and sObjects (see List Available REST Resources and Get a List of Objects).
curl https://<your Salesforce instance>.salesforce.com/services/data/v41.0 \
-H 'Authorization: Bearer <token>'
curl https://<your Salesforce instance>.salesforce.com/services/data/v41.0/sobjects \
-H 'Authorization: Bearer <token>'
For additional information, see Salesforce's REST API Developer Guide .
Create a Salesforce Reader application
To start using the Salesforce Reader in Striim apps, you can create an application in the following ways:
Striim Wizard in the Flow Designer
Striim Flow Designer
Striim TQL
Creating a Salesforce Reader application using the wizard
Log in to a Striim instance.
Click Create an App from the Apps menu.
Select Salesforce as the source.
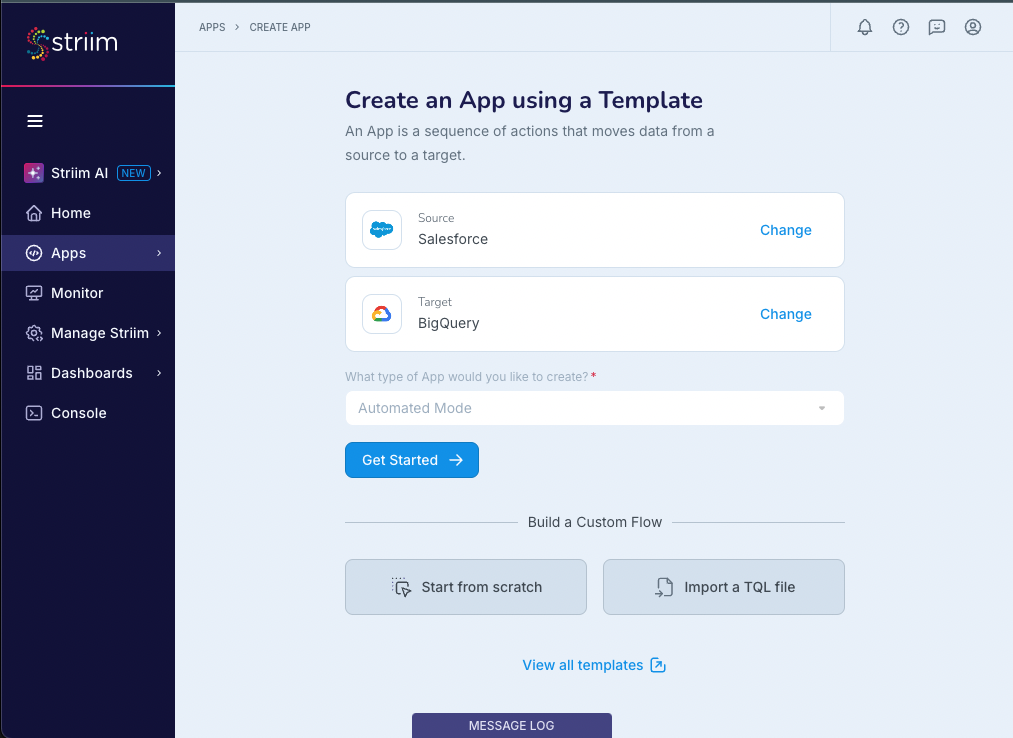
Specify your target and click Get Started.
The Salesforce Reader wizard starts.
In Name, enter a name for the app, then select a namespace from the Namespace drop-down.
The default namespace is the application name.
Click Save.
The wizard advances to the next step. You can specify connecting using a connection profile, or manually enter the connection properties in the wizard (described in steps 7-10).
For the API Endpoint, specify the My Domain Login URL. For example, https://mycompany.my.salesforce.com
Select Authenticate using Auth Token or Authenticate using User Credentials, as suited to your use case.
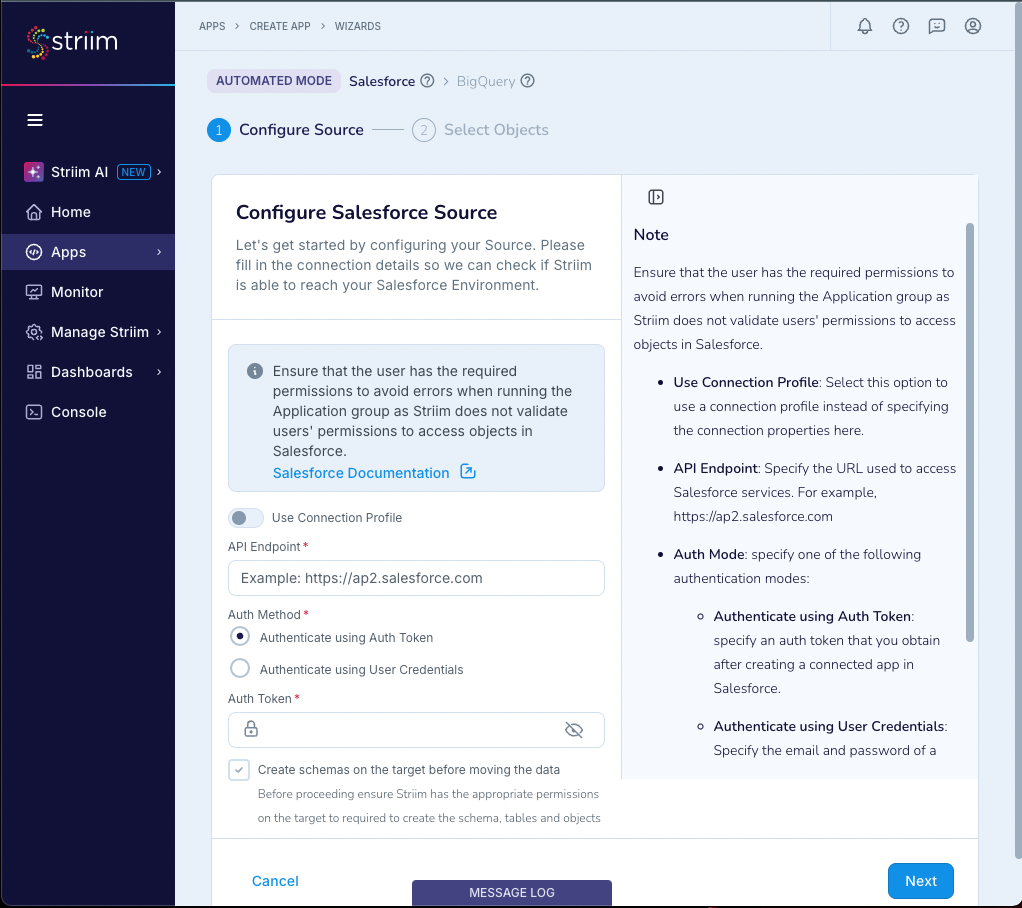
(To authenticate with OAuth authentication token) Specify an auth token that you obtain after creating a connected app in Salesforce.
(To authenticate with OAuth username and password) Specify the credentials for a Salesforce user account, with permissions to access objects:
Username
Password
Consumer Key,
Consumer Secret
Security Token.
Select Create schemas on the target before moving the data if you want the app to create the source schema for all selected tables at the target.
Click Next.
The wizard validates the authentication information and displays the results.
Click Next.
The wizard displays a list of objects available on the Salesforce instance.
Select the objects to ingest and click Next. Select only objects for which the previously specified token has permissions or the application will fail with an "Insufficient permission to access the metadata" error.
Configure your target.
Click Next.
The wizard displays summary information.
Click Save & Run.
The application is saved and begins running.
Creating a Salesforce Reader application using the Flow Designer
Creating a Salesforce Reader application using TQL
The following TQL will read from the Business__c sObject and create an appropriate typed stream:
CREATE SOURCE SFPoller USING SalesforceReader (
  sObjects: 'Business__c',
  authToken: '********',
  apiEndPoint: '<your organization's endpoint UEL>',
  mode: 'InitialLoad',
  autoAuthTokenRenewal: 'false'
)
OUTPUT TO DataStream;

CREATE TYPE OpStream_Type (
  Id String KEY,
  Name String,
  POSDataCode__c String,
  Currency__c String
);
CREATE STREAM OpStream OF OpStream_Type;

CREATE CQ CQ1
  INSERT INTO OpStream
  SELECT data[0],data[1],data[2],data[3]
  FROM DataStream;
Configuring Bulk API for large data volumes
Salesforce Reader supports two versions of the Salesforce Bulk API for loading large datasets. Bulk API processes data asynchronously in batches, making it efficient for migrating thousands to millions of records while minimizing API call consumption.
Bulk API versions
Salesforce offers two versions of the Bulk API, each optimized for different use cases.
Bulk API v1
Bulk API v1 is the default mode and is suitable for most use cases with standard queries and tables containing fewer than 10 million records.
Processes data in multiple smaller batches (typically 20,000-50,000 records per batch).
Default batch size is 10,000 records, configurable via PK Chunking.
Provides fine-grained control over batch processing.
Supports WHERE clauses in SOQL queries.
Does not support ORDER BY, GROUP BY, LIMIT, OFFSET, or aggregate functions in SOQL queries. This is a Salesforce platform limitation. For more information, see Understanding Bulk API 2.0 Query in the Salesforce documentation.
Bulk API v2
Bulk API v2 is optimized for very large tables (10 million or more records) and complex queries.
Processes data in fewer, larger batches (typically 100,000-250,000 records per batch).
Handles up to 150 million records per job.
Supports WHERE, ORDER BY, GROUP BY, LIMIT, OFFSET, and aggregate functions in SOQL queries. However, using LIMIT or ORDER BY disables PK Chunking, which may result in query timeouts for large datasets. For more information, see PK Chunking Header in the Salesforce documentation.
Provides simplified job handling with automatic batch management.
Offers better auto-scaling and improved error reporting.
Choosing between Bulk API v1 and v2
Use the following guidelines to select the appropriate Bulk API version.
Scenario | Recommended version |
|---|---|
Tables with fewer than 10 million records | Bulk API v1 (default) |
Tables with 10 million or more records | Bulk API v2 |
Queries requiring ORDER BY, LIMIT, GROUP BY, OFFSET, or aggregates | Bulk API v2 (may require timeout tuning for large datasets) |
Simple queries with WHERE clauses only | Bulk API v1 |
Need for granular batch control | Bulk API v1 |
Bulk API properties
Configure the following properties to control Bulk API behavior in Salesforce Reader.
Property | Type | Default | Description |
|---|---|---|---|
useBulkApiV2 | Boolean | false | When |
bulkQuery | String | Auto-generated | Custom SOQL query override for fine-tuned data retrieval. When using Bulk API v1, ORDER BY, GROUP BY, LIMIT, OFFSET, and aggregate functions are not supported. WHERE clauses are supported. |
excludedColumns | String | Columns to exclude from the bulk query. Format: |
TQL examples
The following examples demonstrate how to configure Salesforce Reader with different Bulk API versions.
Using Bulk API v1 (default)
CREATE OR REPLACE SOURCE sf USING Global.SalesForceReader (
  mode: 'BulkLoad',
  useBulkApiV2: false,
  threadPoolSize: 5,
  apiEndPoint: 'https://mycompany.my.salesforce.com',
  sObjects: 'Account;Contact;'
)
OUTPUT TO stream1;
Using Bulk API v2
CREATE OR REPLACE SOURCE sf USING Global.SalesForceReader (
  mode: 'BulkLoad',
  useBulkApiV2: true,
  threadPoolSize: 5,
  apiEndPoint: 'https://mycompany.my.salesforce.com',
  sObjects: 'Account;Contact;'
)
OUTPUT TO stream1;
Limitations
The following limitations apply when using Bulk API with Salesforce Reader.
Bulk API v1 does not support ORDER BY, GROUP BY, LIMIT, OFFSET, or aggregate functions in SOQL queries. This is a Salesforce platform limitation caused by the way Salesforce automatically chunks large result sets. When results exceed an internal threshold, Salesforce appends WHERE conditions to the end of the query for batching, which causes queries with trailing clauses to become malformed. Use Bulk API v2 if you require these query features.
Bulk API v2 supports ORDER BY, LIMIT, GROUP BY, OFFSET, and aggregate functions, but using LIMIT or ORDER BY disables PK Chunking. Queries without PK Chunking may take longer to execute and can result in timeouts for large datasets. If you experience timeouts, remove the ORDER BY or LIMIT clause from your query.
Bulk API v2 job creation can take several minutes for wide tables (100 or more columns). The Striim application shows a running status but does not publish data until the job completes.
Bulk API v2 is not supported in older Salesforce orgs.
If columns are excluded using
excludedColumnsandCreateSchemaOnTargetis enabled, the target schema includes the excluded columns but Striim does not propagate data to those columns.
Best practices
Follow these guidelines to optimize Bulk API performance.
Start with default settings and optimize based on observed behavior.
For tables with fewer than 10 million records, use Bulk API v1 unless you require ORDER BY, LIMIT, GROUP BY, OFFSET, or aggregate functions.
For tables with 10 million or more records, use Bulk API v2.
Avoid using ORDER BY and LIMIT with Bulk API v2 on very large datasets, as these clauses disable PK Chunking and may cause timeouts.
Test configuration with small datasets before performing full-scale loads.
Use
threadPoolSizeto control parallel readers for multiple Salesforce objects (default is 5).